
Sign up for our newsletter
to get all the latest news and updates for North American Decal

OEM Decal Solutions: The 2025 Guide to Custom OEM Branding That Sticks
Introduction
“Brands that show up the same way everywhere earn up to 23 % more revenue.” I read that stat a few years back, thought it sounded inflated, and then watched three of my manufacturer clients prove it true, sticker by sticker. Custom OEM decals, yep, the humble little graphics that cling to tractors and smart-home hubs do some seriously heavy lifting. They tell regulators, distributors, and end-users, “This product is legit and ready for action.” I’ve designed, ordered, and occasionally ruined enough labels to know exactly where folks trip up. Today I’m walking you through everything, start to finish, so your next batch doesn’t end up peeling off a forklift at 2 a.m. Let’s dive in before the adhesive sets!
What Exactly Are OEM Decal Solutions?
I used to think decals were just fancy stickers, and that mindset cost me a full production run. An OEM decal is actually a purpose-built label engineered to survive heat, oil, sunlight, and the occasional over-enthusiastic power-wash. We’re talking polycarbonate overlays, vinyl nameplates, and polyester compliance labels that outlive the warranty period.
Decals fall into two camps: OEM (installed at the factory) and aftermarket (slapped on later). That distinction matters because warranty claims can spike if a third-party overlay bubbles or fades early. OEM decals carry the brand’s full weight; aftermarket graphics carry the risk of mismatch and misfit.
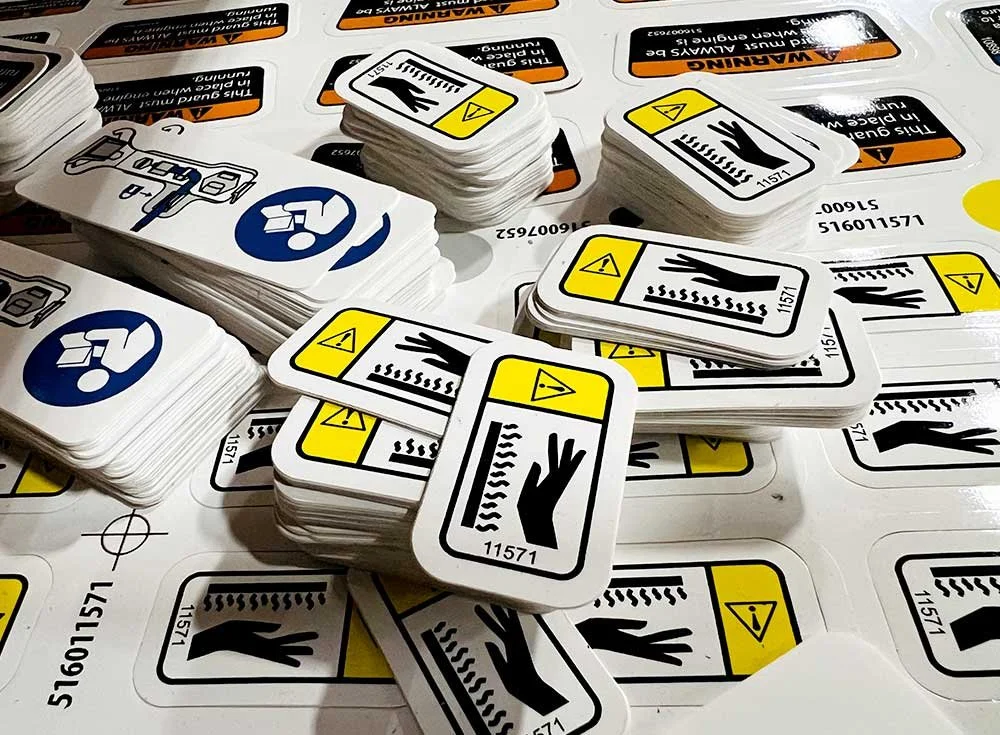
The real job of an OEM decal is fourfold. First, identification: model numbers, serials, that sort of thing. Second, instruction: little icons that keep users from poking live circuits. Third, safety: think UL 969 fire-rated labels. Fourth, aesthetics: color-matched stripes that make an appliance pop on a showroom floor.
Durability benchmarks keep everyone honest. Good labels endure UV exposure of 1,000 hours, salt spray for 96 hours, and repeated wipes with isopropyl alcohol. I once skipped a proper abrasion test, only to watch a forklift decal turn ghost-white after a single season. Lesson learned: always request lab data and field-test a sample.
Lifecycle planning saves headaches. Plan for at least the product’s service life plus a two-year buffer, because customers will blame you, not the decal vendor. If branding flakes early. Factor in storage conditions, too. Rolls of vinyl stored near a loading dock heater lost 30 % adhesion in my old shop.
Bottom line: an OEM decal isn’t an optional decoration; it’s a tiny composite of chemistry, engineering, and brand equity. Treat it that way, and you’ll avoid the rookie mistakes I made.
Why Custom OEM Branding Matters
The first time I swapped generic warning labels for custom-branded ones on an agricultural sprayer, phone orders shot up 18 % in three months. People recognized the bold green logo from half a field away. Brand consistency works like a homing beacon for buyers.
Custom decals build trust, especially in supply chains packed with copycats. A tamper-evident holographic strip makes counterfeiters sweat, and keeps your warranty budget happy.
Then there’s the subtle halo effect. Distributors tell me they’ll bump a product to the front of a trade-show booth if the branding looks polished. Meanwhile, a peeling or mismatched label quietly screams, “Cut corners here!”
Custom graphics deter knock-offs because they’re tougher to replicate. I once embedded micro-text in a nameplate; rivals tried printing it, but the letters blurred under a loupe. That little trick saved a client from a grey-market headache.
Resale value climbs, too. Used equipment with intact, color-accurate decals fetches higher bids. Buyers assume, often correctly, that the gear was cared for.
Most importantly, decals create an emotional shortcut. Farmers talk about “the red combine” or “the blue baler,” not chassis numbers. Those colors, fonts, and textures ride on your decals. Get them right and customers become lifelong fans. Mess them up and, well, social media never forgets.
Industries Winning with OEM Decals
Automotive and Powersports: lead the parade. Domed badges on a motorcycle tank survive roaring engines and road salt while looking showroom fresh. I tested one on my own bike; three summers later, still glossy.
Heavy Equipment and Agriculture: demand high-tack, oil-resistant vinyl. A skid-steer loader decal must stick to powder-coat riddled with micro-texture. Cheap adhesive pulls away after the first hydraulic leak.
Medical Devices: sneak in with ultra-thin overlays that shrug off hospital disinfectants. One client’s ventilator label endured 500 bleach wipes without bleeding. No small feat.
Consumer Electronics: rely on metallic finishes and stealth-black polycarbonate. Ever notice how a laptop brand plate never quite scratches, even after years in a backpack? That’s high-grade hard-coat.
Aerospace, Marine, and Renewables: round out the list, each with niche needs: flame-retardant epoxies, salt-spray champions, and UV warriors. I once mailed a set of solar inverter decals to Arizona in July; if they can live there, they can live anywhere.
Every industry has its pain points, but the winners pair the right substrate with the right adhesive, then laugh all the way to the reorder form.
Materials & Print Technologies 101
Forget one-size-fits-all. Vinyl flexes and sticks to curves; polyester laughs at chemicals; polycarbonate delivers that glassy, premium feel. Choosing wrong leads to puffy corners and warranty claims. Trust me, I once spec’d calendared vinyl on a generator; the heat warped it like cheap taffy.
Printing methods matter. Screen printing lays down thick, opaque ink perfect for bold logos. Digital printing handles photo-real gradients, but watch out for limited abrasion resistance unless clear-coated. Flexo shines for massive runs (100k+ pieces) with tight unit costs. Thermal-transfer excels at last-second serial numbers.
Adhesive science gets nerdy fast. Permanent acrylic bonds to powder-coat; removable rubber peels clean off glass; low-surface-energy adhesives stick to polypropylene fuel tanks that shrug off ordinary glue. Simple test: press a corner of tape on your target surface and yank. If it pops off easily, you need LSE adhesive.
Over-laminates extend life. Glossy films add shine; matte hides fingerprints; doming resin gives a 3-D feel. Anti-microbial coatings are gaining steam in healthcare. Silver ions keep bacteria at bay.
Sustainability finally earns real R&D dollars. Water-based inks cut VOCs. PVC-free films debate durability but improve landfill impact. Some vendors recycle liner waste into composite lumber, a cool selling point if your brand touts eco-cred.
Short version: match material, ink, and adhesive to environment, budget, and brand vibe. Skip that alignment, and you’ll waste cash fixing labels instead of selling products.
Design Best Practices for Decals That Last
Color matching haunts design teams. Pantone 185 C looks different on stainless steel than on ABS plastic. Always request a lab-matched drawdown on your actual substrate. I skipped that once, and the red on the final tractor badge skewed pink. The farmer noticed.
Hierarchy keeps eyes happy. Lead with the logo, follow with the model ID, then QR or barcodes. Compliance marks hide in corners but must remain legible at six feet, or auditors complain.
Durability hacks include adding bleed edges and rounding sharp corners to combat edge-lift. A 1 mm radius can save thousands in rework. Protective varnishes fend off scratches; think of them as invisible armor.
Vector art is king. Raster files blur when scaled. If your intern sends a 72 dpi PNG, send it back. I did once, politely, and spared the print house a meltdown.
Variable-data printing automates serial numbers and date codes. No more hand-stamping, no more typos. Bonus: Field techs can scan a QR code and pull up manuals on their phone, resulting in fewer calls to support.
The golden rule: design for real-world abuse, not the Photoshop mock-up. Your decals will face rain, grease, and impatient users with pressure washers. Prepare accordingly.
Compliance & Certification Checkpoints
UL 969 labels scared me at first. The standard reads like a legal thriller minus the thrills. But skipping certification can halt shipments at the dock. Always verify your print shop’s UL file number.
In Canada, CSA C22.2 governs electrical equipment labels. Across the pond, it’s CE marking, and medical gear answers to FDA guidelines. RoHS and REACH police hazardous chemicals, so mind your ink pigments.
Lot traceability sounds bureaucratic until a recall hits. Keep digital records, tying each decal batch to a purchase order. A friend ignored this step; when the adhesive failed, he spent weeks guessing which customers got the duds. Painful and entirely avoidable.
Audit pitfalls tend to be boring: illegible text under clear-coat, missing contrast ratios, labels placed on curved edges in violation of specs. Walk through the checklist with your vendor before mass production.
Yes, paperwork feels slow. But compliance fines and lost revenue feel slower. Trust me, it’s worth a morning with black coffee and highlighters to get it right.
Choosing the Right OEM Decal Partner
A label vendor once sent me proofs with color bouncing a mile off our corporate blue. They shrugged. I switched suppliers the next day. Quality systems like: ISO 9001, and, in auto: IATF 16949, signal a shop that sweats the details.
Prototype speed matters. You want the first articles on your desk in a week, not a month. Tooling costs should be transparent; hidden die charges are red flags.
Ask about color-matching booths and on-site test labs. Can they run UV, salt-spray, and chemical-soak tests in-house? If not, turnaround drags.
Supply-chain integration wins loyalty points. A vendor offering JIT shipments or vendor-managed inventory keeps your assembly line humming. I once toured a print shop that delivered labels in the exact order of our build sheet, no resorting on the floor. Bliss.
Communication style predicts headaches. If emails take days, imagine response time on a line-down crisis. Choose a partner who answers the phone and owns mistakes.
Cheap quotes tempt, but remember: the least expensive label becomes the costliest when it fails in the field.
Cost & ROI Analysis
Tooling feels pricey up front. A custom steel die might run $800, but by the thousandth label, that cost melts to cents per unit. Skipping proper tooling leads to laser-cut edges that fray over time. Been there, paid that.
Hidden costs lurk in failures. A single product recall over label non-compliance can dwarf years of decal spending. Calculate the lifetime value of a label that simply never fails; it often offsets premium materials fast.
Limited-edition graphics create upsell opportunities. I worked with a snowmobile brand that released a special-edition decal pack; it sold out in two weeks and subsidized R&D on next year’s models.
Consider economies of scale. Digital printing shrinks minimums but spikes unit cost above 5k pieces. Flexo drops price per unit for huge runs, yet setup fees sting smaller batches. Plot volume forecasts before signing POs.
Return on investment hinges on avoided headaches, elevated brand perception, and the occasional marketing windfall. Hard to put on a spreadsheet, but you’ll feel it in customer loyalty.
Implementation Workflow: From Artwork to Application
Kick-off with a tidy checklist: brand guide, PMS colors, substrate info, and environmental hazards. Share these with your print partner day one. I once withheld the chemical-exposure data until late; the chosen adhesive failed, and we had to reprint. Ouch.
Insist on a pre-production proof, physical, not PDF. Hold it, bend it, rub it with shop rags. If anything smears, back to the drawing board.
During the production run, request QA samples pulled hourly. It keeps operators sharp and catches color drift early.
Application sounds simple: peel and stick. Yet 90 % of field failures come from dirty surfaces or cold temperatures. Wipe with isopropyl, aim for 60 °F minimum, and use a roller to chase out bubbles.
Post-installation, snap photos and gather feedback. A quick survey of techs after the first month caught a micro-scratch issue on a batch of overlays, which we fixed before full rollout.
Treat the workflow as a loop: plan, test, apply, review. Continuous improvement isn’t just jargon; it’s decal insurance.
Future Trends in OEM Branding (2025–2030)
Smart decals are no longer sci-fi. NFC tags baked under the ink let users tap a phone and pull up manuals or part-order pages. I demoed one last quarter, and sales reps lit up like Christmas.
AI-driven design portals spit out print-ready art in minutes. Iterations that once took coffee-soaked nights now finish before the mug cools.
Eco-friendly adhesives stick better every year. Early bio-based glues smelled funky and lifted in humidity; the 2025 formulas pass every ASTM test I throw at them.
Mass customization is exploding. Picture an assembly line printing serial-specific overlays on demand, no inventory, zero waste. A mid-sized appliance maker I know just saved six figures on warehouse space.
Augmented-reality overlays will aid service techs. Scan a QR and see virtual arrows on a control panel. It still feels gimmicky, yet early adopters earn a cutting-edge halo that buyers love.
Bottom line: decals are getting smarter, greener, and more integral to the product experience. Buckle up, it’s a fun ride.
Conclusion
OEM decals are tiny billboards, miniature compliance officers, and durable brag badges all rolled into one. When you spec the right material, design for abuse, and partner with a responsive supplier, your branding stays crisp long after the sale, and your customers notice. Take these tips, tweak them to your own gear, and start treating decals as strategic assets, not afterthoughts. Got a war story or pro trick of your own? Drop it in the comments so we can all learn (and maybe dodge a few costly mistakes) together.

Inventory Management for Manufacturing in 2025: Mastering Just-in-Time Decal Supply

Introduction
I read a study last week that claimed manufacturers torch roughly 25 percent of their inventory’s value every single year in carrying costs. Yikes! Yet I still bump into plant managers who shrug and say, “That’s just the price of doing business.” Nah, it doesn’t have to be. I’ve bungled my own inventory plans often enough to know there’s a sweeter way, especially in our high-mix decal world where every square foot of vinyl counts. Stick around and I’ll show you how to keep shelves lean, presses spinning, and cash back in the bank. Let’s dive in!
Inventory Management Fundamentals for Modern Manufacturing
You can’t fix what you don’t measure. Simple, right? In my first gig as a production planner, I lumped every SKU into one giant “raw materials” bucket. Bad move. It masked the crazy volatility of specialty vinyl colors versus everyday white rolls. A quick ABC/XYZ analysis showed that 15 percent of SKUs were eating 70 percent of my cash. Big eye-opener.
Push vs. pull gets tossed around like buzzwords, but here’s the gut-check: decals move on a pull signal because each customer wants their own art, lamination, and finish. If you push production based on shaky forecasts, you’ll drown in obsolete prints. I still have a closet full of outdated NASCAR bumper stickers to prove it.
Cycle counting sounds dull until a big customer screams over a stock-out. We set a rhythm: daily A items, weekly B, monthly C. After three weeks, our accuracy jumped past 98 percent, and my Monday-morning panic attacks vanished. One tip: schedule counts during shift change when machines are idle; no lost production time, no excuses.
Link your production schedule to real-time inventory data. Once our ERP started talking to the floor’s digital kanban board, job changeovers lined up with incoming material like magic. Fewer “where’s my vinyl?” moments, more smooth sailing. Color-coding zones helped too: operators instantly spotted a red-tagged slow-mover languishing on the shelf and either used it or scrapped it.
I’m a fan of the “junk-drawer” bin for odd leftovers. End of every month, the crew turns that random stock into test prints or promo stickers. Waste becomes swag; morale spikes. Quick wins matter.
Bottom line? Fundamentals aren’t flashy, but they’re the launchpad for lean flow, JIT success, and wicked-fast order cycles. Nail them first, then layer on the fancy tech.
The True Cost of Carrying Stock and Chasing Turns
When the CFO slid me that carrying-cost worksheet, I laughed, then gulped. Capital, storage, insurance, shrinkage, obsolescence… it stacked up to almost 30 percent of on-hand value. That’s like paying rent on stuff you might never sell. Brutal.
We decided to chase inventory turns instead. Industry average for print shops hovers around eight turns a year; we shot for twelve. Step one was a “yard sale” purge of dead stock: slashed prices, bundled odd lots, and even donated misprints to a local art school. Inventory dropped 18 percent in one quarter, and the warehouse felt twice as big.
Hot tip: calculate your economic decal run quantity (EDRQ). Unlike the classic EOQ, EDRQ factors in press setup time, film changeovers, and ink purges. A ten-row spreadsheet saved us from producing five-year supplies “just because.”
But beware: chasing turns too hard can backfire. I once cut inventory so deeply that a supplier delay left us scrambling. The lesson? Maintain surgical micro-buffers for critical SKUs. Think one-to-two-day‘ safety net instead of two weeks.
Dashboards keep everyone honest. We flashed the turns on a monitor near the break room. Nothing like a public leaderboard to spark friendly competition between shifts. The numbers climbed week after week without a single nag from management.
Remember, turns are a lagging metric. Pair them with real-time signals like stock-out rate and rush-order percentage. That combo tells the whole story and heads off trouble before customers start chirping.
Just-in-Time (JIT): A Perfect Fit for Decal Supply Chains
Some folks swear JIT died with the first big supply-chain crisis. I call nonsense. JIT isn’t dead; it just grew up. In decal production, where designs change faster than TikTok trends, holding mountains of inventory is suicide.
JIT’s three zeros: waste, delay, and defects. Still rings true. One client switched to a two-bin kanban for laminate film. They used to sit on three weeks of stock “just in case.” Now they carry five days and haven’t missed a beat. Freed floor space turned into a new laminator bay.
Digital kanban boards are game-changers. We mounted cheap tablets at each press; finish a roll, tap the screen, and an auto-PO fires to the supplier via API. It felt sci-fi at first, but now no one can imagine paper cards. Side bonus: real-time usage data for the purchasing team.
Changeover time is the silent killer. JIT lives and dies on small lot sizes, so if swapping jobs takes an hour, you’re sunk. We attacked setups with SMED, color-coded fixtures, quick-release clamps, and pre-staged inks. Changeovers fell to eight minutes. Suddenly, JIT flowed like butter.
Quick reality check: keep a micro-buffer of generic white vinyl. It covers surprise prototype requests without bloating inventory. I learned that after a frantic Friday when the sales team promised overnight samples to a new OEM. The buffer saved our bacon.
Finally, JIT culture matters. A veteran operator once grumbled, “This kanban stuff is college-kid theory.” Two months later, he bragged to visitors about zero queue time at his cutter. Change takes patience and donuts. Always bring donuts to kaizen events.
Tech Stack Essentials: ERP, MRP, and Real-Time Sensors
I once managed a plant with five separate spreadsheets and an abacus. Well, felt like it. When our ERP finally went live, the chaos calmed fast. Must-have modules: lot tracking, BOM versioning, and real-time WIP dashboards. Skip those and you’re flying blind.
Heavyweight MRP II fans love complex scheduling engines; I’m more practical. A cloud SaaS that plays nice with mobile scanners wins every time. One shop spent six figures on a legacy MRP, only to rip it out for a nimble SaaS within two years of painful lessons about “feature bloat.”
IoT bin sensors are my new favorite toy. We glued them under vinyl-roll racks; when the weight dips below a threshold, the system triggers replenishment. Manual counts dropped 60 percent overnight. Plus, the geek factor is high; operators love checking the live dashboard on their phones.
API pipes are your best buddies. Feed press run data straight into inventory, and the consumption lag vanishes. No more Monday-morning data-entry marathons.
One summer, our RFID tags melted in a heatwave, literally stopped scanning. We scrambled to slap on barcodes as a fallback. Moral: always maintain a low-tech backup plan for high-tech tools.
Security is non-negotiable. A ransomware hit on a buddy’s facility froze their ERP for a week; chaos ensued. Daily off-site backups and multi-factor logins are table stakes.
Demand Forecasting & Safety Stock for Custom Orders
Forecasting custom decals feels like predicting teenage fashion; wild. But patterns emerge if you dig. We dumped three years of order history into a lightweight machine-learning model and spotted spikes tied to trade-show season, hockey playoffs, and, oddly enough, pumpkin-spice launch week. Go figure.
I use a blended approach: statistical smoothing for steady SKUs, ML for the lumpy stuff. The combo boosted our forecast accuracy from 68 percent to 82 percent. That 14-point jump slashed safety stock by two days without hurting fill rate.
Ditch blanket safety-stock percentages. Calculate dynamically using SLA, lead-time variability, and desired service level. After switching, we trimmed slow movers yet beefed up one reflective film that customs delays loved to torture.
Create virtual kits in the ERP. When a big customer like an ATV maker orders, the system pre-bundles adhesive, laminate, and cartons. Purchasing sees demand instantly, not a week later when production begs for supplies.
I once ignored a forecast alert, “No way we sell that many.” Then TikTok made chrome-rainbow wraps go viral, and we were out for ten painful days. Lesson: algorithms aren’t perfect, but they’re rarely dumb.
Monthly forecast calls with top customers uncovered upcoming product launches early. We booked material before competitors even blinked. Collaboration beats guesswork every time.
Supplier Partnerships & Contract Strategies
Your supply chain is only as strong as the weakest vendor. Learned that the hard way when a pigment supplier in Texas froze during a freak snowstorm. Production halted for a week; customers were not amused. Now dual-sourcing is gospel.
Dual-sourcing doesn’t double inventory. Split POs 70/30 so the secondary supplier stays warm, but the cost stays lean. Bonus: price quotes stay honest.
Vendor-Managed Inventory (VMI) rocks for ink and laminate. We set min-max levels; suppliers top up bins and own the stock until scan-out. AP cycle time dropped from 45 to 15 days. Finance loved that.
Negotiate lead-time guarantees with penalties for misses. One vendor balked, so we walked away; the new partner has hit 97 percent OTIF ever since.
Scorecard suppliers quarterly on OTIF, response time, cost, and quality ppm. Bring cupcakes, celebrate wins, grill misses. Tough love works.
Don’t forget cultural fit. A vendor with stellar pricing but a “take-it-or-leave-it” attitude drained more energy than they saved in dollars. Sometimes a slightly higher price buys a lot of sanity.
Lock in expedited freight lanes before a crisis strikes. Pre-negotiated rates with a 3PL saved us during last year’s port strike.
Shop-Floor & Warehouse Best Practices
Factories are like kitchens. Messy bench equals burnt cookies. Same for decal shops: clutter kills flow. We embraced cellular layouts, press, laminator, cutter, pack, and clustered by product family. Travel steps dropped 40 percent overnight.
FIFO/FEFO is non-negotiable with adhesives that age like yogurt. We paint huge expiry dates on roll cores. Operators grab the oldest first without thinking; spoilage nearly vanished.
Barcode everything. A $400 handheld scanner paid for itself in a week by catching mis-picks. RFID ups the game—tag finished goods so a recall traces back to the exact shift and operator. Sleep easy.
Cross-docking rush jobs saves a whole day. Receive, stage, print, ship, skip storage altogether. One motocross client thought we were magicians.
Safety and 5S matter. After a pallet clip almost injured a teammate, we marked walking lanes with neon tape, ran monthly audits, and tossed the trip hazards. Throughput ticked up because folks stopped detouring around debris.
Label racks with words and pictures. New hires memorize locations in hours, not weeks. Simple, cheap, gold.
Risk-Proofing JIT Without Blowing Up Stock
I adore JIT, yet I’ve felt it sting. A laminator motor fried on a Friday night, and our micro-buffer vanished by Sunday. We begged a competitor for spare capacity. Very humbling.
Map failure modes: machine downtime, supplier delays, demand shocks, and place tiny strategic buffers. We keep two hours of common-width vinyl at the cutter. Yes, it’s inventory, but microscopic compared to a full shutdown.
Three-way contracts with 3PLs are lifesavers. Our local warehouse stores emergency rolls that ship within four hours. The retainer is peanuts for the peace of mind.
Risk pooling works too: centralize oddball SKUs at one hub instead of sprinkling them everywhere. Total stock stays flat, service jumps.
We hedge commodity PVC when futures look gnarly. Simple forward contracts, nothing Wall-Street fancy.
Insurance matters. Business interruption coverage saved payroll during that fried-motor fiasco. Read the fine print now, not after disaster.
Run crisis drills. Twice a year we simulate “supplier quits tomorrow.” First time was chaos; now the team flips to Plan B calmly. Practice breeds calm.
Measuring Success: KPIs Every Decal Plant Should Track
What gets measured gets managed. Our holy trinity: inventory turns, carrying-cost percent, stock-out rate. We review them weekly, not quarterly. Trends call out issues before fires rage.
OTIF (on-time, in-full) is the customer heartbeat. Slip below 95 percent and phones light up. A big TV in the shop shows OTIF by shift. Peer pressure is magic.
Schedule adherence exposes planning vs. execution gaps. If presses chase hot orders daily, dig into forecast or maintenance issues.
Changeover time rewards SMED work. We time every swap with a stopwatch app; posting “best time” sparks rivalries that shave minutes off every week.
Cash-to-cash cycle ties ops to finance. Cutting ours from 62 to 38 days paid for a new laser cutter—CFO hugged me (awkward, but I’ll take it).
Continuous-improvement funnels: A3s, Kaizen events, Gemba walks: measure idea flow. If suggestion boxes gather dust, culture needs a spark. Start small: one five-minute kaizen per shift.
Implementation Roadmap
Week 1: Baseline audit: stock accuracy, process mapping, pain-point interviews. Expect ugly truths; embrace them.
Weeks 2–4: Low-hanging fruit: label racks, purge dead stock, fix data errors. Momentum is everything. Celebrate quick wins with pizza.
Months 2–3: Tech rollout: tweak ERP rules, install IoT sensors, pilot digital kanban on one line. Keep scope tight; shiny-object syndrome lurks.
Month 4+: Supplier alignment. Share forecasts, set VMI min-max, and renegotiate lead-time terms. Launch KPI dashboards and schedule monthly Kaizen walks.
Important aside: celebrate milestones. We threw a taco party after hitting ten inventory turns. Corny? Yep. Effective? Totally.
Guard against scope creep. Define “done” for each phase, or you’ll spin forever. And schedule quarterly retrospectives. Lean never sleeps.
Conclusion
Inventory is the silent giant, either pummeling or powering your decal business. Trim it. Even by a few points, and you unlock cash, floor space, and sanity. The tools: JIT, ERP, and IoT, are proven, but they only shine when paired with rock-solid fundamentals and a culture that chases waste like a dog after steak.
Now it’s your turn. Audit your top SKUs today, tag the zombies, and set up a forecast huddle with your suppliers. Got a war story or a killer tip? Shoot me a message or drop it in the comments. Let’s keep those presses humming and learn from each other.

Control Panel Overlay Design & Equipment Interface Graphics: The 2025 Ultimate Guide
Introduction
“Up to 75 percent of operator errors trace back to confusing human-machine interfaces.” A mentor tossed that stat at me years ago, and honestly, it smacked me awake. I’d been tinkering with overlays in a dusty shop, thinking fonts and adhesives were the only puzzle pieces. Wrong! Those plastic faceplates are the handshake between people and multimillion-dollar machines, and if that handshake is sweaty, sloppy, or flat-out cryptic, downtime follows fast. Trust me, I’ve lived that headache.
So, in this guide, I’m spilling everything I’ve learned (and occasionally botched) about control panel overlay design and equipment interface graphics. We’ll talk about materials that laugh at solvents, icons that stay clear in blazing sun, and the weird joy of peeling protective film off a perfectly printed overlay. Some sections might read like shop talk; others feel more like design class, but every paragraph is geared toward makers, buyers, or curious techies who want gear that just works. Ready? Let’s hit the start button.
Control Panel Overlay Basics & Terminology
I’ll never forget my first “quick” job labeling a CNC router. I slapped on vinyl stickers, patted myself on the back, and watched the edges curl by Friday. Rookie move. To prevent that fiasco for you, let’s define the playground.
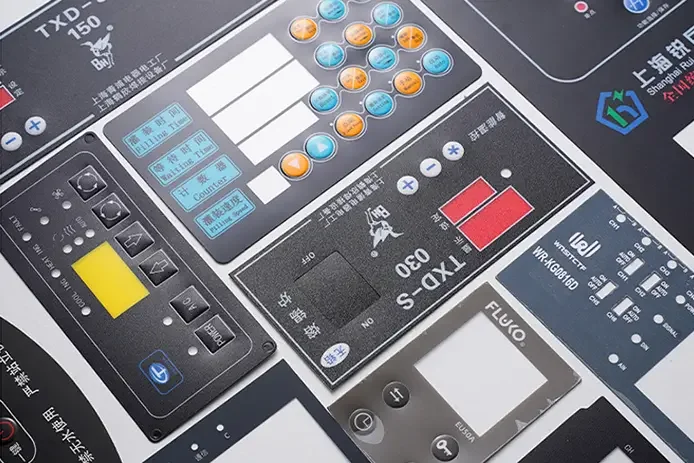
Graphic Overlay vs. Faceplate: A graphic overlay is usually a thin printed film: polycarbonate, polyester, sometimes acrylic. Adhered to a rigid backing or directly to the enclosure. A faceplate might be the thicker, structural layer housing LEDs or membrane switches. Confuse the two and you may over-engineer (read: overspend).
Membrane Switch Overlay: Think of your microwave keypad. Printed circuit traces sit under a tactile dome, all buried under a graphic layer. Press, circuit closes, coffee reheats.
HMI Overlay: In larger control panels, this refers to the whole user interface skin, sometimes married to a touchscreen.
Keypad, Legend Plate, Nameplate: These sub-species pop up everywhere. Keypads offer mechanical or capacitive feedback; legend plates are rigid engraved tags; nameplates carry model numbers or serial numbers.
Why the fuss? Clarity. When someone on your team says, “Order an overlay,” you’ll both picture the same thing and avoid my peeled-sticker shame.
Practical tips learned the hard way:
Measure twice, ask thrice. Confirm cutout sizes and mounting bosses early. A millimeter off equals extra tooling dollars.
Environment dictation. If chemicals fly or UV beats down, pick materials rated to laugh at those threats.
Serial numbering. Bake variable data into the print file so you’re not scrambling with a Sharpie later. Ugly, yes, I’ve done it.
Frustration moment? I once approved a run without specifying matte vs. gloss. The plant lights produced disco-ball glare on every Start button. Customers taped paper over them. Embarrassing. Don’t repeat that.
User Experience & Ergonomics in Interface Graphics
UX isn’t just an app-developer buzzword; it’s the difference between “Push green, machine go” and “Wait, which green?” I learned this standing beside an operator who kept double-tapping a Start pad because the tactile snap felt mushy. We redesigned, and downtime dropped.
Readability First: Contrast ratios matter. The WCAG 2.1 guidelines suggest at least 4.5:1 for small text, and I shoot for 7:1. Navy on light gray beats pale yellow on white any day. Iconography should lean on ISO symbols where possible; folks don’t read manuals mid-panic.
Tactile vs. Capacitive: Tactile domes give that satisfying “click.” Capacitive looks sleek, but can betray gloved hands. I once shipped medical pumps to cold-storage labs, capacitive overlays froze fingers and patience. Lesson: Know your users’ gloves.
Color-Blind–Friendly Palettes: One in twelve men struggles with red-green differentiation. Swap red Stop for bold stop-sign red plus a square icon; use circular green Go. Shapes back up hues.
Layout Zoning: Keep critical controls up top or near the dominant hand. Follow left-to-right process flow; chunk groups (power, motion, diagnostics) with thin divider lines. It’s like arranging a classroom; kids concentrate better when math isn’t next to recess posters.
Practical, teacher-style checklist:
Fonts: Simple sans-serif, minimum 5 mm cap height.
Spacing: Leave at least 1 mm margin around every legend to prevent “label salad.”
Feedback: Back-lighting or indicator LEDs near the action point, not miles away.
And yes, moments of triumph happen: after swapping to glove-rated embossed keys, we measured a 20 % drop in input errors. That’s a stat you brag about at Friday pizza.
Materials & Printing Technologies
Materials make or break longevity. I once cheaped out on PVC overlays for a dairy plant; milk acids chewed them like bubble gum within weeks. Never again.
Polycarbonate (Lexan): Tough, optically clear, easy to silk-screen. Good down to −40 °C. Scratches more easily than polyester but can be hard-coated.
Polyester (Mylar): High chemical and abrasion resistance; better for membrane switches. Slightly pricier but worth it for harsh zones.
Acrylic: Rare for overlays, but great for thick, rigid faceplates requiring laser edge polish.
Printing tech wild ride:
Screen Printing: Best for opaque colors, Pantone accuracy, UV-stable inks. Set-up costs bite on small runs.
Digital UV Printing: Rapid prototyping dream. Full-color gradients, variable data, skip the screener’s solvent smell.
Dead-Front Graphics: Black overlay appears blank until back-lit, looks like James Bond on stereo gear; needs UV-curable inks plus precise opacity layers.
Domed Labels: Polyurethane clear domes add 3-D pop, protect from scuffs, and, weirdly, people love poking them.
Adhesives matter too: opt for 3M 467MP or 468MP for metal, 9472LE for powder-coat. Vent paths prevent air bubbles. Ever see a blister form under a heater control? Yeah, not cute.
Quick lab wisdom: do a “MEK rub test.” Ten double-cotton-swab strokes with methyl ethyl ketone. If ink fades, pick new ink or face warranty claims.
Safety, Compliance & Regulatory Markings
Reg bodies can feel like alphabet soup, but skipping them costs time and cash. Picture me explaining to a UL inspector why our labels fell off in his test chamber.
UL 969 / CSA C22.2 No.0.15: These standards specify adhesion and legibility after 600 hours at 150 °F or chemical splash. Without that mark, North American buyers may reject your product.
IEC 60601-1 (medical): Requires labeling of functional earth, type BF applied parts, etc. Colors: yellow triangles, black text.
OSHA & ANSI Z535: Safety colors, signal red for stop, OSHA green for safe, yellow for caution. Ignore at your peril; fines stack fast.
RoHS & REACH: Material declarations showing overlays free from nasty lead or DEHP. Even adhesives must comply.
Pro-tip sequence:
Ask your overlay vendor for certificates of compliance (CoCs) upfront.
Build a spec sheet referencing UL file numbers. No spec, no accountability.
Keep digital photos of every installed overlay for traceability.
I once forgot to include a flame rating in an RFQ, got glossy samples back, and discovered too late that they didn’t meet the V-0 requirement. Re-tooling stung both wallet and pride.
Branding & Visual Identity Alignment
Here’s the tricky part: balancing brand swagger with operational clarity. Think sports car dash, sleek yet instantly legible.
First, pull up the corporate style guide: Pantone, logo clear-space, taglines. Then ask, “Which elements actually help users?” I had a client demand a 50 mm logo on a 60 mm keypad. We downsized, used a subtle watermark background, and everyone lived.
Textures & Finishes: Brushed-steel print on polycarbonate looks luxe while staying fingerprint-friendly. Matte hard-coat reduces glare; selective gloss highlights a brand mark.
Translucency & Lighting: When an LED back-lights a colored logo at power-on, users get that Apple-boot-chime dopamine. Just ensure diffuser layers prevent hot-spots.
Success Metric: Survey users; if they identify functions faster while still noting brand, you nailed it. A/B tests with prototype overlays can prove ROI.
Tiny Anecdote: I once snuck easter-egg microtext of the company slogan into a texture pattern. Operators spotted it, snapped pics, shared on LinkedIn, and it became free marketing gold.
The Design-to-Production Workflow
Skimp here, and chaos reigns later. My first multi-language panel? I translated “purge” to “puree” on the French layer machines aren’t blenders, folks.
1. Discovery Phase
Interview operators: pain points, glove types, and lighting.
Environment mapping: humidity, chemicals, UV.
Hazard-op (haz-ops) analysis: What happens if the label fails?
2. Rapid Prototyping
Laser-cut blanks + digital UV prints.
Virtual digital twins to test finger reach zones.
In-house “coffee spill” and UV-lamp torture tests.
3. Engineering Drawings
Call out radii ≥1.0 mm to avoid tearing.
Note stack-up thickness for gasket compression math.
Include PMS colors and layer order.
4. Pilot Run & Feedback
10–50 units run through real shifts.
Record peel strength, readability, and operator gripes.
Adjust artwork, adhesive, or tactile dome force.
5. Production & QC
Document every lot.
Spot-check color delta E <2.0.
Maintain spare overlays for field replacements.
Remember to celebrate wins: when our pilot proved 40 % faster button recognition, we bought donuts for the shop. Sugar fuels morale.
Digital, IoT & Augmented Interfaces
Smart overlays used to feel sci-fi; now they’re Tuesday. My first NFC-enabled faceplate blew a customer’s mind. You tap your phone, boom, the manual opens.
Touchscreens Under Protective Overlays: Bond a 0.2 mm PET layer above a capacitive panel to guard against solvents. Keep the total stack under 1.5 mm or touch sensitivity tanks.
NFC & QR Codes: Embed tags under the film for maintenance logs. No more rummaging for PDFs.
RGB Back-Lighting & E-Ink Segments: Overlay icons that shift color based on machine state. Fewer LEDs, more context.
Cyber-Security: Sounds odd for plastic films, but malicious actors can clone NFC tags. Use encoded, dynamic keys and anti-tamper slits in the overlay.
Fun tangent: I hid a Pokémon Easter egg behind a dead-front layer that only appears under UV flashlight. Operators voted it “coolest surprise.” Sometimes fun sells.
Potential frustrations: debugging capacitive ghost touches when humidity rises. A copper mesh shield plus firmware smoothing fixed it, but I lost sleep.
Common Pitfalls & How to Dodge Them
Grab a coffee, this is the hall of shame I reluctantly walk you through.
Over-complicating Icon Sets: Six flavors of arrow confuses everyone. Stick to one arrow, rotate it. Simple.
Ignoring Adhesive Stack-Up: Every micron counts under gasket clamps. Measure, don’t eyeball.
Forgetting Sunlight & Solvents: A gorgeous gloss overlay turns mirror-like outdoors; cherry-picker operators hate that. Test in situ.
Skipping Revision Control: I’ve seen “rev-unknown” overlays still on shelves. Always stamp rev and date small in a corner.
Last-Minute Localization: Text expansion blows up layouts. Plan space for German eight-syllable nouns.
When mistakes happen (and they will), own them. I shipped a batch with the Stop icon upside-down, fixed it for free, and gained trust. Triumph emerges from transparency.
Future Trends (2025-2030)
Buckle up, crystal-ball time.
Printed Conductive Traces: Silver nanoparticle inks drop wiring harness weight by 30 %. Aerospace folks are already prototyping.
Bio-Based Films: Corn-derived polyesters promising 95 % of Mylar’s strength, compostable within a decade.
Shape-Memory Surfaces: Zones that puff up to form a raised button, then flatten when inactive, seen demos, blew my mind.
AI-Driven Adaptive Labeling: Cameras detect user language from the badge, switch overlay text via micro-e-ink. Science fiction? Maybe five-year fiction.
Circular Economy: Removable overlays for refurb cycles. Imagine swapping a faded faceplate without recertifying the whole unit, save cash, save planet.
Keep an eye on partnerships between material giants and electronics start-ups; that’s where the magic brews.
Choosing a Vendor or Going DIY
DIY can be tempting. I’ve run late-night prints on a benchtop UV plotter myself, but know the trade-offs.
When to DIY:
Runs under 20 units, low risk, needs overnight turnaround.
You have in-house design talent and don’t mind zebra-striping from cheap printers.
When to Vendor-Up:
Medical, aerospace, or food-grade compliance needed.
Complex die-cuts, selective textures, or metal domes.
Volume over 100 pieces, economies of scale kick in.
RFQ cheat-sheet questions:
Show me your UL 969 file number.
What adhesive brands do you stock?
Can you color-match to delta E <2?
Do you retain digital print files for five years?
Total cost of ownership includes hidden fail costs, field swaps, brand dings, and operator anger. Buy once, cry less.
Conclusion
Control panel overlays might look like humble stickers, but they steer million-dollar equipment and protect human lives. Dial in materials, nail UX, obey regs, flex your brand, and future-proof with smart tech; all pieces fit together like gears in a gearbox.
Now it’s your turn: sketch that next overlay, quiz your vendor with the cheat-sheet, or hack together a prototype on your garage printer. Whatever path you choose, share your wins (and hilarious fails) in the comments so we can all learn faster, and keep those machines humming safely.

2025 Fleet Branding Trend Report: How Smart Graphics Are Super‑Charging Rolling Billboards
Introduction
“Wait, did that truck just change color as it drove by?” The guy in the passenger seat next to me nearly dropped his coffee as a delivery van flashed an animated discount code on its side panel. He’s not alone. Recent surveys show that 92 % of consumers notice dynamic fleet graphics every single day, and nearly a third whip out their phone to learn more. For marketers drowning in rising CPMs and cookie chaos, fleet branding has become a no‑brainer, arguably the cheapest real estate a brand can buy.
This report digs into why fleet graphics are stealing budgets from digital ads in 2025, which visual trends are popping, and how to track every scan, call, and click, so your trucks haul in way more than freight. Grab your notepad; we’re covering everything from sustainable vinyl to AR overlays, and I’ll sprinkle in a few hard‑earned lessons (including my “oops, forgot the DOT reflective tape” fiasco). Let’s roll!
Why Fleet Branding Still Wins in 2025
Fleet graphics feel old‑school, yet the numbers refuse to quit. Third‑party OOH studies peg average cost per thousand impressions (CPM) below $0.50 in major Canadian and U.S. metros compared to social ads. Unlike banner blindness, bright fleet wraps spark curiosity because they break the monotony of traffic. Jane, a food‑service distributor, told me her inbound calls spiked 14 % two weeks after she re‑wrapped twenty aging box trucks with crisp minimalist artwork. Her only regret? Not swapping out the graphics last fiscal year.
Trust & Recall: Vehicle graphics rank just behind TV in brand recall. Kids in the backseat chant catchy slogans, forcing parents to Google brands later, true story from a Saskatchewan road trip last summer.
Cross‑Channel Synergy: Wraps complement search and social when you geo‑target ads around delivery routes. A quick test in Buffalo paired a QR code on vans with a 10‑km geo‑fence for Instagram ads; click‑through rates jumped 27 %.
Local Dominance: Brick‑and‑mortar retailers use fleets as mobile billboards to edge out big‑box rivals. One HVAC firm simply parked its vans at farmers’ markets on Saturdays and saw appointment requests double.
Case Snapshot: A Midwest bakery measured direct website visits via a vanity URL (“tastydelivery.com/van”). Without paid boosts, those visits translated to $11,000 in online orders in a single quarter—on a $3,800 wrap investment.
Still, fleets flop when graphics get cluttered. Back in 2021, I plastered a startup’s box truck with seven taglines and three hashtags. People loved the design in print, yet the lead volume flat‑lined. Lesson learned: concise messaging wins, especially at 60 km/h.
Data‑Driven Design & Emerging Visual Styles
Designing a killer wrap starts with data, not doodles. Marketing teams now feed heat‑mapped eye‑tracking studies into their mock‑ups. These reveal readers’ gazes gravitate to high‑contrast blocks and oversized icons. Gone are the days of fine‑print mission statements; 2025’s hero styles screams, “look here.”
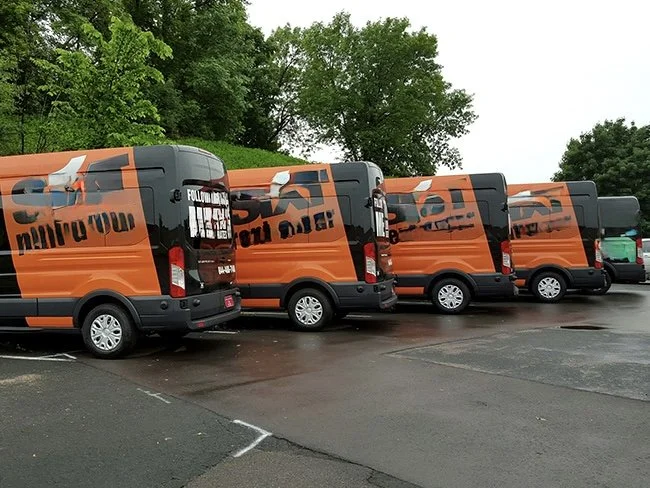
Bold Minimalism: Heavy sans‑serifs, negative space, and two‑tone palettes dominate. Think matte navy bodies with a single neon yellow logo. Drivers love it because cleaning is easier. No dirt hiding in micro‑details.
Cultural Micro‑Trends: Acid pastels, retro 80s gradients, and cyber‑punk neon resurface. Designers tie each palette to region‑specific psychographics, so a Yukon logistics firm might choose cool glacier blues, while Miami delivery fleets pop in hot coral.
Fleet‑Wide Design Systems: Companies with mixed chassis: Transit vans, Class 8 trucks, create modular templates. Side panels share a single color code, while rear doors host scannable offers. A Toronto courier tested this uniform sides, variable promo backs, and sliced design time by 40 %.
AI‑Assisted Mock‑Ups: Tools like Midjourney and Canva’s “Magic Design” spit out ten iterations in minutes. One print shop tracks which mock‑ups get the most clicks in approval portals, then deploys A/B wrap testing on two pilot vans. Best performer gets rolled out fleet‑wide.
Mistake to Avoid: I once let the CEO’s favorite color (lime green) override brand guidelines. Under bright sunlight, it glowed fluorescent, cool, but at dusk, it turned muddy pea soup. Nighttime impressions tanked. So, always test hex codes under varied light.
Pro tip: Photorealistic renders in augmented reality help stakeholders “park” the virtual van outside headquarters and judge scale. It saves thousands in redesigns when someone realizes that the logo is cropped by a wheel well.
Sustainable Materials & Circular Supply Chains
Eco‑friendly wraps aren’t just for the warm‑fuzzy feel. Procurement teams now require suppliers to hit ESG metrics, or they yank the PO. Fortunately, material science has sprinted ahead.
PVC‑Free Wrap Films: Brands like 3M and Avery are releasing polyurethane films that skip chlorine. They’re 25 % lighter and lower fuel burn by a whisper, not enough for headlines, but every liter counts when diesel kisses $2 / L.
Water‑Based Adhesives: Remember the suffocating scent inside print shops? Water‑based formulas slash VOCs, so installers aren’t breathing a chemical swamp. Plus, removal gets easier; less adhesive residue equals shorter peel‑and‑prep cycles.
Recyclable Over‑Laminates: New PET laminates can be shredded and fed back into pallet wrap. One fleet in Calgary recycles 5 tons of vinyl annually, offsetting disposal costs.
Lifecycle Analysis: A sustainability consultancy ran numbers on 100 lorries. Switching to PVC‑free saved 18 t of CO₂ over a four‑year wrap cycle. That stat helped the firm win a grocery chain contract that valued carbon transparency.
Circular Print Shops: Some vendors offer a wrap buy‑back credit: return old graphics, earn 15 % off your next order. It keeps vinyl out of landfills and locks clients into a clever loop.
Personal fail alert: I once spec’d a cheap PVC wrap for a fleet of refrigerated vans. In sub‑zero temps, the film cracked at door seams, leading to frantic replacements mid‑winter. Spending the extra $1 / sq ft on flexible eco‑film would have saved five‑figure downtime. Lesson locked.
Tech‑Enhanced Wraps: QR, AR & Dynamic Displays
2025 wraps play in both real and digital worlds. Slapping a QR code is table stakes; now it needs to scan in three seconds at 30 km/h. We’ve tested code placement 1 m above ground on the rear left panel. It aligns with a typical SUV driver’s eye line.
Near‑Field QR Codes: Short URLs like “go.fleet/offer” boost scan success. Static codes fail if links break, so smart teams use redirect platforms (Bitly, Rebrandly) for edits later.
Augmented Reality (AR) Overlays: Point your phone at a truck; suddenly, a 3D pastry spins above a bakery van. ARKit and WebAR mean users don’t need an app. Marketers embed lead forms right in the experience fast funnel.
E‑Ink & LED Panels: Delivery giants attach thin e‑ink strips to trailer sides, swapping creatives daily via LTE. One beverage brand ran game‑day promos on southbound routes, Christmas ads on northbound. ROI? A 19 % lift in coupon redemptions.
Telematics + Geo‑Fencing: Pair wrap ID numbers with telematics to trigger localized Google Ads within a 5‑km bubble behind the vehicle. I helped a pest‑control company do this; form fills spiked every time the truck entered suburban neighborhoods at dusk—prime bug time.
Cautionary Tale: We over‑designed an AR scene for a construction client: HD textures, heavy models. Users’ phones lagged, and battery drain complaints flooded support. Simpler AR with clear callouts works better.
If you’re dabbling, beta‑test with one truck, measure scans and dwell time, then scale. Resist the temptation to outfit fifty units before you have proof.
Compliance, Safety & Reflectivity Regulations
Fun fonts are great, until the Department of Transportation (DOT) slaps you with a citation. Regulations can feel like alphabet soup, but missing a strip of reflective tape can invalidate insurance.
North American DOT & ECE Rules: U.S. FMCSA mandates 2‑inch red‑and‑white conspicuity tape on rear bumpers of trailers over 80‑in wide. In Canada, provincial laws mostly mirror FMVSS 108, but Quebec requires French safety wording.
Accessibility Considerations: Font height should be at least 5 in for readability at 50 ft. High‑contrast color combos: dark indigo on white, which helps color‑blind viewers. Bilingual markets (Ontario, New Brunswick) demand English and French taglines.
High‑Visibility Night Graphics: Reflective logos double as safety gear. One municipal fleet installed prismatic chevrons; near‑miss incidents dropped 12 % year‑over‑year.
Insurance Perks & Pitfalls: Some insurers offer premium discounts for reflective wraps; others penalize if graphics obscure hazard placards. Always share final proofs with underwriters.
My Blunder: Early in my career, I approved reflective stripes but skipped edge sealant. Moisture seeped in during coastal fog, stripes peeled within months. Replacement cost? $280 per trailer, not life‑ending, but avoidable.
Pro tip: Keep a compliance checklist taped to the print room wall. Have a legal sign‑off before the first plotter run. Saves countless headaches.
Measuring ROI & Attribution in Motion
Spray‑and‑pray has no place in 2025 budgets. Decision‑makers want numbers. Thankfully, we can track nearly every eyeball and finger tap.
Trackable URLs & Dynamic QR Codes: Assign unique vanity URLs to each unit: “brand.ca/van12”. Use redirect dashboards to pivot offers without reprinting.
Call Tracking Numbers: Services like CallRail generate number pools. When a prospect dials the wrap number, the software logs duration, call source, and lead score. A plumbing firm found 28 % of wrap calls converted to jobs within a week.
Attribution Models: Multi‑touch beats last‑touch. If someone scans a QR, browses later, and then converts, tools stitch the journey. Google Analytics’ data‑driven model helps prove wraps assisted conversions.
Dashboard KPIs:
Impressions (traffic volume × route distance × viewing angle)
Engagement (QR scans, URL visits, calls)
Conversion rate (leads ÷ engagements)
Lifetime value (revenue ÷ customers acquired from wraps)
Sample ROI Calculator: Wrap cost $3,000, lifespan 4 years. Annual impressions 1 M, conversion rate 0.05 %, average sale $500. Revenue: 1 M × 0.0005 × $500 = $250,000. ROI: (250k – 3k) / 3k ≈ 8,233 %. Crazy, right?
Reality check: attribution isn’t perfect. Rough drivers scratch QR codes, skewing data. Schedule quarterly wrap inspections, replace damaged codes promptly, and keep your analytics clean.
Implementation Best Practices & Vendor Selection
A flawless wrap rollout feels like a symphony; designers, print techs, installers, and fleet managers all hit their cues.
Timeline Checklist:
a. Design (Week 1‑2): Lock color codes, compliance checks.
b. Proof & Approval (Week 3): Stakeholders sign digital 3D renders.
c. Print (Week 4): Batch print panels, label by vehicle.
d. Install (Week 5‑6): Mobile bays wrap two vans per day.
e. Quality Assurance (Week 6): Inspect seams, heat‑gun bubbles.
Vetting Wrap Shops: Ask for 3M UAS or Avery certifications, view previous fleet projects, and confirm indoor, climate‑controlled bays. Warranties should cover colorfastness for at least five years.
Downtime Minimization: Rotate vehicles through nights or weekends. One courier booked “pit‑stop installs” at 9 pm, returning vans by 5 am. Clients never noticed.
Driver Training: Provide a one‑page wipe‑down protocol. A pizza chain’s delivery guys used gritty sponge pads, which scratched the laminate; $1,200 in repairs later, they switched to microfiber.
Contract Clauses: Include removal costs upfront. Unwrapping a 53‑foot trailer at the end of the lease can top $1,000 per unit.
Don’t overlook culture: printers who care ask about your marketing goals, not just square footage. That empathy often predicts successful long‑term partnerships.
Future Outlook: What’s Next After 2025?
Fleet branding innovation speeds faster than highway traffic.
3D‑Printed Textures: Imagine rubberized burger patties protruding from a food truck. Early pilots show 20 % higher social shares than flat graphics.
Programmatic OOH Buying: Dynamic e‑ink panels on vans plug into ad exchanges. Brands bid for impressions based on route, weather, or events. If rain clouds form, a roofing company snags the ad slot, fresh lead juice.
Autonomous Delivery Pods: As electric self‑driving vans proliferate, side panels become “prime billboard zones.” Without drivers, fleets can run 24/7; display battery‑friendly OLED panels that will rotate messages while charging at depots.
Drone Docking Stations: Warehouses plan drone launch pads on van roofs. Wraps integrate landing target graphics. Marketers treat this as double duty, branding from the street and aerial.
Regulatory Curveballs: Expect stricter microplastic rules affecting vinyl. Print industry lobbies for biodegradable substrates. Wise brands start testing alternatives now to dodge future compliance shocks.
Will the classic vinyl wrap disappear? Unlikely. Costs remain low, and removal is straightforward. But hybrid systems, static base designs overlaid with digital hotspots, will let fleets surf trends without re‑wrapping whole units every quarter.
Conclusion
Fleet branding in 2025 is no longer a passive paint job; it’s a tech‑laden, data‑tracked storytelling platform. By mixing bold minimalist design, sustainable materials, and QR‑to‑AR engagement funnels, marketers can turn delivery routes into revenue engines. Remember to bake compliance into every pixel, measure results with vanity links and call tracking, and choose vendors who sweat the small stuff as much as you do.
Ready to put your fleet to work? Start with a brand audit, pilot one or two data‑driven wraps, and iterate. Then drop a comment below, share your own wrap wins (or fails!) so the community can learn together. Safe driving, sharp branding, big returns. Let’s make every kilometer count.

Decal Durability Field Guide 2025: How Weather, Chemicals & UV Really Affect Lifespan

Introduction
“Sixty‑eight percent of fleet managers admit their graphics look washed‑out before the warranty even ends.” That stat hit me like a squeegee to the shin! It proves a simple truth: keeping a decal bright, stuck, and professional isn’t luck; it’s science plus a pinch of street smarts. In the pages below, readers will see exactly how weather, chemicals, and ultraviolet light chew through vinyl, why a sloppy install can undo a premium film, and what everyday habits separate a two‑year eyesore from a ten‑year showroom piece. Grab a coffee, flex those adhesive‑dabbed fingers, and let’s unpack every trick the pros won’t always share.
Decal Materials & Protective Coatings
Cast vinyl, calendered vinyl, and polyester overlays may look alike on the workbench, yet they age like totally different creatures. Cast starts life as a liquid, so its molecules relax and shrug off shrinkage; calendered gets rolled out under heat and pressure, which bakes in tension that can later pull the edges. Old‑school sign writer Tom once tried saving fifteen bucks by mixing films on the same box truck. Two years in, the calendared panel had shrunk a half‑inch and left a filthy glue halo. Protective coatings shift the odds. A two‑mil gloss laminate blocks most road grit, but a four‑mil polyurethane dome feels like putting a helmet on the graphic. Pigment chemistry matters, too: reds fade fastest because the azo molecules snap apart under UV‑B, while earthy browns cling on stubbornly. A funny misstep? A rookie at the shop topped a matte wrap with a high‑gloss spray clear, chasing “extra pop.” Instead, the mismatched surface energies wrinkled the whole piece like bacon in a pan. Lesson learned: pair matte with matte laminates and test small. Finally, remember plasticisers: they keep vinyl flexible yet slowly leach out, making everything brittle. Premium films use high‑molecular‑weight plasticisers that hang around longer, so pay attention to those quiet data‑sheet footnotes.
Weather Exposure: Temperature Swings, Moisture & Wind Abrasion
Mother Nature loves stress-testing decals. When January drops to ‑25 °C and July bounces to 35 °C, vinyl expands, contracts, expands again, tiny gymnastics that loosen adhesive bonds. In Labrador, a municipal snowplow’s reflective chevrons cracked along every rivet after just one winter because the installer skipped post‑heat. Moisture sneaks under edges through micro‑channels, then freezes and pries the film upward like a crowbar. Snowplow grit is vicious, yet even a calm prairie wind throws sand that scuffs clear coats to a hazy mess. Folks in coastal BC fight salt spray; inland teams battle ultraviolet‑boosted thermal cycles. A neat trick: use an infrared thermometer during application, if the panel skin sits under 10 °C, pause and warm it. Those few extra minutes beat months of corner curl. And don’t forget venting. A friend wrapped a cargo trailer in humid July air, sealed the seams tight, then watched moisture blisters bloom within days. Little relief slits at hidden edges would have saved the job.
Chemical Contact: Cleaners, Fuels & Industrial Solvents
A decal surviving weather can still melt under the wrong cleaning cocktail. High‑pH truck soap strips plasticisers; cheap citrus degreasers chew adhesive like gum. At an airport ground‑support fleet, de‑icing fluid dripped along fuselage drip rails and left ghosted stripes in three months flat. Mechanics tried scrubbing with isopropyl, which made it worse by driving ink deeper into micro‑cracks. Rule of thumb: stay between pH 6 and pH 8, rinse within five minutes, never let soap dry. Gasoline splash is sneaky; its aromatics dissolve adhesive flow modifiers, so station pumps deserve an extra edge‑seal bead. For graffiti‑prone city buses, sacrificial laminates mean vandals’ markers wipe right off, but those films add cost and change gloss. Lab tests like ASTM D1308 sound fancy yet translate to simple kitchen science: place a fuel‑soaked cotton pad on a spare decal square, cover with glass, wait eight hours, then peel. If the imprint sticks around, rethink materials. Yes, mistakes happen. During a local fair, Joe sprayed bleach on a carnival ride decal “to brighten the white.” He brightened it, all right. The design lifted in flakes the size of dimes. Always test a corner first, champ.
UV Radiation: Photodegradation & Colour Fading
Sunlight is relentless, especially the UV‑B band below 320 nm. Pigment molecules absorb those photons, vibrate, then snap like dry spaghetti. Reds, oranges, and magentas fade fastest. Ask any fire‑truck refitter. To combat this, manufacturers cram in UV absorbers and HALS (hindered amine light stabilizers). These chemical bodyguards soak up rays and quench free radicals before they torch the polymer chain. Fleet operators in Phoenix report that a cast vinyl with nano‑ceramic laminate held crisp magenta for five summers, whereas an economy film turned dusty pink in eighteen months. Delta‑E readings quantify fade; anything above 4.0 catches the human eye. Warranty fine print often hides limitations: “up to 60 % gloss retention on vertical exposures in Zone 1,” meaning flat hoods in Florida are basically excluded. An anecdote: a charity food truck boasted brilliant teal. After parking near a mirror‑clad office tower, the reflected blaze doubled the UV load and ghosted the logo outline. Sometimes shade sails or garage space add more life than the priciest laminate.
Application Surface & Prep: The Hidden Factor
Ask ten installers the secret sauce, and nine say “prep, prep, prep.” Surface energy decides whether adhesive flows into microscopic pores or sits like a pancake on Teflon. Aluminum scores high; raw polypropylene low. One tech once degreased a fiberglass boat hull with auto wax. Yes, wax isopropyl wiped it pretty, but adhesive bonds were toast within weeks. Proper prep: wash with detergent, rinse, dry, wipe with 70 % IPA, dry again. Use primer on low‑energy plastics; 3M 94 still rules. Temperature matters: below 10 °C, pressure‑sensitive adhesives act like cold honey. Portable propane heaters and “wrap cubes” save winter jobs. Tools? Felt‑edge squeegee for cast films, hard nylon for calendered. Post‑heating edges to 95 °C relaxes the internal stress; skip it, and edge‑lift follows. Rivets? Snip relief cuts, circle‑press, then heat. Bubbles? Modern air‑egress liners help, yet a pin poke plus fingertip massage wins. A quick checklist taped to the wall ensures new hires don’t freeload on memory.
Maintenance Best Practices: Cleaning, Sealing & Inspection
Maintenance extends life by thirty percent, give or take. Weekly gentle wash keeps pollutants from embedding. Pressure washers stay below 1,200 psi and 45 cm away; otherwise, you’re basically sand‑blasting. Hand-washing from bottom up prevents streaks. A rural delivery outfit logs every wash in an app, handy for warranty disputes. Edge‑seal pens stop water wicking at cut lines; reapply yearly. Post‑heating edges six months in can reseat sneaky lifts. Inspection walks once a quarter catch blister hot‑spots behind wheel arches; early nip‑and‑tuck with a spare patch beats full reskin. Tip: keep leftover film rolled in its original liner, stored at 20 °C, humidity alike. Nothing stings like needing a color‑match patch and finding your spare film faded on a shelf. Finally, train drivers. Yes, drivers, to avoid harsh roadside brushes and report fuel spills before they turn decals gummy.
Testing & Certification Standards You Should Know
Standards turn marketing fluff into measurable truth. ASTM D3359 rates adhesion: cross‑hatch cut, tape pull, score 0–5. Good films score 4B+ fresh, 3B after weathering. QUV cabinets (ASTM G154) simulate a year’s sun and rain in roughly six weeks—handy but imperfect. Xenon arc testers (ISO 4892‑2) mimic daylight spectrum better, but cost way more. CSA C22.2 or UL 410 listings matter when decals sit on electrical devices or floor graphics. Safety regulators like ANSI/ISEA require reflective conspicuity stripes to stay above a specific candlepower through abrasion cycles. Reading claims? “Up to ten‑year vertical durability” usually shrinks to five near the Equator or on the roof of a van. Field‑testing is cheap: mount control panels on a south‑facing wall and measure colour shift each month with a pocket spectro. A pal ran such a rig and discovered his “premium” silver turned tan after six months, yet a cheaper chrome stayed true. Never trust labels, always verify.
Choosing the Right Decal for Your Environment
Selection is a balancing act of climate, chemicals, sunlight, and budget. Start by mapping exposure: a skid‑steer in Alberta farm fields needs grit‑proof matte cast; a storefront window in Seattle prefers optically clear polyester with UV hard‑coat. Build a simple decision matrix: columns for temperature range, UV index, chemical splash, cleanability, expected life, then score materials. Sometimes a pricier cast film is cheaper long‑term once re‑wrap labour is counted. Retro‑reflective sheeting excels for 24/7 safety signage, but cracks on tight curves unless you buy the “cube‑corner” flexible type. Anti‑slip over‑laminate on floor graphics prevents lawsuits but costs double. Ask suppliers pointed questions: “What’s your delta‑E threshold at 2 000 mj/m²?” If they stare blankly, walk away. And yes, warranty service level counts. One wrap shop replaced an entire municipal bus set after lamination clouded under humidity; the film maker footed the bill because the installer had documented every step.
Troubleshooting Premature Failure: Diagnostics & Fixes
When things go south, diagnose like a detective. Curling corners point to low surface energy or skipped post‑heat. Random blisters signal trapped moisture or degassing substrate (new paint outgassing is notorious). Discoloured spots in a diesel splash line scream chemical attack; strip, clean with adhesive remover, neutralize the surface, then patch with sacrificial overlap. For small tears, use a matching scrap, round the corners, lay it centred, and squeegee outward. Done right, the fix hides in plain sight. Economics guide repair vs. replace: if more than 30 % of the panel is shot, a full redo saves labor. Warranty paperwork? Photos dated, ambient temps noted, cleaner brands listed, manufacturers love data, hate guesswork. A shop once sent blurry cell pics of a faded trailer and got denied; a rival provided spectro readings and install logs, and the claim was approved in days. Lesson: document like a crime scene.
Future Tech: Nano‑Coatings & Eco‑Friendly Inks
Innovation never sleeps. Researchers embed silica nanoparticles in polyurethane to make self‑healing surfaces that shrug off keys and branches. Early tests show 60 % scratch recovery under modest heat. Bio‑based PU laminates ditch petroleum yet perform on par, great for brands eyeing carbon footprints. Inks evolve too: low‑energy UV‑LED curing reduces power draw and slashes VOCs, pleasing both accountants and regulators. Metallic pigment without flakes? Metal‑oxide vapour deposition does the shimmer with zero galvanic corrosion risk. Some metro agencies trial smart decals with NFC tags and printed sensors logging UV dose. Imagine your wrap pinging a phone when it needs re‑lam. Exciting stuff, though costs remain high today. Still, watch this space; what seems bleeding‑edge now may hit mainstream pricing before the decade’s out.
Conclusion
Decal life is never a guessing game. By matching film chemistry to real‑world abuse, obsessing over prep, and babying graphics with smart maintenance, anyone can double or even triple the visual lifespan. Customize these tips to your climate, chemicals, and budget, and always test before you invest. Got a war story or genius hack of your own? Drop it in the comments so the community keeps learning. Until then, go forth, apply with confidence, and let those colours stay loud long after the first applause fades.

Decal Tech Trends 2025: From PVC‑Free Films to In‑Line RFID

Introduction
“Labels might be small, but they push a $76‑billion global market racing toward $120 billion by 2035.” The day that stat hit his inbox, this writer almost showered the keyboard in coffee. Stickers, it turns out, are sprinting into a future where green chemistry clinks glasses with Industry 4.0. He’s watched converters swap PVC for sugar‑cane PE and embed RFID antennas faster than you can say “inventory audit.” The momentum feels wild. Sometimes dizzying, but completely irresistible. This guide unpacks the seven forces set to rock shops, brands, and materials scientists over the next twelve months. Buckle up; the sticky revolution is on!
Sustainable Materials Revolution: PVC‑Free, Bio‑Based & Recyclable
Every converter has a love‑hate history with PVC. It’s cheap, tough, and prints beautifully. Yet regulations and eco‑anxious customers now treat chlorine like the boogeyman. Cue the surge of PET‑G, PLA, and sugar‑cane polyethylene, bio‑polymer darlings that slash carbon footprints without tanking performance. One midwestern print house, let’s call them RiverLabel, swapped vintage PVC fleet‑wrap stock for PLA shrink sleeves last summer. The boss expected warping nightmares. Surprise: press tension tweaks and a lower oven temp solved it. They trimmed curing energy by 18 % and snagged two new sustainability‑obsessed clients in six weeks.
Anecdotes aside, greener films ride three levers. First, feedstock innovation, think corn‑based PLA or tall‑oil PE, cuts fossil dependence. Second, recyclable release liners (glassine or PET) loop back into curbside streams instead of landfills. Third, “linerless” rolls chuck the liner altogether, slicing waste by 40 %. Early adopters battled adhesive ooze, but the latest top coats behave.
Practical tips pop up fast. Audit substrate SKUs every quarter; flag ones with chlorine, phthalates, or crazy VOC counts. Lean on suppliers for comparative CO₂ life‑cycle sheets; nobody expects your team to model cradle‑to‑grave impacts from scratch. Pilot the greener film on short‑run jobs first. Customers love the story, and your operators learn without meltdowns. Yes, bio‑polymers can cost 10‑20 % more. Yet freight offsets, avoided eco‑fees, and premium pricing opportunities often level that bill. And don’t sleep on antimicrobial or anti‑fog additives baked into the new films; they open lucrative chilled‑food niches. Mistakes still happen. One rookie tech overheated PLA, and labels shrank like cheap jeans in a hot wash. Lesson logged: follow supplier heat curves, always.
Bottom line: Ditching PVC isn’t a trend; it’s a glide path to regulatory compliance and fatter margins. Early movers bank both.
Next‑Gen Adhesives & Liners: Water‑Based, PFAS‑Free, Linerless
Materials get all the fanfare, yet adhesive chemistry can make or break compliance goals. Water‑borne acrylics now rival solvent varieties for tack and shear, even on sweaty beverage cans. Dave, an old‑school plant manager, recalls flooding the pressroom with solvent fumes during a 2010 heatwave. Today, water‑based formulas keep OSHA air‑quality inspectors yawning.
PFAS‑free release coatings have gone from curiosity to necessity after the EU signaled sweeping bans. When Jenny’s Vancouver label plant phased out PFAS silicones, initial release values skidded below spec. Her rookie move? Skipping a dwell‑time recommendation hidden in a footnote. A three‑day hold cured the coating properly. She never made that error again.
Linerless systems deserve a spotlight. They eliminate the waste stream that haunts brand‑owner audits. Operators gripe that linerless labels jam older applicators. True. Retrofit kits, often a new nip roller and tension sensor, usually fix the snag. Research shows linerless rolls run 30 % more labels per linear foot, translating to fewer roll swaps and less downtime. Pro tip: Train pack‑line teams early; the slab of adhesive on the back feels alien at first.
Finally, adhesive choice intersects cold‑chain growth. Water‑based, freezer‑grade glues now survive –25 °C blasts without flagging. They shine in e‑grocery boxes and vials racing across pharma cold‑rooms. Keep freezer simulations on site, cheap chest freezers, data loggers, and three days of patience to prevent embarrassing peel‑offs later.
Adhesives rarely star in marketing decks, but the shops that master them win repeat business.
Digital & Hybrid Printing: UV‑LED, Inkjet & Variable Data
Pressrooms used to hum like diesel trucks; today, they hum like Teslas. UV‑LED curing slashes energy by 60 %, nixes ozone, and still cranks speeds over 100 m/min. Old‑timer Barry, who’s run flexo since the ‘90s, was skeptical. The dude now brags about utility‑bill savings more than his grand‑kids.
But the real fireworks pop in expanded‑gamut inkjet. Seven‑color sets hit 95 % of Pantone without spot inks, so small beer brands can flaunt full‑bleed murals on shrink sleeves, no extra plates. Hybrid lines blend flexo’s white ink and varnish muscle with inkjet’s variable wizardry. A print operator joked, “It’s like having Hulk and Iron Man on the same shift.” The shift to variable data isn’t just names on Coke bottles; it’s QR‑driven track‑and‑trace, anti‑counterfeit serialization, and loyalty campaigns.
Tips: Start with mid‑range hybrid presses before diving into six‑figure inkjet stand‑alones; ROI comes easier. Colour management is critical. Cloud‑based RIPs let suppliers remote‑tweak curves, handy when internal pre‑press talent’s thin. Mistakes still bite. One shop forgot to profile a new PLA film; colours shifted teal, and 50,000 labels hit the shredder. Colour bars and spectro scans are boring, but they save budgets.
Ink costs scare newcomers. They shouldn’t. When you subtract plate making, wash‑ups, and make‑ready waste, break‑even shifts surprisingly low. And end‑users relish micro‑runs: seasonal SKU bursts, regional promotions, even influencer collaborations. Hybrid’s agility covers that ground.
Digital’s bottom line? Faster turns, leaner inventories, and fresher creative. Hard to resist.
In‑Line Smart Features: RFID, NFC & IoT‑Ready Decals
Remember when RFID tags were exotic, 30‑cent widgets glued on post‑press? 2025’s kits now implant antennas in‑line between print stations. That cuts handling, preserves press speeds, and drops tag cost below eight cents. Jim, a converter in Ohio, ran his first in‑lay trial last spring. He misaligned the lamination nip, shredding 5,000 smart labels. Humbling, yes, but by the fourth roll, his crew was threading antennas like pros and shipping to get this Walmart’s new RFID mandate tier.
The smart‑label arena splits into passive vs active. Passive tags borrow energy from readers; active tags carry mini‑batteries for longer ranges. Passive wins in price‑sensitive retail; active shines in cold‑chain pallets. Meanwhile, NFC dazzles marketers. A surf‑brand’s bumper sticker now launches an AR wave animation on your phone, then funnels you to a merch drop. Stickers that sell themselves? Wild.
Data security crops up fast. Europe’s GDPR fines sting, so brands anonymize IDs on tags and pull customer consent inside their apps. For converters, that means adding secure‑encode stations and audit logs, which is expensive but inevitable.
Tips: Partner with an RFID inlay supplier for antenna design and testing; don’t reinvent radio physics. Run read‑range tests inside actual corrugate packaging; metalized inks or high‑moisture goods can choke signals. Finally, brand‑owners crave ROI numbers. Bundle analytics dashboards to prove shrink reductions or stock‑out cuts.
Smart labels convert decals from static art to live IoT nodes. Once clients taste the insights, they rarely look back.
Automation & Quality Control 4.0
Being stuck on a 4 a.m. downtimer because a mis‑registered colour bar slipped past the human eye? Pure pain. Now, camera‑based vision systems catch a broken line at 600 ft/min and flash a strobe. One Saskatchewan plant chopped waste by 12 % in three months. They celebrated with a pancake breakfast, and small wins matter.
On the shop‑floor, cobots lug 130‑lb master rolls without coffee breaks, trimming ergonomic claims. Skeptics argued robots steal jobs. What happened? Operators pivoted to high‑skill tasks: calibrating cameras, crunching press‑dash data, and troubleshooting adhesives.
Digital twins might sound sci‑fi, but they’re practical. Before printing a shrink sleeve, software warps the art on‑screen to predict distortion. That saves real film, time, and hair‑pulling. Couple that with MES/ERP integrations, and suddenly every order has cradle‑to‑grave traceability, including CO₂ scorecards. A client once demanded proof of Scope 3 emissions. Ten clicks later, PDF delivered. Done.
Start small: add a single AI inspection camera to your narrow‑web press, then scale. Build SOPs around the new alarms, operators tune them out like a car beeping every 30 seconds. And budget training. A team that understands basic machine‑vision lingo (contrast, threshold, blob) spots issues faster than any vendor tech.
Automation isn’t about replacing humans; it’s about letting them flex the brainier muscles that bots can’t.
Regulatory & Compliance Landscape 2025
Regulators sprint almost as fast as technology. The EU’s Packaging and Packaging Waste Regulation (PPWR) comes into effect in January, demanding 30 % recycled content on plastic packaging by 2030. California’s SB‑343 restricts recycling logos to materials actually recycled at scale. Canada’s new EPR rules put end‑of‑life fees straight on brand‑owner invoices.
Converters juggle a compliance matrix. Tip one: Create a rolling spreadsheet of regulations by region, material, and deadline. Assign owners, no orphan cells. Tip two: demand supplier declarations for PFAS, phthalates, and SVHCs. Jane from QC once accepted a vague “PFAS‑compliant” note; inspection day came, lab tests flunked, and that paper‑trail embarrassment cost four figures. Lesson: always verify CAS numbers.
For REACH and Prop 65, invest in software that cross‑checks ingredient lists in seconds. Manual look‑ups drown teams. A cheap SaaS subscription beats regulatory fines every time. Also, place QR codes on pallets linking to digital SDS and compliance files. Auditors love immediate transparency.
Finally, market claims like “recyclable” or “compostable” now demand substantiation. A brand slapping the Mobius loop on PVC gets roasted fast. Run third‑party lab tests, keep certs on file, and train sales to speak facts, not fluff. Compliance equals trust; trust equals repeat orders.
Market Outlook & Investment Playbook
Where’s the money? Analysts peg label CAGR at 5.1 % through 2030, but certain slices rocket ahead. Pharma cold‑chain labels rise on mRNA demand. E‑commerce boom fuels linerless shipping tags. EV battery packs require durable high‑heat warnings; few converters qualify, so margins balloon.
M&A buzz blares too. Large converters hunt RFID inlay specialists to shore up smart‑label capacity. PE firms sniff for shops running hybrid presses with sub‑3‑day lead times. A plant owner pondering retirement can score a solid multiple if they sport sustainable substrates and digital traceability.
Capital‑ex decisions still scare. One CFO built a simplistic ROI calculator: press cost, ink cost, plate savings, and predicted run lengths. Payback fell under 24 months for a mid‑range hybrid press gunning for craft‑food SKUs. Smart. Staff matters as much. Upskill operators in data analytics; reading press logs beats wrench‑turning in the AI age.
Investment tip: diversify substrate inventory toward bio‑film, water‑based adhesives, and RFID inserts. Hedging regulatory shifts keeps you ahead. Also, chase green grants; governments subsidize decarbonizing capital.
The playbook is clear: follow growth verticals, automate wisely, and broadcast the eco‑story loudly.
Conclusion
Decals this year aren’t just prettier, they’re greener, smarter, and downright chatty. PVC‑free films cut carbon, PFAS‑free adhesives dodge looming bans, hybrid presses pump vibrant micro‑runs, and in‑line RFID turns every label into a data beacon. That mash‑up of sustainability and connectivity isn’t optional; it’s the price of admission for tomorrow’s supply chains.
So, what’s next? Audit your material mix, trial a bio‑film on a small order, bolt a vision camera over that aging flexo, and flirt with a smart‑label pilot before the competition. Safety counts; always vet food‑contact compliance and data‑privacy protocols. Then share your wins (or scars) in the comments. Got a trick for taming linerless tension or a horror story about curing PLA? Spill the beans so the whole community sticks the landing together.

Vinyl vs. Paint Economics: Total Cost of Ownership Over 10 Years (2025)
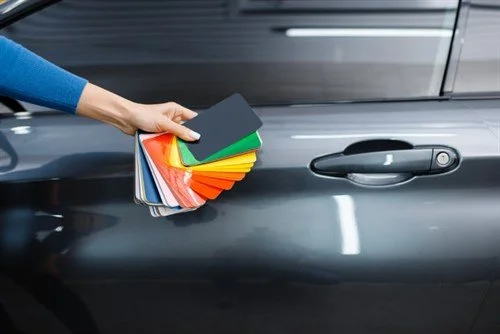
Introduction
“North Americans drop nearly $57 billion a year on exterior upgrades. Most of it is just to keep an older finish from looking shabby.” That number floored me the first time I dug into remodeling data. It also made me wonder, are we sinking good money into repainting when a one‑and‑done vinyl siding job might do the trick?
In the next few minutes, you’ll get a clear, nuts‑and‑bolts breakdown of vinyl siding versus high‑quality exterior paint over a full decade. Expect hard numbers, real‑life “oops” stories (like the time my buddy power‑washed paint clean off his cedar boards..yikes), and plain‑language tips you can act on this weekend. Whether you’re a first‑time homeowner or a seasoned real‑estate hand, you’ll walk away knowing which finish keeps your home handsome without torching your wallet.
Up‑Front Installation Costs: Sticker Shock vs. Smart Spend
Stepping onto any job site, the first word you’ll hear is “budget.” Vinyl siding usually clocks in between $7 and $12 per square foot installed, while pro‑grade exterior paint hovers around $2 to $4 per square foot, but those raw numbers hide a few curveballs.
A neighbor named Carla learned the hard way. She snagged a bargain‑basement paint quote for her 2,000 sq ft bungalow, signed the contract, then watched the crew spend three extra days scraping, sanding, and replacing rotted trim. Prep ended up doubling her labor bill. Vinyl, meanwhile, rolls over rough surfaces after a quick inspection. The panels themselves cost more, sure, yet they cover a multitude of sins without grinding away old coatings.
Regional labor rates also crank the dial. In the Upper Midwest, unionized painters may match non‑union siding installers dollar for dollar. Down South, paint labor can be half that of vinyl because more crews chase fewer jobs in winter. Add‑ons matter as well: foam backer boards improve R‑value but tack on up to $1.50 per square foot; premium primers and elastomeric top‑coats bump paint material costs by 30 %.
Financing sweeteners make the upfront punch easier to swallow. Many siding manufacturers partner with lenders to offer zero‑interest promos if you repay in 18 months. Paint contractors rarely have that leverage. Oh, and don’t forget federal and local tax credits; some states kick back up to $1,000 when you install insulated siding with a minimum R‑value. Paint? No such love.
Bottom line: paint shouts “cheap” at first glance, but hidden prep work, scaffolding rentals, and inevitable change orders can drag your opening spend uncomfortably close to the vinyl range. Always demand an itemized bid so you’re comparing apples to apples, not apples to surprise bagels.
Maintenance & Repair: The Silent Budget Killer
Ask ten homeowners why they dread repainting, and nine will say one word: ladder. Paint looks crisp on day one, but Mother Nature plays the long game. Sun bakes pigment molecules, rain swells wood fibers, and soon you’re chasing flaking edges with a scraper. Industry surveys indicate that most homes require a fresh coat every five to seven years, with a shorter interval in hot, humid zones.
Vinyl siding care feels downright lazy by comparison. A once‑a‑year sudsy rinse with a garden hose keeps algae patches at bay. My college roommate tried skipping that step two summers later; his beige panels sported green stripes that looked like abstract art. Thankfully, vinyl forgives; he spent a Saturday with a foam cannon, and they looked new again. Paint would’ve demanded sanding, priming, and re‑rolling… plus a weekend of sore shoulders.
Numbers? Figure $2,500 to $4,500 for a mid‑sized house repaint using quality latex. Multiply by two cycles in ten years, and you’re flirting with ten grand. Toss in touch‑up cans, caulk tubes, and the odd clapboard replacement, and you see why paint quietly drains savings. Vinyl might need the occasional replacement panel, storm damage happens, and at roughly $8 to $12 per panel and zero labor if you’re handy, the tab stays tiny.
Labor inflation piles on. The Painting Contractors Association reports a 4‑6 % annual rise in wages over the past decade. Your “cheap” paint job today may spike 30 % by the time you’re due again. Vinyl’s maintenance currency is time, not cash: a bucket of soapy water, a brush pole, and a good podcast.
That doesn’t mean vinyl is fully bulletproof. Pressure washers set higher than 1,500 psi can blast seams apart, and dark‑colored panels can warp under concentrated reflections (think low‑E windows next door). Still, the fix is usually a single course swap, not an entire façade redo.
If you crave lazy Saturday barbecues over scraping fascia boards, vinyl’s maintenance math wins hands‑down.
Durability & Lifespan: How Long Will It Really Last?
Paint aficionados tout new resin blends that boast 10‑year fade warranties, and yes, they’re legit, if you doggedly follow prep guidelines and touch up before cracks show. Yet UV radiation, freeze‑thaw cycles, and wood expansion conspire to outsmart even the fanciest formulas. Eventually, pigment bleaches, and tiny fractures invite moisture to party.
Vinyl siding, molded with color clear through, shrugs off chips. In lab tests, it survives baseball impacts that would crater painted wood. Still, impact resistance varies. Economy .040‑inch panels flex like spaghetti, while premium .046‑inch boards shrug off hail up to golf‑ball size. Pay for thickness if storms visit often.
Warranties reveal intent. Paint makers typically guarantee color retention, not labor, and pro‑rated coverage shrinks after three years. Vinyl brands throw down limited lifetime warranties that transfer once, sometimes twice, to new owners. Translation: your buyer inherits peace of mind, and may pay extra for it.
Climate factors shift the longevity ledger. In damp coastal regions, salt spray accelerates paint peeling on clapboard seams. Vinyl’s chloride base resists corrosion, though cheap panels can go brittle in sub‑zero snaps. Meanwhile, fiber‑cement boards hold paint like champs but need joint sealant inspections every other year.
A cautionary tale: my cousin Bill slapped black paint on his south‑facing farmhouse, chasing the modern look. Within eighteen months, surface temperature hit 170 °F on sunny August days, causing blister bubbles. Dark vinyl panels fare better; they’re engineered with heat‑dispersion pigments, but even they cap at certain LRV (light reflectance value) thresholds. Always pick colors that the manufacturer certifies for your climate.
Expect high‑end paint to show cosmetic fatigue by year eight, structural issues by year twelve in harsh zones. Good vinyl can motor twenty‑five, even thirty years, with minimal fuss. If longevity ranks top of your list, vinyl’s a slam‑dunk.
Energy Efficiency & Utility Savings
Insulated vinyl siding often hides a ¾‑inch foam backer boasting an R‑value bump of 2.0 to 3.5. That may sound small, yet energy nerds know dropping thermal bridging on studs can shave 6‑10 % off heating, and more in air‑conditioning heavy markets.
Traditional paint adds no insulation, though “cool‑coat” formulations reflect infrared rays and can trim attic temps up to 10 °F. Savings show on electric bills… if you live where AC hums eight months a year. Up North, reflectivity does zilch during long heating seasons and might even rob you of passive solar warmth.
Real‑world case: A 2,400 sq ft colonial in Minnesota wrapped in insulated vinyl saw gas bills fall from $150 to $120 monthly average, netting $360 saved each year. Over ten years, that’s $3,600, enough to offset roughly half the initial vinyl premium. Meanwhile, my aunt’s Phoenix ranch switched to cool, ceramic‑infused paint. Her summer power bills slid by $25 a month. Good money, but the coating costs twice standard acrylic and will still need redoing in seven years.
Don’t ignore air leakage. Vinyl installers frequently add house wrap under panels, creating a windbreak that paint alone can’t match. When blower‑door tests slice infiltration by 15 %, furnace runtimes shorten.
If utilities gobble your paycheck or you live where temperature swings are savage, vinyl’s steady efficiency wins. In moderate climates? Either finish works, but only insulated siding locks in savings for decades without repeat coats.
Curb Appeal, Resale Value & Appraisal Impact
First impressions sell houses. Realtors swear by fresh paint scents and eye‑popping colors at open houses. Buyers associate crisp paint lines with attentive ownership. Still, they also Google maintenance schedules, and “never paint again” grabs attention.
The 2025 Remodeling Cost vs. Value Report pegs vinyl siding replacement recouping 83 % of cost at resale, while a midlevel exterior repaint returns around 55 %. Why the gap? Durability and worry‑free warranties reassure buyers budgeting for the first few years of ownership.
Color flexibility does lean paint’s way. Want a trending sage green? Grab a roller this weekend. Vinyl colorways expand yearly, yet you’re still picking from a catalog, and custom orders hike the price. My friend Jenna flipped a craftsman and needed a vintage mustard tone. She found it, after waiting six weeks and paying a rush fee.
Fade resistance matters. Quality paint with UV blockers resists chalking for half a decade, maybe eight years if overhangs protect walls. Dark vinyl boards maintain hue for fifteen years or more before subtle bleaching creeps in. That means less chance a buyer will knock dollars off their offer citing “sunburned” siding.
Appraisers notice maintenance backlog. A peeling façade can shave 2‑3 % off valuation instantly on a $400k home, that’s ten grand gone. Vinyl’s tidy seams sidestep that pitfall.
HOA rules? They can be a buzzkill. Some associations forbid vinyl to maintain historical aesthetics, while others require it for uniformity. Always scan bylaws before signing contracts.
When your plan includes selling within five years and color swapping helps stand out, paint fares fine. For hold‑and‑rent investors or long‑term owners, vinyl’s ROI looks tastier on closing day.
Environmental Footprint & Sustainability
Paint slaps you with volatile organic compounds (VOCs). Modern “low‑VOC” lines cut emissions, yet the EPA still tags painting as a top household source of indoor air pollution for 48 hours post‑application. Vinyl manufacture, on the other hand, pumps greenhouse gases at the factory stage but releases practically no VOCs on site.
Production energy usage tilts: latex paint needs lower heat in processing than polyvinyl chloride pellets. However, repainting every five years multiplies a paint job’s cradle‑to‑grave tally. One life‑cycle assessment found a vinyl install emitted roughly 20 % more CO₂ upfront but broke even on total emissions by year thirteen thanks to avoided repaints.
End‑of‑life issues loom. Scrap vinyl can be ground and re‑extruded into new panels or deck boards. Local recycling access varies, though. Paint waste demands hazardous drop‑off centers, and leftover cans often languish in basements until someone coughs up disposal fees.
Certifications help eco‑minded shoppers. Products bearing UL SPOT or GreenCircle labels verify recycled content and sustainable sourcing. Paint with Greenguard Gold rating keeps indoor air cleaner, while insulated vinyl can earn LEED points under Energy & Atmosphere.
Water runoff matters, too. Unsealed wood posts shed paint chips into soil over decades; heavy‑metal pigments, though rarer today, still show up in lab tests. Vinyl granules are larger, sink quickly, and usually get caught in landscaping mats, which has less chance of storm‑sewer contamination.
Is either finish zero‑impact? Nope. But stretching maintenance cycles lowers total harm, pushing vinyl slightly ahead in most full‑life calculations. If green cred sits atop your decision tree, look for high‑recycled‑content vinyl or mineral‑based paints that ditch petrochemical binders.
Real‑World Case Studies & 10‑Year Cash‑Flow Models
Case Study 1: Atlantic Canada Two‑Story (2,000 sq ft)
Paint Path: $7,800 initial (scraping cedar shakes, two coats); $8,400 repaint in year 6 (inflation 4 %/yr). Ten‑year total: $16,200.
Vinyl Path: $18,000 insulated .044‑inch panel install; annual hose‑down $20 (soap). Ten‑year total: $18,200.
Result: Vinyl costs $2,000 more but boosts R‑value, cutting heating bills by $380/yr. Net present value (5 % discount): vinyl ahead by $930 by year 10.
Case Study 2: Pacific Northwest Bungalow (1,400 sq ft)
Heavy rainfall rots fascia quickly. Paint cycles shrink to four years. Cost over ten years: $12,000. Vinyl in mossy climates demands twice‑yearly soft wash at $150 service call. Ten‑year total: $18,300. Paint surprisingly cheaper here—if you’re okay babysitting the calendar.
Case Study 3: Great Plains Ranch, Hail Alley (1,800 sq ft)
Paint prone to hail pockmarks; insurance pays minus deductible each storm, but owner must arrange repairs. Five hail events in ten years cost $6,000 out of pocket. Thick vinyl had three cracked panels total ($250 DIY swap). Vinyl miles ahead financially and stress‑wise.
Sensitivity analysis shows paint’s Achilles heel is labor inflation; bump wages 6 % annually and repaint costs skyrocket 45 % by year ten. Conversely, PVC resin prices can swing with oil markets; a 20 % spike raises initial vinyl bill but barely nudges long‑term tallies because there’s no second purchase.
Crunch the numbers for your square footage, energy rates, and storm history. A simple spreadsheet plus conservative estimates will reveal a clear favorite fast.
Decision Matrix: Which Finish Fits Your Goals?
Budget Today vs. Budget Tomorrow
a. Tight cash? High‑quality paint lets you stage expenses.
b. Long view? Vinyl front‑loads spend, then chills.
Climate Realities
a. Harsh sun, hail, or salty breeze? Vinyl endures abuse.
b. Mild, dry seasons? Paint may hold up longer, narrowing the gap.
DIY Spirit Level
a. Love weekend projects? Painting scratches the itch.
b. Prefer Netflix over scraping soffits? Vinyl suits the lifestyle.
Color Commitment
a. Fashion‑forward type who changes palettes like socks? Paint wins.
b. Happy with timeless neutrals? Vinyl delivers set‑and‑forget beauty.
Resale Horizon
a. Selling within five years? Fresh paint offers instant curb pop for less cash.
b. Holding ten‑plus or renting? Vinyl’s ROI climbs with each rent check.
Use this matrix, score each factor 1‑5, tally totals, and your answer jumps off the page. Simple, yet effective.
Conclusion
Choosing between vinyl siding and exterior paint isn’t a battle of right or wrong; it’s about aligning dollars, durability, and daily hassle with your personal priorities. Over ten years, vinyl often edges ahead on maintenance savings, energy efficiency, and resale ROI, especially where weather punishes paint. Yet paint keeps shining for quick color swaps and lower entry costs.
So, grab a notebook, run your own cost‑of‑ownership math, and remember key safety and eco steps, proper ladder footing, responsible disposal, and low‑VOC options. Have you tackled a siding or repainting project lately? Share lessons learned or rookie mistakes in the comments. Your story could save the next homeowner a bundle and a headache!

Floor & Facility Graphics That Last: Anti-Slip, Forklifts, and Safety Lines (2025 Guide)
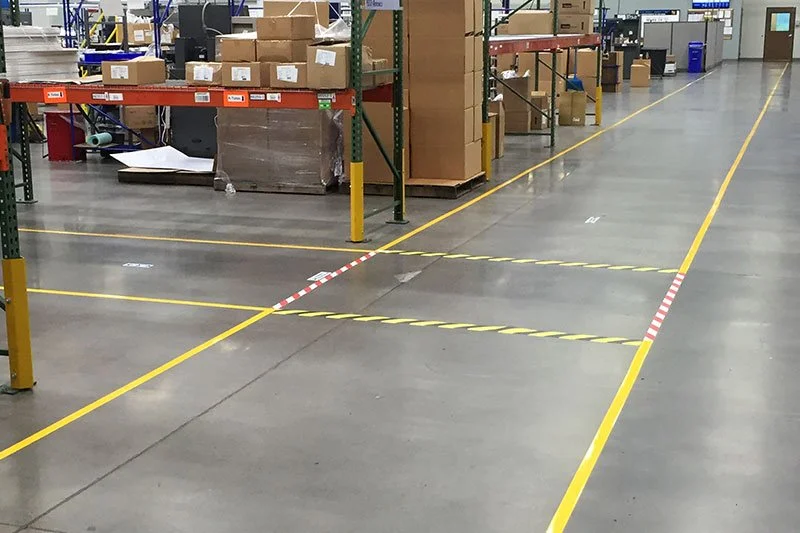
Introduction
“Safety doesn’t happen by accident.” I keep that line taped to the inside of my notebook because it’s true in busy facilities where floor graphics do real work. They guide people, separate hazards, and keep traffic moving, and then forklifts, pallet jacks, auto-scrubbers, oils, and winter grit try to destroy them. Some markings fail in a week. Others hold up for years. The difference isn’t luck; it’s choosing the right materials, prepping the surface, and installing with a plan that fits the environment.
In this guide, I’ll show you how to create floor and facility graphics that last with anti-slip texture, forklift-resistant durability, and safety lines that stay visible. We’ll talk DCOF and ANSI references, high-tack adhesives, textured overlaminates, edge-lift prevention, and the small habits that make a big difference. I’ve made mistakes (plenty) and learned fix-it tricks the hard way. You don’t need to. Let’s build something tough, clear, and safe!
What “Durable” Really Means for Floor & Facility Graphics
Durability is not one thing; it’s a bundle of performance traits working together. When I spec floor graphics now, I define durability across adhesion strength, abrasion resistance, chemical resistance, slip resistance (COF/DCOF), UV stability, and edge integrity. If one of those legs is weak, the whole stool wobbles. A graphic might bond beautifully but scuff fast under Taber abrasion. Or it resists scuffs but loses anti-slip texture after a month of auto-scrubbing. Durable means balanced.
Start by matching environment to expectation. Foot-traffic corridors and office lobbies need one thing; forklift wheel paths, staging lanes, and dock approaches need another. Heavy pallet jack traffic causes point loading and shear that pry edges up. In a freezer, adhesive gets stiff, and low temps rob you of tack. In a washdown room, chemicals and hot water soften inks and laminates. Durable means you’ve anticipated that specific mix.
It also helps to name the most common failure modes: edge-lift, scuffing, delamination, discoloration, texture flattening, and ink abrasion. I once watched a perfect-looking installation start curling at the corners in week two. The material wasn’t the villain, the spec ignored turning radii where forklift wheels “grind” the same edge dozens of times a day. We radius corners now and keep edges out of high-shear arcs. Simple change. Big payoff.
Set KPIs up front. For example: “Minimum 12-month service life in forklift aisles; maintain DCOF ≥ 0.42 wet; no more than 10% edge fray at 9 months; withstand daily auto-scrubbing with neutral pH cleaners.” It sounds formal, I know, but those targets help you judge success fairly. And because slip resistance is safety-critical, plan periodic COF/DCOF checks with a documented inspection interval. Not complicated. Just consistent.
Finally, durability includes clarity. If the message is scuffed to a gray blur, it’s functionally failed even if adhesion is fine. Choose overlaminates that protect both texture and legibility. A durable graphic is the one that still does its job when you’re busy and not looking. That’s the benchmark.
Surface & Substrate: The #1 Predictor of Success
If I could only fix one variable, I’d choose the substrate every time. The floor under your graphic is the true boss. Sealed/epoxy concrete, polished concrete, VCT/LVT, quarry tile with grout lines, sealed wood, even coated steel plates, each behaves differently with adhesives. Porosity, moisture, and contamination drive outcomes more than brand names on boxes.
Start with moisture. Concrete looks dry but can be breathing out water vapor for months. Check MVER/RH (moisture vapor emission rate / relative humidity) and respect cure times and sealer recommendations. High moisture pushes against adhesive, and the bond eventually gives up, usually at edges first. In borderline cases, a primer/adhesion promoter can help, but it’s not a band-aid for soaked slabs.
Then tackle contamination control. Degrease thoroughly (forklift aisles collect oils, silicone from tire dressings, and winter salts). I prefer a two-stage clean: a strong degreaser, an agitation pass, a clean water rinse, and ample dry time. If you can, lightly abrade/etch glossy coatings to improve mechanical grip, then remove dust. Waxes and floor finishes complicate adhesion. Sometimes the right move is to strip or seal first for a known, consistent surface.
Compatibility matters. I’ve seen vinyls lift on ultra-low surface energy (LSE) coatings where only an LSE-tuned adhesive would do. Polished concrete is slick and beautiful, and a challenge for bond. Tile and grout add uneven support: edges that live over grout lines get flexed and stressed by load. In those areas, consider wider radiuses, thicker films, or shifting the layout a few inches to ride solid tile.
Temperature is the quiet saboteur. Many adhesives have a minimum install temperature; if the substrate is cold, tack starts weak and never recovers. Warm the floor (safely), schedule installs midday, or use materials rated for colder application. Humidity can also condense at dew point and leave a thin water film you can’t see. I learned to check dew point on “perfect” days after one install mysteriously bubbled.
Bottom line: the best material on the wrong surface will still fail. Document the floor type, porosity, moisture, contaminants, and temperature before you spec. If anything’s uncertain, run a pilot patch in the worst-case spot and abuse it for a week. Floors tell the truth if you listen.
Materials that Survive Forklifts (Films, Overlaminates, Thickness)
“Will it survive forklifts?” lives in my head when I open a catalog. Start with the base film. PVC is common and cost-effective; PET and polycarbonate bring higher abrasion resistance and dimensional stability. The thicker the stack (film + adhesive + overlaminate), the better it resists point loads and scuffing, but thickness alone isn’t the hero, texture and chemistry matter more.
For true traffic zones, choose a textured, anti-slip overlaminate designed for floors. There are two major families: micro-textured (easier to keep clean, kinder to print clarity) and grit (higher bite, sometimes harsher on mops and slightly dulls fine details). Aim to retain DCOF while preserving legibility. I’ve had wins with micro-texture in pedestrian areas and grit near wet entries and ramps. Match texture to the environment, not vanity.
Inks and curing matter too. UV-cured inks typically have strong scratch resistance and solvent resistance, though solvent/latex can be excellent with a good laminate. Do a quick ink anchorage check, rub aggressively after a full cure; if color transfers, rethink the stack. Premature lamination can trap solvents and lead to bubbles later (a mistake I made once, only once).
Edges are where shear happens, so design them to survive. Use rounded corners (I like at least 0.25" radius; more for forklift lanes). Avoid sharp points. In high-shear zones, a beveled edge overlaminate or a thin edge sealant can stop “peel-up” from starting. And keep critical edges out of turning arcs. If a wheel can find a corner, it will.
Adhesive type is the silent partner. High-tack adhesives bond to sealed and slightly irregular surfaces, while LSE-tuned adhesives handle tricky coatings. If removability matters (temporary 5S) pick a removable adhesive but understand it trades some ultimate strength. For freezers or cold rooms, look for cold-temperature adhesives that still wet-out at low install temps.
Finally, remember thickness is both comfort and risk. Thick stacks feel premium and resist scuffs, but a tall edge can catch more easily. I balance this by using thicker constructions in the center with strong texture, then designing radiused shapes and smart placement to keep edges safe. Forklifts are tough, but a smart spec is tougher.
Anti-Slip Compliance & Testing (COF/DCOF Standards)
Slip resistance isn’t a nice-to-have; it’s life and limb. That’s why I treat COF/DCOF like I treat brakes on a car. You’ll hear two families of measures: static COF (how hard it is to start moving) and dynamic COF (how hard it is to keep from sliding once in motion). Many facilities target DCOF because it reflects real walking conditions, especially wet.
Common references include ANSI A326.3 for DCOF, NFSI B101.1/B101.3, and European DIN 51130 (the “R-ratings”) or pendulum testing methods. I don’t get religious about one standard over another. I get practical. What rating corresponds to your actual conditions, dry corridors, wet entries, ramps, washdown areas, cold rooms? If you choose a texture that hits your target on day one but polishes smooth after a month of auto-scrubbing, you didn’t buy safety; you rented it.
Here’s a routine that works. First, spec a textured overlaminate with tested DCOF values for wet and dry. Second, confirm a cleaning plan that preserves texture: neutral pH cleaners for routine work, and avoid aggressive pads that act like sandpaper. Third, create a re-testing cadence. Quarterly is common where risk is high. Semiannual in calmer areas. Log the results. If the DCOF drifts below target, act, clean differently, replace, or move to a grippier texture.
I learned this lesson in a lobby that looked spotless but became slick after a new disinfectant. The chemistry left a faint residue that filled the micro-texture. The fix wasn’t a harsher pad; it was a rinse step and a compatible cleaner. Slip resistance returned, and the team stopped holding their breath on rainy days.
Keep signage honest, too. If an area is temporarily wet after cleaning, mark it until dry. Safety lines and icons communicate risk quickly, but they only help if the floor under them stays anti-slip. You can even add photoluminescent accents for low-light egress paths, in some settings, that extra guidance matters when power blinks.
Build anti-slip into your spec, into your cleaning SOP, and into your inspections. That’s how you protect people and stay compliant without playing standards bingo.
Safety Lines & Zone Markings: Paint vs. Tape vs. Graphics
Choosing between paint, tape, and graphics is like choosing a vehicle each has a job. Paint is permanent-ish, excellent for large base stripes and areas where you can afford downtime for surface prep and curing. It’s durable with the right epoxy systems, but changes later mean grinding or recoating. Floor marking tape is fast, clean, and removable; perfect for evolving 5S layouts and seasonal lanes. High-grade tapes can be impressively tough, though they still prefer clean, dry floors with good adhesion. Printed graphics sit in the middle, giving you rich icons, arrows, ISO 7010 symbols, and ANSI Z535 color accuracy, with service lives ranging from months to multi-year depending on the stack.
I often use a hybrid approach. Paint the base aisles (long unbroken runs benefit from paint’s cost per foot) and overlay durable icons, arrows, keep-clear labels, dock numbers, charging-station symbols, using textured, anti-slip graphics. That combo minimizes repaints while keeping the visual language flexible. If a process changes, swap the icon without redoing a 200-foot stripe.
Color coding matters. Standardize early: yellow for aisles and walkways, red for fire equipment, green for first aid, blue for information, black/yellow for hazard areas. Consistency builds trust. I once walked a warehouse where yellow meant three different things in three zones. People stopped trusting the markings and, eventually, stopped noticing them. A small legend poster near entries cures confusion fast.
Consider lifecycle cost. Tapes look cheaper until you replace them every quarter in forklift lanes. Paint looks cheaper until you tally downtime and line-shut costs. Durable graphics cost more up front but can be optimized around wheel paths to avoid abuse. Build a simple TCO model over three years: material + install + downtime + refresh cycles. Surprises disappear when you do the math honestly.
One more tip: design for visibility. High contrast, low-glare finishes, and sizes that read at the right distance. If drivers can’t read an icon until they’re on top of it, it’s decoration. When in doubt, go larger and space elements so the eye has room to breathe. Safety lines should feel calm, not noisy.
Design & Placement for High-Traffic, High-Shear Areas
Good design isn’t just pretty; it’s survivable. Start with traffic mapping. Walk the floor and trace forklift turning radii, pallet jack stops, and places where loads pivot. Those are the grind zones where edges die young. Move critical edges out of those arcs or use larger radius corners so the wheel rolls over a curve, not a point. If an icon must sit in a lane, center it well away from wheel paths.
Use iconography that reads fast: bold arrows, footprints for pedestrian walkways, and clear hazard symbols. Pair critical graphics with text if space allows: “KEEP CLEAR,” “PEDESTRIAN,” “FORKLIFT X-ING”, and keep the typeface simple. I like to include QR codes or barcodes that link to SOPs or quick checklists. A supervisor scans and sees the rule in context; it’s surprisingly helpful during audits.
Manage contrast and glare. A glossy laminate looks sharp in photos and then blinds drivers under LED lights. Choose matte, textured overlaminates that cut glare, preserve DCOF, and keep message clarity. In low-light egress paths, consider photoluminescent highlights that echo wall markings for continuity.
Sizing and spacing are rules of thumb informed by sight lines. If a driver needs three seconds to register an icon at 10 mph, size accordingly and place upstream of the decision point. It’s amazing how often markings sit exactly where the decision is already made. Move them back 10–20 feet, and compliance improves.
A small tangent, because it matters: I once built a gorgeous icon set for a healthcare corridor. Clean, compliant, and invisible because the floor pattern competed with the graphics. We fixed it with a high-contrast shape behind each symbol, like a quiet “stage” that let the message pop. The best design sometimes is subtraction.
Lastly, treat edges like fragile parts. Keep them out from under pallets; avoid transitions across cracks, grout lines, or expansion joints; and align graphics so auto-scrubber paths ride across the center, not along an edge. Good placement is free durability. It’s also the easiest win.
Installation Best Practices That Prevent Edge-Lift
A perfect spec can be ruined by a rushed install. I’ve done that. Never again. Start by checking environmental conditions: substrate temperature within the material’s window, ambient humidity under control, and no risk of dew point condensation. If the floor feels cold to the touch, it probably is. Warm the area or schedule when temps are friendlier.
Do a final surface prep. Even after cleaning, dust sneaks back. Tack-cloth or a lint-free wipe with the recommended cleaner, then let it dry fully. If the substrate is challenging, polished concrete, epoxy with a slick finish, LSE coatings, apply the manufacturer’s primer/adhesion promoter exactly as directed. Too little is useless; too much can create a weak boundary layer.
During application, pressure is your friend. Use a firm squeegee or roller and work from the center out, chasing air to the edges. Overlap strokes, go slowly, and watch seams. With thick stacks, a J-roller helps wet-out the adhesive into micro-textures. If you’re using edge sealant, mask a clean line and run a thin, even bead; more is not better. It should protect the edge, not create a gummy ramp.
Trim corners to a radius; don’t leave sharp points. In known high-shear areas, consider a slightly oversized shape so the message sits away from the edge. After install, enforce a dwell time before traffic returns. Adhesives build strength over hours; sending forklifts over a fresh graphic is like driving on wet paint. When possible, cordon the area and add a simple sign: “Setting: use alternate lane.”
Post-install, do a quick quality walk. Press down any suspect edges again, check for bubbles (tiny ones often relax overnight), and verify alignment with your layout. I used to skip this step to save 10 minutes and spent an hour fixing a curl the next morning. Ten minutes wins.
Finally, capture a few photos and note the install conditions in your log: date, temp, humidity, substrate, cleaners used, primer used. If you ever need to troubleshoot, those breadcrumbs save the day.
Maintenance & Cleaning Without Killing Your Graphics
Maintenance either extends service life or secretly shortens it. The trick is simple: clean in a way that preserves texture and adhesion. Use approved cleaners, usually neutral pH for routine work, and avoid harsh solvents that soften inks and adhesives. Strong disinfectants are sometimes necessary; if so, test them on a sample and rinse as recommended. Residue can fill micro-texture and drop DCOF even though the floor looks spotless.
Auto-scrubbers are wonderful and dangerous. The wrong pads act like sandpaper that flattens texture and erases print. I specify compatible pads and a speed/pressure setting that cleans without grinding. In wet entries or food areas, schedule an extra pass to remove grit and oils before they become embedded. Small habits matter: a well-rinsed mop head, a clean squeegee, a fresh water change.
Create a simple inspection schedule, monthly visual checks for edge-lift or scuffing, and quarterly COF/DCOF tests in higher-risk zones. Log it. If an edge starts to lift, re-edge-seal early or replace the piece before dirt crawls underneath. Partial fixes are fine; modular graphics exist for this reason. Don’t wait for a line to become a trip hazard.
Training is underrated. A five-minute huddle with the cleaning team can double service life: show the pad type, the no-go chemicals, and the right dwell time for cleaners. Explain why we never let a scrubber ride along an edge. I remember a night crew leader who switched to a “faster” pad. The shine was great. The DCOF wasn’t. A respectful conversation and a test patch turned it around.
Finally, measure what matters. If you track incidents, near misses, and replacement intervals, you can see patterns. Maybe a certain aisle needs a tougher grit laminate. Maybe a disinfectant switch quietly reduced texture. Your maintenance plan should be a living document, not a binder you never open. Keep it light, practical, and focused on outcomes: safe, readable, durable floor graphics.
ROI: Downtime, Risk Reduction & Lifecycle Costing
People argue about cost per roll. I prefer to talk about total cost of ownership over 3–5 years. Add up material, install labor, downtime, refresh cycles, and the not-so-small value of risk reduction (fewer incidents, cleaner audits). Suddenly, the “expensive” durable graphic looks cheap next to tape you replace every quarter or paint that requires lane shutdowns and slow-cure weekends.
Build a quick model. Suppose a forklift lane needs safety lines and directional arrows. Option A: mid-grade tape with quarterly replacements and 2 hours of downtime each time. Option B: painted base stripes with a weekend shutdown, then durable icons that last a year or two. Option C: full durable graphics with textured overlaminates tuned for that load. When you layer in labor rates, overtime, and scheduling pain, Option B or C often wins. Especially when the layout changes just a little over time and you can swap icons, not everything.
Include risk value. A single slip-and-fall costs more than a year of better materials. I’m not fear-mongering; I’ve seen the math. If better anti-slip preserves DCOF, and clearer markings prevent near-misses at intersections, the savings are real. Insurance audits go smoother; corrective actions shrink.
Also consider brand and morale. Crisp, consistent 5S markings make a facility feel cared for. That shows up in retention, in how people treat equipment, and in how visitors judge your operation. It’s soft value, but I’ve watched it change behavior.
On warranties, read the fine print. What’s covered? Abrasion, adhesion, colorfastness? Are there exclusions for certain chemicals or auto-scrubber pads? A pro-rated remedy is nice, but only if your maintenance SOP matches the warranty’s assumptions. This is where logs help you win a claim.
When you present ROI, use clear assumptions, show sensitivity (what if refresh extends to 18 months?), and document downtime costs. It’s hard to argue with numbers, and you’ll pick better specs next time with real data instead of vibes.
Troubleshooting Guide: If It Lifts, Scuffs, or Slips
Troubleshooting is pattern recognition. Start with a rapid diagnostic checklist: substrate (type, moisture, finish), prep (degreased, abraded, primed), adhesive (type and cure), load (forklifts, turning arcs), chemicals (cleaners, oils), and environment (temp/humidity). Failures usually leave clues.
For edge-lift, ask: Is the edge in a wheel path or turn? Are corners sharp instead of radiused? Was there dew point condensation at install? Fixes include re-applying with a primer/adhesion promoter, trimming to a larger radius, adding edge sealant, or repositioning outside grind zones. If tile/grout is below, bridging the void may be the problem; shift the layout or use a thicker stack.
For scuffing and delamination, confirm the overlaminate choice and ink anchorage. A micro-texture may be too gentle for sand and grit, move to a grit laminate in those lanes. If inks are lifting under abrasion, let prints fully cure and use a laminate rated for ASTM D4060 wear. It sounds technical; it’s just matching the tool to the job.
For slip complaints, test DCOF. If readings dropped, examine cleaners and pads first. Residue often fills texture. Switch to a compatible cleaner and add a rinse step. If texture is flattened, replacement is honest, then adjust the maintenance SOP to prevent a repeat.
When in doubt, pilot. Replace one failing graphic with an alternative stack and monitor a week. I keep a small “trial kit” with different films, high-tack adhesives, and textures. We label the patch, note conditions, and let the facility beat on it. The floor gives a verdict quickly.
Finally, know when to escalate. Vendors can run lab tests, suggest LSE adhesives for tough coatings, or confirm a PVC-free or polycarbonate option for chemical resistance. If trouble keeps returning, the substrate may need sealing or minor refinishing. It’s not a defeat; it’s part of getting to a durable solution.
Industry-Specific Notes (Food, Pharma, Healthcare, Logistics)
Every industry has quirks worth respecting. In food & beverage, washdown drives everything. Choose graphics with chemical-resistant overlaminates and adhesives that tolerate frequent wet cycles. Consider PVC-free stacks if required and keep DCOF high in wet zones. Color coding can align with HACCP, clear red no-go areas, green safe paths, and yellow staging. Cold rooms need cold-temp adhesives and longer cure times; plan installs accordingly.
In pharma/cleanrooms, documentation rules. Low-shedding materials, low-VOC primers, and an installation log that would make a quality engineer smile. Edges must stay sealed to avoid particle traps, and markings often support SOP visual management, QR codes here are gold for linking to controlled docs.
Hospitals are disinfectant land. Disinfectant-resistant graphics protect both print and texture. Wayfinding matters as much as safety lines. Choose low-glare matte textures for readability under bright lights and at night. I favor photoluminescent egress accents to echo wall signs during outages. Installation windows are tight, so choose systems with minimal downtime.
Warehousing & 3PL is the home of forklifts. Expect high traffic density, sharp turns, and seasonal layout changes. I’ve had success painting base aisles and laying durable icons that swap as processes evolve. Label dock doors and staging with large, high-contrast numbers. Plan for auto-scrubber routes and keep edges out of their preferred paths.
In each sector, involve the frontline team early. Ask what fails first, where near-misses happen, which cleaners they actually use (not just what’s on the spec). People love being heard, and they’ll point to the problem spots in five minutes. That input, plus a small pilot, usually lands you on the right spec the first time.
Sustainability & EHS Considerations
Durability and sustainability can be friends. A long-life spec means fewer replacements and less waste. When possible, choose PVC-free films, recyclable liners, and low-VOC adhesives/primers. If a vendor offers a take-back program, use it. It’s not perfect, but it’s movement in the right direction.
Think modular. If you can replace a single icon instead of a 30-foot run, waste drops. And if your graphics survive auto-scrubbing with neutral cleaners, you’ll avoid harsher chemistry long term. That’s good for the floor, the environment, and your EHS team.
During install, practice safe ventilation and PPE. Adhesion promoters can be smelly; masks and gloves are basic respect for the crew. Around active lanes, add lockout/tagout-style controls for traffic and a spotter. I know this sounds obvious. The one time you skip it is the time someone nearly backs into a cart. Ask me how I learned.
Finally, document the end-of-life plan. If materials can’t be recycled, at least consolidate removals and dispose of them responsibly. Sustainability isn’t one heroic act, it’s consistent small choices that add up over the service life of your safety program.
Vendor Selection & Spec Sheet Template
Good vendors save you money by telling you “no” at the right time. When you evaluate partners, ask for COF certificates, abrasion data, chemical resistance lists, and any forklift wear testing they’ve done. Request a reference site that looks like your environment, not a showroom lobby. Probe lead times and SLA for emergencies. If a line gets torn the day before an audit, you’ll want someone who can move.
I like to build a one-page performance spec you can reuse. It includes:
Substrate: type, condition, moisture status, and any sealer.
Film: PVC/PET/polycarbonate, thickness.
Adhesive: high-tack or LSE-tuned; cold-temp if needed.
Overlaminate: textured or grit; DCOF targets (wet/dry).
Print: ink type and cure requirement; ink anchorage check.
Edges: radius size; edge sealant where specified.
Install: temperature/humidity window, primer, pressure, dwell time.
Maintenance: approved cleaners, pads, and COF re-test cadence.
Warranty: coverage, exclusions, proof required.
Before rollout, run a pilot in the worst-case location. Define pass/fail up front: no edge lift at 4 weeks, DCOF within target after three scrub cycles, legibility intact after specific traffic counts. If it passes there, it will sail in friendlier spots.
One small note on culture: choose vendors who share the “measure twice, cut once” mindset. The cheapest quote fades fast if you spend months chasing tiny failures. I’ve come to value the rep who says, “I don’t love this on polished concrete. Let’s test a different adhesive.” That honesty often buys you the durability you’re paying for.
Conclusion
Safe, clear, and durable floor graphics don’t happen by chance. They happen when you match materials to traffic, prep the substrate correctly, install with care, and maintain texture so anti-slip performance stays high. It’s a chain of small decisions; film, high-tack adhesive, textured overlaminate, edge-lift prevention, smart placement, that add up to safety lines that survive forklifts and look great doing it. Customize the specs to your exact floors, chemicals, and traffic patterns, and keep a simple log for testing and maintenance. You’ll save money, cut downtime, and most important, protect people. If you’ve got tips or war stories from your facility, share them. We learn faster together, and I’m always looking for the next small tweak that makes graphics last even longer. Ready to start? Pilot one tough, well-designed spec in your worst-case zone, then scale with confidence.

Edge-Lift Prevention: Design & Install Rules That Actually Work
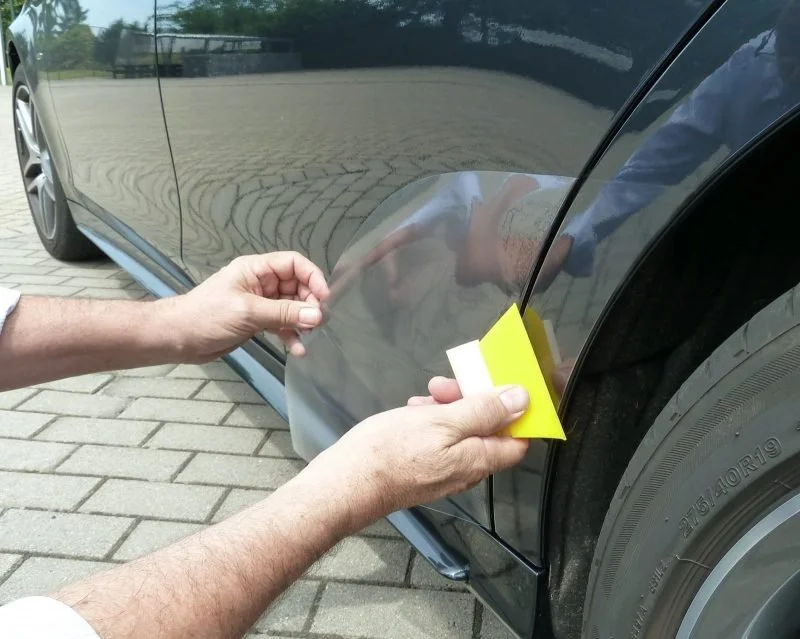
Introduction
“Edges fail first.” A senior installer told me that years ago, and it stuck. Most vinyl graphics don’t quit in the middle; they peel where wind, water, and fingers attack the edge. I’ve watched beautiful wraps start curling within days because the wrong film met a dusty panel in cold weather. Painful. The good news? Edge-lift is predictable and preventable. With the right design rules, substrate prep, adhesive selection, and post-heat habits, those edges can stay crisp and clean for years. I’ll show you what actually works and why. You’ll get practical techniques, checklists, and little tricks learned the hard way. Let’s get those edges locked down and keep the warranty calls quiet!
Why Edges Fail: Failure Modes & Root Causes
Edge-lift is not a mystery. It’s a chain of small decisions that either build adhesion or break it. The most common failure modes show up as curl at corners, tunneling along seams, bridging over channels, and dirt lines right at the edge. Each one usually starts with a simple cause: low surface energy (LSE) plastics like polypropylene (PP) or polyethylene (PE), a paint that hasn’t cured, or a cleaning step that left residue. When a graphic fails, he shouldn’t only look at the last step; he should trace back to substrate preparation and design choices. Vinyl edge curl rarely appears if the surface is truly clean and the adhesive has wet out properly.
Surface energy matters a lot. On high surface energy materials like glass or painted metal, pressure-sensitive adhesive can flow and anchor well. On LSE plastics, the adhesive beads up microscopically and then tries to let go. That’s where adhesion promoters or LSE-optimized adhesives earn their keep. Temperature and humidity also pull strings behind the curtain. Installs below the recommended temperature range, slow adhesive flow, and a cold substrate can trap moisture at the edge. Humid days add their own risk: condensation near the dew point turns “clean” into “slippery.”
Design errors set traps too. Sharp V-cuts, thin strokes that end at a panel break, or seams placed into the wind create stress points that collect wash water and peel forces. Combine one design mistake with a dusty wipe and a quick, low-heat pass and you’ve stacked the odds against yourself. He might get lucky once, but not across a fleet. Edge contamination is another quiet culprit. One careless touch with an oily glove, one pass with a fuzzy rag, and the edge is compromised. It might look fine at install, but a week of thermal expansion and pressure washing tells the truth.
Lastly, film memory is real. Calendered film stretched around a compound curve wants to spring back. If it’s not properly post-heated to reset that memory, it slowly walks away from the edge. And while UV and wash cycles don’t start the failure, they finish it faster. Understanding these root causes, surface energy, environmental conditions, design stress, contamination, and film memory, gives a clear map to prevention. Fix the system, and edges stop failing.
Design Rules That Prevent Edge-Lift
Great installs begin at the design desk. Rounded corners beat sharp points every time. A practical rule he can apply: choose a corner radius at least equal to the film thickness in millimeters, and larger for exterior edges that face wind shear. Thin strokes that terminate at seams, corrugations, or door gaps invite trouble, so he should keep delicate elements away from panel breaks and high-stress areas. A safe margin, often 6–12 mm from an edge, reduces lift risk dramatically.
Overlap seams should follow the shingle method: upper panel overlaps lower panel in the direction water travels. That way, wash water and rain don’t push under the seam. When he lays out large graphics, he can angle seams away from the dominant airflow on vehicles. It sounds fussy, but it pays off. For trailers or riveted panels, plan cap strips or micro-hems on leading edges. These add a small, stable “lip” that resists peel forces where the wind hits first.
In channels and corrugations, design to reduce stretch. If a brand element must cross a deep channel, consider a relief cut or a separate inlay for the channel. He once tried to bridge a deep corrugation with a single piece to “save time,” and it crept back within a week. The rework costs more time than the inlay would have. For compound curves, cast film should be the default spec, and the layout should avoid tight inside corners where possible; when unavoidable, increase the radius or split the piece.
Edge-sealer channels and hem wraps are not signs of failure, they’re part of professional design in high-risk zones. He can spec them for wheel wells, door edges, and areas that are hand-touched often. Simple detail changes help: avoid arrows that narrow to a point; blunt them or add a small radius. Move logos off gasket edges onto smooth painted surfaces. If a seam must land near a door handle, shift it a centimeter to a flatter, less-handled area.
Finally, document these rules in a design checklist: corner radii, safe margins from seams, overlap direction, cap strips on windward edges, inlays for channels, and approved cut paths. Designers who see the installation reality make better files, and installers who see the file logic make cleaner edges. That partnership is the quiet secret to edge-lift prevention.
Substrate & Surface Preparation Standards
Substrate identification is the first real step. Painted metal, powder-coated parts, glass, FRP panels, and LSE plastics each need a slightly different approach. He should teach the team to name the surface before anyone opens a cleaner bottle. On painted or clear-coated metal, a clean–degrease–decontaminate workflow works: first remove heavy soil, then a proper degreaser, then a final isopropyl alcohol (IPA) wipe using the two-cloth method; one cloth wet to loosen residue, one dry to lift it. Lint-free matters. Fuzzy rags leave dust that hides at the edge.
A quick water break test helps confirm cleanliness: a thin, even water film means high surface energy; beading or fisheyes means contamination remains. For powder coat and textured FRP, cleaners must not leave residue, and he should consider a light scuff only if the manufacturer allows it. If a part was freshly painted, he needs cure times from the paint system; outgassing can push against the adhesive from below and create tiny tunnels right at the edge.
On PP/PE and other LSE plastics, he should either specify LSE-optimized adhesives or use a compatible adhesion promoter. Promoters are not a magic wand; they must be applied in a thin, even film only where needed, with full dry time. Too much promoter creates a brittle line that can crack. He once watched a crew flood promoter along an entire door edge; it held for a month, then failed in a straight, shiny line; clear evidence of overuse.
The tape-snap test is helpful too. Apply a small strip of the chosen film to the prepared surface, burnish, then snap it off sharply. Strong, even resistance suggests good prep; a quick, clean release hints at low surface energy or leftover contaminants. Always log these small tests, especially on mixed fleets where one truck’s panel might be FRP and the next is aluminum.
Finally, environmental prep is part of surface prep. Control dust by wiping nearby edges, use PPE that doesn’t shed, and keep hands off cleaned edges. If the shop is cold, pre-warm the panels and films. Nothing undermines perfect cleaning like condensation forming at the edge when a cold part meets warm air. Prep that looks slow is actually the fastest way to a long-lasting edge.
Film & Adhesive Selection (Match to the Job)
Choosing the right film and adhesive is the second pillar. Cast films have better conformability and lower memory, which makes them ideal for corrugations, rivets, and compound curves. Calendered films are fine for flat panels and indoor graphics, but they resist deep stretching and can “walk back” from edges if overstressed. He learned this the expensive way on a box truck with deep channels, calendered film looked good on day one, then edged up after the first cold snap.
Adhesive chemistry matters too. Repositionable adhesives reduce initial tack for easier alignment, but he still needs firm squeegee pressure to achieve full wet-out at the edge. For LSE substrates: PP, PE, some powder coats, specify an LSE-optimized adhesive or plan for a proven primer. Read the technical data sheets (TDS). They list installation temperature ranges, dwell times, and edge-sealer compatibility. When a TDS says “minimum 10°C substrate temperature,” it’s not a suggestion.
Liner types affect handling. A stable release liner can keep the film flatter and reduce edge stretch during handling. For long panels, a liner that lies flat makes it easier to control tension at the leading edge. If rivets or channels are involved, confirm that the film’s recommended post-heat temperature resets memory in those shapes. Adhesive dwell time is another overlooked detail. Even after installation, adhesives keep flowing, and early exposure to pressure washing can shear the edge before it’s fully anchored.
Edge sealer vs. adhesion promoter? They do different jobs. Promoters increase bond strength to tough substrates. Edge sealers create a protective, moisture-resistant barrier at the edge. In windy, wet environments, he can spec a compatible sealer for leading edges and wheel arches. But do not mix brands blindly. Some sealers and films don’t play well together. A quick compatibility check saves rework.
If he is unsure, run a small pilot. Two panels, two film options, one week of weather, then evaluate with a tape-pull test. The right film–adhesive combination feels boring during installation. No drama, edges burnish down, and post-heat holds. Boring is good here.
Environmental & Application Conditions
Environment makes or breaks adhesion. Ideal conditions usually mean moderate temperature, low dust, and controlled humidity. Cold panels slow adhesive flow, and edges that feel secure can pop when the film relaxes overnight. He should schedule installs when the substrate and ambient temperatures sit within the manufacturer’s range, not just the air. An IR thermometer is cheap insurance. If the panel reads cold, pre-warm it and the film roll.
Humidity hides a second danger: dew point. When warm, moist air meets a cooler surface, condensation forms, even if he can’t see it clearly. Applying film over a micro-layer of moisture creates a weak edge. The solution is simple: stabilize the panel temperature, reduce indoor humidity with fans or dehumidifiers, and watch the dew point gap. Wind and dust are obvious problems in mobile installs. Build a micro-environment with wind screens, clean tarps, and a defined tool area so lint and grit don’t follow him into the edge.
Thermal expansion and contraction through seasons stress edges. A wrap installed on a hot afternoon may relax overnight and pull at the corners. He can reduce this by minimizing stretch during application, especially near edges, and by post-heating to the specified temperature to reset film memory. Let the wrap rest indoors for a bit before the vehicle hits the highway. That dwell time gives the adhesive a chance to wet out fully.
Material conditioning matters, too. Keep film rolls in the install space long enough to reach room temperature. Cold film is stiff. Warm film handles with less tension at the edges. He once rushed a job right after the film arrived from a cold truck. The edges looked fine, but three days later the corners curled slightly. Ever since, rolls rest before cutting.
Lastly, plan the sequence. Start on shaded or indoor sides first and avoid chasing the sun. If a panel is sun-baked, it may be too hot for a clean install and will force the edge into poor tack. Patience with the environment is not wasted time; it’s part of the install itself.
Install Techniques That Lock Down Edges
Technique is the third pillar of edge-lift prevention. Proper squeegee pressure and stroke angle drive adhesive into the surface, especially at the edge. He should work edge-to-center on narrow trims and center-to-edge on broader panels, using deliberate, overlapping strokes. Felt squeegees protect the film face, while hard squeegees and rollers can set edges more firmly when used with care.
Heat-forming must be controlled, not improvised. Around rivets and into channels, ease the film with progressive heat and pressure instead of stretching it hard and fast. Too much stretch stores energy that pulls back later. Relief cuts are not a failure; they’re good craft. A tiny relief near a tight inside corner lowers tension and helps the micro-hem lie flat. He once avoided a relief cut to keep the look “clean,” and the corner lifted in a week. A two-millimeter snip would have saved a service trip.
Overlaps should follow the shingle method and include just enough coverage. Usually 6–12 mm, so the edge can be properly burnished. Knife-less tape is helpful for clean seams without cutting on the substrate, and it reduces the temptation to force a sharp angle that will only curl. For exposed leading edges, consider a micro-hem: fold a small edge of film onto itself before applying. It creates a thicker, more stable edge that resists wind and wash.
Post-heating is non-negotiable where the film was stretched. Use an IR thermometer to confirm target temperatures from the TDS. Wave-and-guess heat often misses the mark. Heat, hold briefly to let memory reset, and then check the edge by feel. It should feel seated, not springy. Work methodically: finish a section completely, apply, burnish, post-heat, and verify before moving on. Rushing across the whole panel and “coming back later” is how edges get forgotten.
Finally, keep fingers off edges after cleaning. Application gloves help, but gloves can pick up oils too. Keep a clean glove for handling edges, and swap if it gets dirty. Small habits like this add up to edges that stay put.
Post-Install: Edge Sealing, Heat-Set & Quality Checks
Once the film is down, the job’s not done. He should walk the edges with eyes and fingertips. Look for bridging over gaps, feel for springy corners, and watch for tiny tunnels that show trapped tension. If any area looks glossy from over-stretch or feels alive under the finger, it needs more post-heat or a relief cut. Use the IR thermometer to verify temperatures at representative spots, corners, rivet fields, and channel bases.
Edge sealer is a targeted tool. Apply it where hands, wind, or wash water attack, leading edges, wheel arches, and door edges that people grab. Use the brand-approved sealer and a clean applicator. Thin and consistent is the rule. Heavy blobs invite dirt and can even crack along the line. He learned to run blue tape as a small guide when he started: quick, straight, and keeps the sealer off the graphic face.
Quality checks should be documented. A simple checklist: install temperature recorded, adhesive type, substrate ID, post-heat temperatures achieved, sealer locations, creates traceability. Photos of edges, seams, and high-risk areas help future troubleshooting. It sounds bureaucratic, but when a fleet manager calls three months later, that record proves the team followed standard operating procedures.
The final step is a short rest period. Let the adhesive dwell before sending the vehicle to a pressure wash or highway run. If the schedule allows, 24 hours is great; if not, even a few hours can make a difference. Communicate this to the owner during handoff. He once watched a client head straight to a wash bay after a same-day wrap. The edges survived, but it was an unnecessary risk.
A careful post-install pass, heat-set verification, selective edge sealing, and documented QA turn a good wrap into a reliable one. Edges that pass this inspection tend to stay down for the long haul.
Testing & Validation: Simple Field Tests That Matter
Field tests save money. The tape-pull test is fast and telling. Apply a small tab of the actual film onto the prepared substrate, burnish with real pressure, then yank it off at a sharp angle. He should feel strong resistance and see no chalky residue or uneven peel. On questionable surfaces, add a cross-hatch test with a fine blade on a small sample, score a grid, apply tape, and pull. If squares lift, prep or adhesive choice needs attention.
Sacrificial tabs near critical edges are another trick. Install a small piece adjacent to a seam or corner, post-heat it exactly as the main panel, and come back the next day. If the tab edges hold, the process is sound; if not, he has an early warning before the full wrap rolls out. He once used this on a powder-coated fleet with mixed results. The tabs told the truth: some parts needed promoter, others didn’t. The team adjusted by panel and saved rework.
Pilot installs are underused. On a large program, test two film systems on two identical panels for a week outdoors. Track conditions, take photos, and do a tape-pull after temperature swings. This light testing catches issues with out-gassing paint, hidden LSE plastics, or unexpected wash routines. It’s not fancy lab work, but it’s honest and quick.
Finally, document tests the same way each time. Use the same tape grade for pulls, the same pressure passes, and note temperatures. Consistency makes results comparable. If a manufacturer gets involved later, having real data, photos, temps, and timings, it moves the conversation from opinions to facts. That’s how field tests pay for themselves.
Maintenance, Cleaning & Owner Instructions
Owners influence edge life more than they realize. Clear, simple instructions prevent accidental damage. Start with the first 48 hours: no pressure washing, no waxes, minimal handling at edges. Adhesive dwell time is real; let it finish wetting out. When regular cleaning begins, recommend approved cleaners and soft brushes or cloths. Harsh chemicals, aggressive scrubbing at edges, and high-heat drying can all stress the seam.
Pressure washers aren’t forbidden, but they need rules. Keep the nozzle at least 12–18 inches away, use a moderate angle (not straight into the edge), and avoid concentrating the spray on seams. He once watched a facilities crew chase a dirt line by aiming straight at a cap strip. The strip eventually lifted, not because the install was poor, but because the water jet acted like a knife.
Set a seasonal inspection habit. Encourage a quick walk-around for fleets at the change of seasons. Look for early signs: slight corner lift, dirt streaks at edges, or tunneling near rivets. Small repairs done early, re-burnish, gentle heat, a tiny sealer touch; stop a problem from spreading. Provide an owner care guide one-pager at handoff. Keep it readable: approved cleaners list, pressure wash standoff, do’s and don’ts, and the warranty terms that matter.
If a repair is needed, teach “least harm.” Warm the area, ease the film back just enough, clean, then re-set with heat and pressure. If contamination got behind the edge, replace that section rather than trapping dirt under the sealer. It’s tempting to patch everything, but patches can telegraph and fail. Smart maintenance equals longer life and fewer callbacks.
High-Risk Scenarios & How to Spec Them Right
Some scenarios are simply tougher. Deep corrugations and channels demand cast film with excellent conformability and a disciplined post-heat. Here, inlays or segmented applications reduce stretch. Riveted panels need a methodical approach: bridge lightly, set around the rivet with heat, and then post-heat the halo. Trying to force a single sweep over a rivet field looks quick, but edges around rivets will relax and lift.
Powder-coated parts and textured FRP can act like LSE surfaces. He should plan an adhesion promoter where allowed and run a pilot before full rollout. For PP/PE plastics, an LSE-optimized adhesive is best; otherwise, a promoter is necessary and must be applied properly. Outdoor leading edges facing wind shear, front bumpers, trailer noses, benefit from cap strips, micro-hems, or edge sealer. He once spec’d a beautiful hood graphic without a cap strip on a highway fleet; the wind found that edge in a month. A narrow cap would have solved it.
Cold-weather installs are their own category. If he must install in the cold, create a micro-environment: pre-warm panels, warm the film, control humidity, and extend post-heat and dwell before exposure. Schedule heavy wash routines a few days later when possible. Door edges and high-touch areas like handles and fuel doors deserve reinforcement. Either shift the graphic away from those edges, or add micro-hems or cap strips that can take the handling.
Finally, think like water and wind. Ask: Where will water try to get in? Where will the wind push most? Then design overlaps and reinforcements in those exact spots. The best edge is the one that never sees a direct attack.
Troubleshooting Matrix: Symptom → Cause → Fix
When something goes wrong, look for patterns. Curl at corners often points to sharp angles, under-post-heating, or oily contamination. The fix: round the design corner, clean again with the two-cloth method, then reapply and post-heat to spec. Dirt lines along edges suggest incomplete cleaning or residue from a cleaner. Switch to residue-free products, increase the IPA final wipe, and re-train on lint-free cloths.
Tunneling after temperature swings usually means the film was overstretched or the memory wasn’t reset. A controlled post-heat with verified temperature can stop the creep. If a tunnel keeps returning, a relief cut or a small inlay solves it for good. Visible primer lines or brittle cracking indicate over-application of adhesion promoter. Use less, target only the edge area, and allow proper dry time. He once tried to “guarantee” a leading edge with a heavy promoter band; it held perfectly until it didn’t, then failed in a neat, shiny line.
If a seam lifts under wash, check the overlap direction and burnish technique. Re-set with the shingle method and ensure the overlap is fully seated with a roller. Blisters near rivets point to heat-handling issues. Warm and massage the film around each rivet rather than stretching and forcing it. In every case, confirm environmental basics, temperature, humidity, and dust control before blaming the materials.
The fastest path to a fix is an honest diagnosis. He should document the symptom, guess the root cause, test that theory on a small area, and only then scale the repair. Guessing without testing is how the same problem returns next week.
Checklists & Templates (Ready to Use)
Standard checklists close the gap between “we know how” and “we do it every time.” A site readiness checklist asks simple questions: Is the substrate identified? Are the temperature and humidity within range? Are dust controls in place? Are the correct films, adhesion promoters, and edge sealers on hand? A substrate ID form records paint type, powder coat, FRP, or LSE plastics. It also notes any fresh paint cure dates. This single sheet prevents a dozen small mistakes.
A surface prep SOP spells out steps: degrease, rinse if applicable, final IPA two-cloth wipe, water break test, and a quick tape-snap verification. An install parameters log captures ambient and substrate temperatures, film batch numbers, overlap directions used, and post-heat temperatures verified with an IR thermometer. If a job spans multiple days, this log keeps consistency across shifts and crews.
A post-install QA checklist walks the perimeter: check corners for spring, look for bridging over gaps, verify cap strips where specified, confirm edge sealer only where needed, and take time-stamped photos. Finally, the owner's care one-pager gives simple maintenance rules, approved cleaners, pressure wash standoff distance, and first-wash timing.
He once resisted paperwork, thinking it slowed him down. The first time a fleet manager questioned an edge, the logs settled it in minutes. Checklists don’t replace skill; they protect it.
Bill of Materials & Tools That Improve Outcomes
A reliable bill of materials (BOM) puts edge success on the shelf. Stock the right films for the work: cast films for corrugated, riveted, or curved surfaces; premium calendered films for flat, short-term jobs. Pair them with compatible adhesives and, where needed, LSE-friendly options. Keep a tested adhesion promoter and a brand-approved edge sealer for high-risk edges. For cleaning, use residue-free degreasers and fresh IPA, plus lint-free wipes. Old rags and mystery cleaners are enemies of adhesion.
Tools matter. Quality squeegees (felt and hard), a small roller for edges, and a rivet brush make application precise. Two reliable heat sources, a heat gun and, when appropriate, a torch used correctly, cover shaping and post-heating. An IR thermometer is essential; guessing heat is how memory wins. Knife-less tape protects substrates and keeps seams straight. Application gloves reduce fingerprints, but keep a clean pair for edge work.
Small test kits pay for themselves: a simple tape for pulls, a blade for cross-hatch, and a notepad to log conditions. Even packaging and transport materials belong on the list. If graphics arrive with edge damage from transport, they start at a disadvantage. He once saved money by skipping corner protectors during shipping. The bent edges cost more in reprints than the protectors would have.
A thoughtful BOM isn’t fancy. It’s the set of things that, used consistently, turn good practices into repeatable outcomes. Edges benefit most from the boring, well-chosen tools he reaches for every day.
Training, SOPs & Continuous Improvement
People, not products, keep edges down. Training that connects design, prep, install, and maintenance builds real skill. New installers should shadow veterans and practice on the tricky stuff, inside corners, rivets, and channel inlays- before touching customer work. Brand-specific certifications add useful structure because they teach film behavior and post-heat targets. But internal SOPs make it real in the shop.
SOPs should be short, visual, and easy to follow. A photo of a proper micro-hem beats a paragraph. A short video showing correct overlap and burnish pressure is worth more than a memo. Post them where work happens: near the install bay, on a tablet, or inside job packets. He once hid SOPs in a folder nobody opened; unsurprisingly, edges didn’t improve until the team saw and used them daily.
Continuous improvement is a rhythm. Track a few KPIs: rework rate, failure type mix (curl, tunnel, seam lift), and time-to-repair. When a pattern appears, adjust the SOP: bigger corner radii, warmer panels, slower post-heat. Share small wins in toolboxes or stand-ups. When one installer’s trick reduces seam issues, bake it into the standard. Vendors can help too; good reps love pilot tests and will often advise on weird substrates.
A culture that treats edge-lift as a solvable system problem grows calmer and more confident. It’s not about blaming the last person who touched the panel; it’s about tuning the system so anyone on the team can produce edges that stay down.
Warranty Language & Risk Management
Clear warranty language protects both sides. It should list acceptance criteria (clean, seated edges; no bridging), exclusions (unapproved cleaners, early pressure washing, abrasive scrubbing), and the maintenance steps required to keep coverage. Pass through relevant film manufacturer terms so expectations match material limits. If a project includes high-risk zones, leading edges, or unpainted plastics, note the reinforcements used, like cap strips or edge sealers.
Documentation is risk control. Keep time-stamped photos of edges, logs of temperatures and post-heat checks, and records of any adhesion promoter or sealer used. When a claim arises, facts, not memories, guide the fix. Define field repair SLAs so issues don’t linger. For large rollouts, pilots and mockups reduce surprises; a single approved panel can set the standard for the entire fleet.
He once skipped a pilot to save a week and spent three weeks troubleshooting mixed substrates across a fleet. The lesson was simple: a short, well-documented pilot pays back, every time. Warranty terms should feel fair and workable, not scary. When owners understand their role, gentle early care, proper washing, and quick reporting of issues, edges tend to live longer, and relationships do too.
Conclusion
Edges fail first, but they don’t have to. When design respects corner radii, overlap direction, and stress points, edges breathe easier. When substrate preparation is really clean, decontaminated, and tested, the adhesive can actually do its job. When the film and adhesive match the surface, and post-heat resets memory, edges settle in and stay quiet. Add clear QA, owner care instructions, and a little seasonal attention, and edge-lift becomes rare instead of routine.
Take these rules and tailor them. Your vehicles, your climate, your wash routines, each shop has its quirks. Customize the SOPs, run small pilots on tricky substrates, and keep the checklists close. Above all, stay safe with heat tools and blades, and stay honest about tests and documentation. Have a tip that saved your edges? Share it with your team or share it with the community. The more we learn from each other, the longer those clean lines last. Let’s keep edges down and the work looking sharp, season after season.
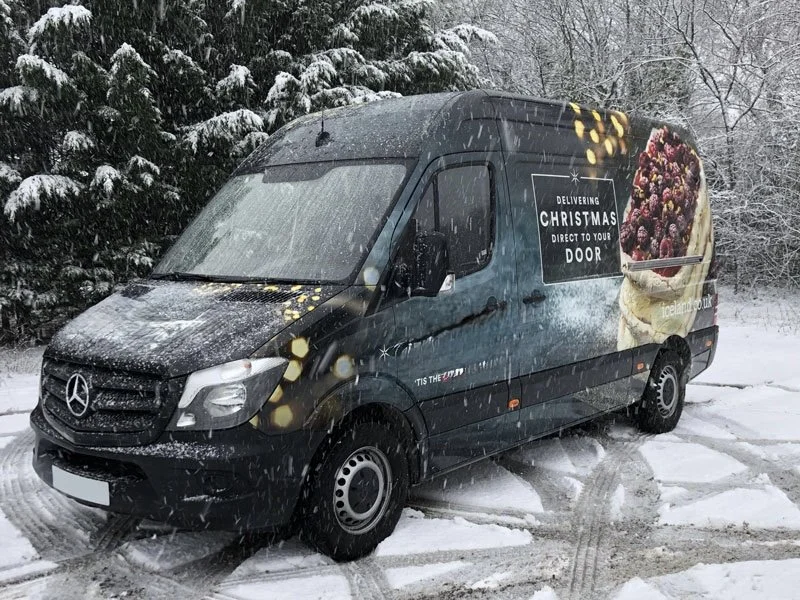
Cold-Weather Installs: How to Get Decals to Stick at −10 °C (2025 Guide)

Introduction
“Cold reduces adhesive tack by as much as half before proper pressure and time do their work.” That line has been taped inside my toolkit for years, and it’s saved more winter installs than I can count. Installing decals in subzero weather sounds risky. It is. But with the right materials, warm-up routines, and discipline, it moves from scary to very doable, even at −10 °C (14 °F)!
Here’s why this matters. Many projects can’t wait for spring; fleet graphics, safety markings, exterior signage, or urgent branding on equipment that’s rolling out now. Cold weather decal installation isn’t about heroics. It’s about understanding low temperature adhesive behavior, controlling condensation, and using pro habits like post-heating and edge sealing. In this guide, readers will get a field-ready playbook: what to buy, how to set up, exactly how to squeegee, and when to add heat or primer. And yes, a few mistakes and wins are shared along the way because that’s how real learning sticks!
Choose the Right Materials & Adhesives for Cold Weather
Cold is a bully to adhesives, so material selection matters more than anything. Low temperature adhesive formulations in pressure-sensitive vinyls can keep initial tack when the air stings, but they still need pressure and time. Acrylic adhesives tend to be more stable and durable in outdoor graphics than rubber-based ones, especially after cure, and they usually have a broader service temperature range. In winter work, a high-tack acrylic that’s explicitly rated for low application temperatures earns its keep, and that rating belongs on the spec sheet, not in a guess.
Vinyl type also plays a role. Cast vinyl, being dimensionally stable and more conformable, performs better on curves, rivets, and corrugations when everything is cold and stiff. Calendered films can work on flat panels, but in subzero installs they may resist forming and recover toward flat unless heat and pressure are done well. A cold rated overlaminate should match the base film’s flexibility, because mismatched stiffness at low temperatures encourages edge lift and silvering under the laminate. Small detail, big payoff.
Surface energy can silently sabotage a good plan. Low surface energy plastics like polypropylene (PP) and polyethylene (PE), powder-coated panels, and some painted surfaces make adhesives struggle to wet out. When the mercury drops, wetting gets even harder. That’s why an adhesion promoter or LSE primer is often the difference on those substrates. It’s not cheating; it’s smart chemistry management. He once tried skipping promoter on a powder-coated cabinet because it “looked clean.” Edges lifted overnight. It took twice as long to fix as it would have taken to prime in the first place.
Spec sheets aren’t paperwork; they are winter survival gear. Check minimum application temperature, service temperature range, dwell or cure time, and any notes about post-heat. If a film says “minimum application +4 °C,” forcing it at −10 °C without warming the substrate first is asking for premature failure. A practical tip: build a short list of trusted SKUs, cast vinyls, reflective films, laminates, tapes, edge sealers, and primers, with known low-temp performance. Keep them in a warm storage case so they start the job ready. There’s relief in grabbing a roll that you know behaves.
A final thought on matching materials to mission. Safety graphics, reflective sheeting, and long-term fleet wraps all benefit from higher-grade films and adhesives in winter. In loud terms, the cheapest roll isn’t cheap when it peels. Choosing the right combination, low temperature adhesive, cast base film, cold rated overlaminate, and an LSE primer where needed, sets up everything else to work. It feels boring on a purchase order, but it reads as “no callbacks” in February.
Prep the Substrate Like a Pro (Clean, Dry, Warm)
Substrate prep is the make-or-break step at −10 °C. Road film, salt, and invisible oils cling to panels and absolutely kill initial tack. A simple two-stage cleaning process works: first, a mild soap wash and rinse to remove bulk grime, then a wipe with isopropyl alcohol using lint-free cloths. He learned the hard way that paper towels can shed fibers that tuck under edges and create lift paths. Lint-free wipes cost a bit more, but they don’t leave debris that turns into bubbles later.
Moisture control is its own battle in the cold. Bring a warm panel into cold air, and condensation can form instantly if the surface temp is below the dew point. That thin layer of water is invisible sabotage because adhesives won’t bond to it. The fix is practical: measure the substrate temperature with an infrared thermometer and warm the panel above the dew point, not just the air around it. A small, directed heat source or heat mat makes a big difference, and it’s safer than blasting the entire area with a heater that stirs dust.
Air temperature gets the headlines, but substrate temperature wins the war. Readers should focus on the panel’s actual temperature and keep it steady while they work. A tip from a winter fleet job: he marked a corner with a light pencil dot and checked it every few minutes with the IR thermometer. When that spot slipped colder, adhesion noticeably dropped. So they paused, re-warmed the zone, and continued. The job took longer, but there were zero callbacks. That’s the kind of trade anyone will take.
Layout and masking are worth setting up indoors if possible. Using the hinge method reduces handling time outside and keeps the liner attached until the last moment, which limits exposure to cold wind and dust. Application tape choice matters too; select a tape that releases cleanly in low temperature conditions so you’re not fighting it. It’s such a small detail, but a stubborn tape that won’t let go makes hands cold, tempers short, and edges messy. He’s been there, scraping tape with numb fingers, not recommended.
Finally, don’t rush drying between prep steps. In the cold, liquids linger. If isopropyl alcohol is still evaporating, the panel is also cooling as the solvent flashes off, which encourages new condensation. Give it an extra minute, re-check the temperature, and move on. Prep that is clean, dry, and warm is more than a checklist; it’s an insurance policy for the rest of the process.
Control Temperature, Humidity & Wind on Site
The best winter installers don’t fight the weather head-on. They build a micro-environment and play inside it. A pop-up install tent or temporary wind block cuts the wind chill that steals heat from panels and hands. Portable heaters can be used, but aim them across the area, not at a single hot spot that can blister films or make dust whirl. As a general habit, warm the substrate, not just the air, and keep the tools warm in a closed bin until moments before use.
Humidity and dew point awareness sound technical, but it’s simple in practice. If the surface is colder than the dew point, moisture forms, and adhesion suffers. A pocket hygrometer and IR thermometer make this chess game visible. He once skipped the hygrometer on a “quick” outdoor decal and watched tiny silvering appear under the laminate as trapped moisture out-gassed later in the day. It wasn’t catastrophic, but it looked like stars under the film and had to be re-done. Lesson learned: measure first, stick second.
Staging materials prevents nonsense. Keep vinyl, application tapes, squeegees, and rollers in a warm crate or vehicle until needed. Cold vinyl gets stiff, loses conformability, and micro-cracks when bent sharply. Warm tools glide; cold tools chatter. Rotate rolls inside the warm crate so the portion you’re applying has been acclimated. It’s a little dance, but it works. And yes, it feels fussy, but fussy is cheaper than pull-and-replace.
Wind is sneaky in winter installs. A steady breeze is manageable, but gusts yank liners and throw dust at your adhesive. Build a wind break with tarps or position the vehicle near a wall to create calm. Work smaller sections to reduce the time any adhesive is exposed. He remembers a windy day where a full-width pull turned into a sail. After wrestling it across a fender, they cut the panel into two sections and the job calmed down at once. Smaller bites win in bad weather.
Finally, plan your heating strategy. Heat lamps or mats can keep a panel within a narrow temperature band while you apply adjacent sections. A heat gun is for spot warming and post-heat, not for blasting the entire area like a hair dryer. Slow, even warmth helps the adhesive flow and wet out the surface energy of the panel. Control the environment, and the install feels almost normal, even when frost crunches underfoot.
Tools & Supplies That Make Cold Installs Work
Winter work rewards a deliberate kit. A mix of hard-edge and felt-edge squeegees covers flat runs and sensitive laminate faces. Rollers and rivet brushes help drive adhesive into corrugations without tearing. Keep extra squeegee sleeves because cold edges can scuff films faster. It seems minor, yet a fresh sleeve prevents scratches that show under reflective film or gloss laminates.
For heat, a reliable heat gun with adjustable settings is the workhorse. Torches exist, but the margin for error is small on vinyl and overlaminates in cold air; scorching is easy. A steady, sweeping motion from the gun warms the film and panel evenly. He once overheated a corner trying to force conformability, and the vinyl shrank at that spot the next morning. Now he treats heat like seasoning: a little, evenly applied, goes a long way.
Adhesion promoters and edge sealers become essential in subzero installs. On low surface energy plastics, a thin, controlled application of primer can double or triple bond reliability at edges and corners. Edge sealers lock down high-stress zones like overlaps, seams, and panel corners. Used sparingly and neatly, they disappear visually but add real insurance. The mistake most people make is globbing it on. Thin coats, clean lines, and a calm hand win. It’s slower in the moment, faster over the life of the graphic.
Application tapes need to match the environment. Some transfer tapes can get stubborn and won’t release at low temperatures, which stretches letters or lifts edges as you peel. Choose a cold-rated tape and test a small area before committing. He keeps a short roll of each tape and tries them on an off-cut right on site. Fifteen seconds of testing prevents fifteen minutes of frustration.
Quality assurance tools save time. An infrared thermometer confirms the substrate is warm enough. A hygrometer warns when dew point is looming. A simple timer on the phone tracks dwell between steps and standardizes the team’s rhythm. It might read overly organized, but winter conditions change fast. The right tools give objective data, which makes the next decision easy. Less guessing, more sticking.
Step-by-Step Application at −10 °C
Start with acclimation. Keep the vinyl roll and application tape warm until moments before use, and pre-warm the installation area so the substrate temperature is in the safe zone for the chosen film. Set up a hinge using application tape, and do a dry fit to confirm placement. He once skipped the dry fit on a tailgate badge because “it’s centered, obviously.” It wasn’t. In cold weather, removing and resetting wastes warmth and patience, so alignment first, then commit.
In subzero conditions, dry application is usually safer. Wet application introduces water that freezes or lingers, blocking adhesion. With dry installs, the adhesive meets the panel cleanly, and pressure activates initial tack. Work in smaller sections than you would in summer. Peel back only what you can apply in the next minute or two, and keep the rest covered. The liner is a shield against dust and wind; use it well.
Pressure is a big lever. Firm, overlapping squeegee strokes push adhesive into the micro-texture of the panel and set up good wet-out when the piece warms slightly from the environment or post-heating. Cold hands often back off pressure; gloves with a good grip help maintain force. He switched to a pair with rubberized palms one winter and noticed fewer micro-bubbles simply because the squeegee didn’t slip. Little upgrades matter.
For curves, rivets, and corrugations, add gentle heat and form the vinyl in stages. Pre-warm the area, then work a small zone with the rivet brush or roller, locking the film around the feature without stretching it thin. Avoid yanking the film; stretching in the cold springs back later. A heat-and-set approach warm, press, hold. It creates stable conformance. It takes patience, but it avoids the heartbreak of lift lines the next day.
Manage liners strategically. On longer runs, slit the liner into channels so you can apply a center strip first, anchor it, and then work out to edges. This reduces wrestling with a full-width sheet in wind or gloves. He learned to cut those liner channels on the bench, not in the cold air, because scissors fail when fingers are numb. A small prep step indoors keeps the outdoor step calm.
Once a section is down, give it a quick pass of warm air to relax the film and help initial wet-out. Don’t overdo it. You’re not trying to cook the vinyl; you’re trying to take the brittleness out of the film so the adhesive can meet the surface fully. Step by step, section by section, the panel fills in. It is methodical and a bit slower than summer, but it works.
Post-Heat, Edge Sealing & Curing for Long-Term Hold
Post-heating is the winter installer’s secret weapon. After the decal is fully applied, a controlled sweep of the heat gun over edges, corners, and formed areas encourages the adhesive to flow and reduces internal stress. Think of it as telling the film, “Relax here. Stay put.” He still remembers the first time he skipped post-heat on a curved bumper because daylight was fading. The next morning, two corners lifted like tiny flags. Five minutes saved, two hours lost.
Edges are the high-stress zones. Corners, overlaps, door seams, and panel ends see the most movement and exposure to ice, salt, and wash water. A light edge sealer applied neatly after post-heat makes those zones boring, and boring edges are successful edges. On low surface energy plastics or powder coat, pairing an adhesion promoter before install and a sealer after install creates a belt-and-suspenders result. It’s not overkill; it’s winter-proofing.
Cure and dwell time stretch in the cold. Pressure-sensitive adhesives don’t “snap” to full strength; they build over hours and days. In winter, that build takes longer, so the first 24–48 hours are critical. Avoid power washing or flexing panels too soon. If the project allows, keep the vehicle or panel indoors overnight or parked out of direct freeze. He once arranged for a fleet to stay in the garage for one extra night and never saw a single callback, despite temps dropping hard outside.
Quality checks catch small issues before they become big ones. A quick corner-lift test on an off-cut reveals whether adhesion is real or wishful. Visually inspect for silvering those tiny starry patterns under the laminate, which can show trapped moisture or insufficient pressure. If found, re-warm and re-squeegee the area right away. Most small flaws can be fixed immediately because the adhesive hasn’t fully set, and it’s easier to persuade now than to repair later.
Documentation helps future you. Note the materials used, the environmental conditions, and any promoter or sealer applied. When teams record that a panel was warmed to a target band and post-heated methodically, patterns emerge in success rates. Over time, this turns into a winter SOP. It feels a bit nerdy to write it down, yet it’s how a shop stops relying on heroics and starts relying on repeatable process.
Special Cases: Reflective, Textured, and Vehicle/Fleet Graphics
Reflective films bring their own rules. Micro prismatic layers can be stiffer, and in the cold, they resist forming even more. Warm them gently, use steady pressure, and avoid over-bending at sharp corners, which can create micro-cracks that show in headlights. He once hurried a reflective chevron onto a tailgate in freezing wind; the next week, faint white lines appeared at the bend. Slow down with reflective, especially below freezing, and the finish stays crisp and compliant.
Textured substrates demand a plan. Brick, block, and rough powder coat all reduce surface energy and create peaks and valleys that the adhesive must bridge. In winter, bridging fails. The solution is to help the adhesive meet the peaks and flow into the valleys with heat, pressure, and sometimes a textured-surface film designed for the job. An LSE primer at edges and an edge sealer at transitions closes the gaps. It is not fast work, but it’s honest and it holds.
Fleet graphics add logistics to the technical puzzle. Doors, seams, gaskets, and body lines flex and move, and winter magnifies that movement. Whenever possible, work indoors or at least out of the wind, and stage vehicles so each panel gets the same warm-up routine. He likes to start with easier flat panels first to build momentum and refine the day’s warm-up rhythm, then move to curves and corners once the team is in sync. Momentum matters when fingers are cold.
Safety markings and compliance graphics deserve special respect. Retro reflectivity should be maintained, and edges should be sealed where wash water and road spray hammer the surface. Don’t stretch reflective across complex shapes without a plan; use seams strategically so the film sits relaxed. It’s better to have a neat overlap than a stretched panel that creeps back and lifts. Readers can think of reflective like a rigid friend; it will help you be seen, but it won’t bend far in the cold.
Lastly, think about service conditions. Marine decals, exterior equipment on construction sites, and trailers see salt, grime, and repeated freeze-thaw cycles. Choose higher-grade cast films, pair them with compatible cold-rated overlaminates, and increase the attention to post-heat and edge sealing. It’s a long sentence to write, and it’s a long winter out there. Special cases reward special care.
Scheduling, Safety & Operational Logistics
Winter success starts with the calendar. Watch the forecast and pick weather windows with lower wind and a touch of sun on the install surface if possible. Even a few degrees of substrate warmth can change everything. He’s moved a job by two hours to catch sunlight on the passenger side of a fleet, and the install went from stubborn to smooth. Logistics like that look small in a schedule and feel large in a result.
Crew workflow keeps people safe and productive. Rotate tasks so no one’s hands stay exposed too long. Keep a warm staging area for tools and fingers. Assign roles: one person warms and monitors substrate temperature, another places and squeegees, and a third manages liners and edges. It’s not about hierarchy; it’s about rhythm. When the team moves in a loop, panels finish cleaner and faster with fewer do-overs.
Safety is non-negotiable. Portable heaters, cords, and tight spaces create trip hazards. Ice and snow make slips likely near the work area. Lay down anti-slip mats, secure power cables high or along edges, and confirm ventilation if heaters are used in enclosed spaces. He remembers one job where steam from a heater condensed on a cold roof and dripped onto the panel. They paused, dried the area, and re-positioned the heater. It felt like lost time, but really it was avoided rework.
Client communication sets expectations that winter makes real. Explain cure times, advise against immediate power washing, and note that edges have been sealed for protection. If scheduling must shift for a better weather window, say so early. Most clients prefer a reliable result over a risky date. A simple checklist shared before install, prep, warm-up, application, post-heat, edge sealing, and cure, turns mystery into plan, and plans calm nerves.
Finally, build buffers into travel and setup. Cold gear takes longer to deploy, and vehicles warm slowly. A spare heat gun, extra extension cords, and backup wipes prevent small issues from becoming show-stoppers. The shop that wins winter isn’t faster at one step; it’s better at all the small steps that add up to a steady day. That kind of discipline looks quiet from the outside. It feels like confidence on site.
Troubleshooting Common Issues & Fast Fixes
Poor initial tack shows up as corners that won’t stay down or panels that feel “floaty.” The quick checks are simple: confirm substrate temperature, add firm overlapping pressure, and re-warm the area. On low surface energy plastics, apply an adhesion promoter to stubborn edges and re-set them. He once tried to muscle through without promoter on a polyethylene bin lid. It stuck for a day, then lifted like a smile. Primer would have prevented the frown.
Silvering and bubbles can appear under laminates or large panels, especially if condensation sneaks in or pressure was light. The fix is to re-warm the area gently and re-squeegee with slow, even strokes from the center outward. For tiny bubbles, a micro-vent with a pin, followed by gentle heat and pressure, clears the pocket. Don’t chase every speck right away; some will relax as the film acclimates, but obvious pockets should be addressed while the adhesive is still cooperative.
Edge lift demands quick attention. Post-heat the edge, press it back with a felt-edge squeegee or roller, and apply a thin line of edge sealer once it sits. Inspect corners, overlaps, and high-stress transitions where lift loves to start.
Adhesion failure on low surface energy substrates calls for a process change. Switch to an LSE-rated film or add a proper primer protocol. Wipe lightly, let the promoter flash per instructions, then apply. He once tried stacking more heat instead of changing chemistry. It seemed to work, until the first freeze-thaw cycle popped the edge. When surface energy is wrong, heat alone doesn’t fix it.
If a large panel looks compromised, triage it. Secure the most exposed edges first with post-heat and sealer. Mark any suspect areas for follow-up after a short warm-in period. Sometimes waiting thirty minutes in a controlled micro-environment allows an accurate read on what truly needs repair. The installer’s best troubleshooting tool is patience paired with a warm gun and a clean squeegee. Slow down, fix right, and the decal will live through winter just fine.
Conclusion
Cold-weather decal installation isn’t about beating the elements. It’s about respecting adhesive chemistry, controlling the environment, and following a steady process from prep to post-heat. With low temperature adhesives, clean dry warm substrates, smart pressure, and tidy edge sealing, decals can stick at −10 °C and keep sticking when ice and road salt show up. The steps stack: choose the right materials, prep like a pro, control temperature and wind, apply in smaller sections, then lock it down with post-heat and a clean edge.
Readers should tailor this playbook to their work, fleet graphics, safety markings, exterior signage, because each niche has its own edges and risks. Safety matters too. Manage heaters and cords, prevent slips, and avoid poor ventilation, since none of this is worth an injury. If you’ve got a winter tip or a hard-won lesson, share it so others can learn faster. And if a big cold-weather project is coming up, use this guide as your checklist, then go make winter installs boring, reliable, and done right the first time.

Bilingual Safety Labels that Don’t Reprint: EN/FR Done Right
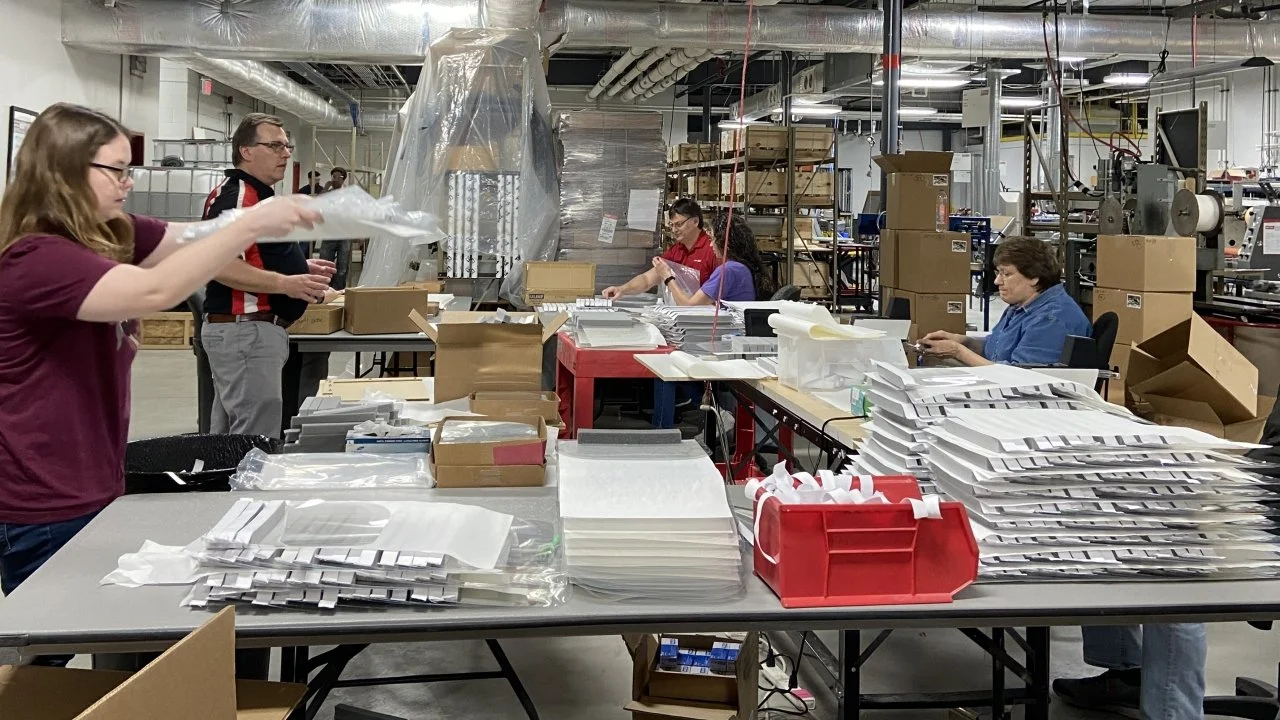
Introduction
“One bad label can shut a line down.” I’ve seen it more than once, and the cost surprised everyone. A mislabeled chemical container or a peeling equipment nameplate can spark audits, slow production, and erode trust fast.
Bilingual safety labels matter because Canadian workplaces depend on clear English/French communication, durable materials, and predictable processes. They protect people, reduce risk, and keep operations steady. When labels are compliant, legible, and tough, you avoid reprints and all the chaos that comes with them.
In this guide, I’ll break down the EN/FR rules, common mistakes, and the no-reprint workflow that works under real plant conditions. We’ll talk WHMIS/GHS, Quebec French expectations, UL 969/CSA durability, adhesives for tricky surfaces, and proofing steps that actually catch errors. Let’s make labels you install once and then don’t think about again!
The Compliance Landscape in Canada (EN/FR Essentials)
Canada expects clarity in both official languages for safety and hazard communication, and that’s the starting point for bilingual safety labels. WHMIS aligns with GHS and sets required elements for hazardous product labels. The core pieces include the product identifier, hazard and precautionary statements, signal word, supplier information, and the right pictograms.
For many organizations, bilingual safety labels are not just a best practice; they’re the default to ensure every worker understands the risk. This reduces training gaps and makes audits simpler. It also keeps multi-site operations consistent across provinces.
Quebec adds an extra layer because French needs to be given clear priority on public-facing communications. Many companies choose to make French prominent on equipment and safety decals used in Quebec. The practical approach is to use equal prominence or slightly prioritize French where the audience demands it.
Standards like ANSI Z535 and ISO 7010/ISO 3864 help bring consistency to signal colors, safety headers, and symbols. These aren’t Canadian laws in themselves, but they are proven frameworks that safety teams rely on. They make your system predictable and easier to review.
Electrical nameplates, machinery guards, and confined space signage often involve sector-specific expectations. A nameplate may need performance markings that stay readable after heat, chemicals, and abrasion. That’s why a one-size-fits-all approach rarely works.
An engineer once told me their teams struggled because French text always ran long and wrapped over icons. They thought it was a translation issue, but it was a layout problem and a lack of planning for text expansion. Once they used flexible containers and parallel structures, approvals sped up.
The safest mindset is to map the label types to the regulatory drivers: chemical containers to WHMIS/GHS, machine warnings to ISO/ANSI conventions, and equipment nameplates to your durability specification. Then specify language rules for each family so no one debates it during a rush job.
When you standardize these expectations in a single policy and template library, plants stop improvising. You’ll see fewer late edits and less confusion about what “compliant” means. That alone cuts reprint rates.
Finally, keep a short register of the standards and codes you follow. Include WHMIS/GHS elements, how you apply ISO/ANSI symbols, and when you lean on UL 969/CSA-tested constructions. It becomes your quick reference for audits and supplier onboarding.
The point is simple: define the EN/FR labeling rules once, make them visible, and reuse them everywhere. That consistency is half the battle in avoiding reprints.
Why Labels Get Reprinted (Root Causes to Eliminate)
Most reprints don’t come from fancy edge cases. They come from the same five causes over and over again. Language errors, drifting requirements, layout failures, wrong materials, and messy processes drive nearly every do-over I’ve seen.
Language errors show up as mistranslations, missing diacritics, or inconsistent terminology across lines. French tends to be longer than English, so copy that fits in EN may crash into icons in FR. That’s not a translator problem; it’s a container and hierarchy problem.
Requirements drift when teams update SOPs or a hazard classification changes, but artwork doesn’t. An H-statement tweaks by one word and the old version keeps being printed. By the time someone notices, a batch is on pallets and the line is booked.
Layout failures usually appear as tiny symbols, crowded headers, and unclear hierarchy. Workers need danger/warning/caution headers that read quickly, with symbols that are visible from the viewing distance. If the icon is too small or the contrast is weak, the label fails at the exact moment it’s needed.
Material mismatch causes peeling labels, faded ink, and smudged data. An adhesive that holds well on smooth stainless may fail on powder coat or LSE plastics like polypropylene. If the laminate can’t handle solvents, a single wipe with IPA tells the truth.
Process gaps are the sneakiest. No master data, version chaos, and last-minute edits at the press or on the plant floor turn good art into bad stickers. Someone types a serial range directly in the file, and there goes traceability.
A maintenance supervisor told me they reprinted a set three times in one week. The problem wasn’t the printer. It was different spreadsheets feeding different label versions. When they moved to a master data source and locked variables, reprints dropped to near zero.
Another team thought they needed heavier adhesive because labels were lifting on textured housings. The real fix was surface prep and proper pressure during application. They added a roller and a 15-second hold. The “adhesive problem” disappeared overnight.
You can cut reprints by attacking these causes with checklists and templates. Build bilingual copy you trust, templates that allow text expansion, and materials specified for the real substrate. Tie it together with version control so people can’t improvise at the eleventh hour.
Once you track the reprint reasons, patterns emerge. You’ll see the same three errors every quarter. Solve those upstream, and the rest gets quiet. That’s the no-drama labeling program you want.
EN/FR Copy & Translation Done Right
Great bilingual safety labels start with language, not graphics. The copy must be accurate, plain, and consistent between English and French. That means building a bilingual glossary and using translation memory for hazard and precautionary statements. It’s faster and safer than starting from scratch each time.
Keep sentence structures parallel so workers can scan either language quickly. If the English uses clear imperatives, the French should do the same. It sounds minor, but it shapes how people read instructions under stress.
Plan for text expansion in French. A simple rule of thumb is to assume 15–25% more space. Templates that flex with containers and line breaks will save endless headaches. I’ve watched a team cram French into 8-point type just to make it fit. It technically “fit,” but it failed the legibility test the first week.
Avoid relying on auto-translation for safety-critical phrases. Use a qualified translator or an internal bilingual SME who knows WHMIS/GHS phrasing. Pictograms carry meaning, but text still does the heavy lifting in many workplaces.
Build a mini style guide for labels. Decide on punctuation, capitalization, number formats, units, and date conventions in both languages. When those details are steady, the labels feel professional and trustworthy.
A small anecdote: a plant manager told me workers ignored a specific caution label because it looked different from everything else. The French ran in a smaller font, and the punctuation changed mid-shift after a quick edit. Standardizing those elements brought the trust back. It was a subtle fix with a big effect.
Create a review loop that includes a bilingual SME, safety, and the equipment owner. Use redlines to focus comments and lock the final. I prefer a short checklist: header accuracy, pictogram match, hazard statement conformity, supplier info, and variable data zones.
Consider a “symbol-first” pattern where appropriate. Leading with the ISO/ANSI pictogram can speed recognition, followed by short EN/FR lines. It won’t replace the need for full statements on WHMIS labels, but it helps for quick warnings and equipment decals.
Store all approved phrases in a searchable repository, tied to label families. People should pull from the same source every time. If a phrase changes, a single update cascades through your templates. That prevents the old language from reappearing a year later.
Finally, treat language as a controlled asset. It’s not an art project that gets reinvented for each label. When copy is consistent, approvals are faster, and reprints fall away.
Design Standards that Prevent Reprints
Design is where labels either become easy to use or easy to ignore. Start with signal colors and headers that follow proven standards like ANSI Z535 and ISO 3864. A strong DANGER/WARNING/CAUTION hierarchy is familiar on the floor and reduces hesitation when seconds matter.
Use ISO 7010 pictograms where they fit the hazard. People recognize them at a glance. Pair them with the right header and concise EN/FR text so meaning is obvious from a distance. This layered approach improves comprehension.
Legibility depends on type size, x-height, and contrast. Calculate viewing distance and size the text and symbols accordingly. If operators read labels from 1.5 meters, design for that distance with room to spare. Better to be a bit bigger than technically minimal.
French expansion is a design constraint, not a surprise. Use containers that accept longer lines gracefully. Avoid locking icon and text boxes so tightly that any change triggers an emergency redesign. Flexible grids make bilingual work calm.
Keep information architecture consistent across label families. I like hazard → consequence → avoidance → required PPE. When every label follows the same flow, training sticks and searches go faster. Workers learn where to look first.
Watch out for variable data collisions. Serial numbers, dates, and lot codes can collide with the fixed EN/FR text if the merge fields aren’t boxed thoughtfully. Reserve zones for variable data and test with the longest realistic strings.
Anecdote: an OEM added a QR code linking to a digital manual. Smart idea, poor placement. The code overlapped the French line break in two sizes. Field techs couldn’t scan it, and the plant reprinted the whole run. A simple move to a dedicated corner solved it.
Contrast matters more than brand color on safety labels. Keep backgrounds clean and avoid placing small text on patterned surfaces. If a brand palette fights legibility, let the safety palette win. It’s the right fight to lose.
Build a “do-not-change” layer in your artwork with bleed, safe areas, and dielines. Lock it down. People can adjust copy and variable fields, but they shouldn’t touch the structural lines. That’s how you stop last-minute shifts that cut off text.
Finally, pilot the design in the real environment. Print a few, stick them on the actual substrate, and observe from the real distance and lighting. Field trials beat screen proofs every time, and they keep the reprint truck from arriving.
Materials, Adhesives & Durability (UL 969/CSA-Ready)
Durability is where many bilingual safety labels fail after installation. The message can be perfect, but if the label peels, fades, or smears, you’re reprinting anyway. This is where UL 969 style constructions and CSA-ready thinking save the day.
Choose substrates based on the environment. Polyester films handle heat and chemicals well and stay dimensionally stable. Vinyl can flex on curved or textured surfaces and is forgiving on installs. Polycarbonate excels as an overlay for control panels where abrasion is frequent.
Match adhesives to the substrate. Low surface energy plastics like PP or PE need LSE-rated adhesives. Powder coat and textured housings demand thicker, more conformable adhesives. Oily metals may require aggressive tack plus proper surface prep.
Protect the print with the right overlaminate or overprint varnish. If the area sees solvents, choose laminates tested against IPA, acetone, and cleaning agents. UV exposure calls for UV-resistant inks and films that won’t yellow. Washdown areas need moisture and edge sealing strategies.
A maintenance lead shared that their labels lifted near steam lines every winter. The fix wasn’t a “stronger” glue; it was thermal cycling and edge exposure. A slightly thicker film, rounded corners, and edge-sealing pushed durability past two winters without a single lift.
Nameplates may require metalized films or aluminum if temperatures swing high and abrasion is constant. Combine that with a permanent adhesive rated for the operating range. Don’t guess the range. Measure it or get the real numbers from engineering.
Run basic environmental checks before you commit to a construction. Try a solvent wipe test with the chemicals techs actually use. Do a quick temperature cycle in a lab oven or even a controlled room test. Light salt spray exposure can reveal weak edges.
UL 969-style tested combinations are useful because they’re proven to stay legible and adhered. If your supplier offers pre-qualified systems, you skip months of trial. For CSA nameplates, confirm readability requirements and the expected lifetime of the equipment.
Keep a materials matrix in your spec. List the substrate, the adhesive family, the laminate type, and the approved printer/ink. When people choose from that matrix, they’re choosing durability. That’s how you stop “mystery” failures.
In the field, durability is a chain. If any link, film, adhesive, ink, or laminate doesn’t fit the environment, the whole label fails. Build the chain for the real conditions, and reprints stop showing up on work orders.
Print, Application & Field Realities
Even the best design and materials won’t survive poor printing and sloppy application. Choose the print method that matches your run sizes and durability needs. Digital is fast for short bilingual sets and frequent changes. Flexo shines for large volumes where consistency rules. Thermal transfer is reliable for variable data in harsh environments.
A supplier once told me their thermal transfer ribbon looked fine on day one but smeared after a month. The ribbon wasn’t matched to the film and the environment. They switched to a resin ribbon rated for chemicals, and the smearing stopped for good.
Application is its own process. Clean the surface, remove oils and dust, and let solvents evaporate fully. Apply with firm, even pressure and hold for a few seconds to wet out the adhesive. On colder days, pre-warm the surface within the adhesive’s recommended range.
Textured or riveted surfaces need technique. Use a roller to push adhesive into micro-textures. Bridge over rivets with care or use a slit to relieve tension if the spec allows it. A simple edge sealant can extend life in high-wash zones.
Avoid on-site edits to approved labels. If a number changes, generate a new variable data run from the master. The minute people type on the label in the field, version control is gone. That’s where traceability breaks and reprints rise.
Do quick field audits after the first install. Photograph labels at the real viewing distance. Check for edge lift, bubbles, or early scuffs. Note which surfaces gave trouble and update the application SOP so the next shift doesn’t repeat the same mistake.
Train installers with a small toolkit: surface cleaner, lint-free wipes, a roller or squeegee, edge sealant if specified, and a short checklist. When people have the right tools in their pocket, quality becomes normal.
Printer maintenance matters. Replace worn printheads, calibrate registration, and keep dust out of the path. Many “design problems” are really print defects that vary by shift. Consistent press conditions make consistent labels.
One last detail: test the scannability of barcodes and QR codes on the actual surface under plant lighting. A code that scans at the desk might fail over textured housing. Field tests save embarrassment and avoid emergency reprints.
Print, apply, and verify as a single chain. If you do, reprints become rare because the process is steady from art to equipment.
The “No-Reprint” Workflow (Governance & QA)
A no-reprint program is mostly governance with a bit of discipline. Start with a single source of truth for copy, symbols, and templates. Tie it to your PIM/PLM or document control so changes are tracked and visible. People should pull assets, not recreate them.
Version control is non-negotiable. Every label family gets an ID, a revision, and an owner. Approvals are recorded with dates and names. If someone asks, “Which version is on Line 2?”, the answer should be a click away.
Preflight checks catch 80% of errors. Confirm language accuracy, symbol set, dielines, bleed and safe areas, variable data zones, and contrast. Run a short test print and have a second person sign off. Two sets of eyes beat any spellchecker.
Golden samples help installers and auditors know what “good” looks like. Store a printed master with a QR code that links to the current spec and artwork. If there’s doubt on the floor, people scan and verify. No debates, no reprints.
A quality manager told me they added a five-minute “label gate” to their work orders. If a label was touched, someone checked the version, language, and material before release. Reprints dropped by half in the first quarter, and no one felt overburdened.
Schedule maintenance reviews quarterly for regulatory language and annually for materials. If WHMIS phrasing updates or a new cleaner is introduced, you’ll catch it early. Don’t wait for a failed audit to discover drift.
Document deviations. If a plant uses a different adhesive for a specific surface, record it and test it. If it works, add it to the matrix. If it fails, close the loop so it doesn’t sneak back in six months later.
Supplier management is part of governance. Ask for change notifications on films, adhesives, and inks. A quiet formulation change can alter adhesion or print density. Good suppliers will signal those changes in time for you to test.
Keep the workflow short and repeatable. Intake → design using approved assets → preflight → pilot print → golden sample → release with version control. When people trust the system, they follow it. When it’s a maze, they won’t.
Governance sounds dull. It is, and that’s the point. Boring workflows make exciting emergencies disappear.
Cost of Reprints & the ROI of Doing It Right
Reprints cost more than paper and ink. They burn time, interrupt production, and invite risk. When you model the true cost, the ROI of a no-reprint program becomes obvious. It’s one of the rare safety initiatives that pays for itself.
Start with direct costs: materials, printer time, and labor. Add the time to remove bad labels, clean surfaces, and install new ones. If production pauses, include that downtime cost. Even a short stop can ripple through a shift.
Include quality and risk costs. A mislabeled hazardous product increases incident likelihood and audit findings. Warranty claims and customer complaints follow weak nameplates and unreadable warnings. Those costs are real and visible during reviews.
A facilities team I worked with tracked reprints for one quarter. The number looked small until they added the downtime minutes. The hidden cost doubled the total. After switching to a certified construction and a locked template, they cut reprints by 70% and the savings covered the change in one quarter.
Reduce reprints by consolidating SKUs. Clever bilingual layouts with flexible fields can serve multiple product variants. Fewer SKUs mean fewer chances to pick the wrong file. It also simplifies inventories and training.
Track KPIs that show progress. Reprint rate by line, number of nonconformances, field failures, and audit findings tell a clear story. When those graphs slope down, leadership notices and keeps supporting the program.
Build a simple business case template. Show current reprint cost, projected reduction, the price of upgraded materials, and the workflow setup time. Most teams find the payback occurs within a few months if reprints are frequent.
Celebrate quick wins. When a high-visibility line runs a month with zero label issues, share it. People respond to evidence more than memos. Momentum makes the rest of the rollout smoother.
If budgets are tight, pilot on the worst offender first. One line, one label family, one surface. Prove it, bank the savings, and reinvest in the next wave. That’s how you scale without drama.
ROI here is practical, not theoretical. Do the math once, and you’ll have the support to keep the program strong and rare reprints.
Implementation Plan & Checklist (Download-Ready)
A clean implementation plan gives everyone confidence. Use a 30–60–90 day approach so teams see progress and the work stays manageable. Start with an audit, set standards, pilot a family, then scale.
In the first 30 days, audit label families, materials, and workflows. Identify the worst reprint causes and the high-risk surfaces. Build or refine your bilingual glossary and approve core WHMIS/GHS phrases. Pick a pilot family and document the current state.
In the next 30 days, finalize templates with flexible containers and parallel EN/FR structure. Specify materials and adhesives for real substrates. Set up version control and a simple preflight checklist. Print and test golden samples in the field.
In the final 30 days, train installers, approve the pilot, and roll out to one additional family. Record results, update SOPs, and lock the change control rules. Prepare a short business case summarizing savings and issues solved.
Define a RACI so roles are clear. EHS owns WHMIS/GHS language, Engineering owns surfaces and operating ranges, Quality owns preflight and approval gates, Operations owns application SOPs, and Suppliers own material specs and change notices.
Qualify suppliers with a few focused questions. Ask for their tested material constructions, adhesive families for LSE and powder coat, and lead times on change notifications. Reliability beats the lowest unit price every time.
Keep a printable checklist for each label release. Confirm header and symbol accuracy, EN/FR copy, diacritics, viewing distance legibility, variable data zones, dielines and safe areas, materials, adhesive, laminate, and version control. Check the box, sign, and archive it.
Anecdote from a rollout: a team laminated the checklist to clipboards and used dry-erase markers. It sounds simple, but it nudged people to slow down and verify. Their reprint numbers dropped visibly within two sprints.
Plan a quarterly review to revisit the glossary, templates, and material performance. If a new solvent shows up on the plant floor, test labels against it. If a new substrate appears, add the right adhesive to the matrix.
Implementation succeeds when people can follow it easily. Small, clear steps beat grand strategies that live in binders. Make it practical, and the results follow.
Conclusion
Bilingual safety labels protect people and keep lines moving, but only when the language, design, materials, and workflow come together. When EN/FR copy is consistent, the design follows proven standards, and the construction survives the real environment, reprints just fade away. That’s safer for teams and simpler for budgets.
Use the steps here to audit one label family this month. Build your glossary, lock a flexible template, specify a proven construction, and run a small field pilot. Adjust, record, and roll forward. It’s steady work, not flashy, but it pays off quickly.
Remember the basics: clear hazard communication, legible type, durable materials, and strict version control. Respect the safety intent, and let the process stay boring. That’s the quiet success of a no-reprint program.
I’d love to hear what’s worked in your plant, too. Share your best tips or your toughest surfaces, and let’s help more teams get EN/FR labels done right the first time.

The Future of Decals: Smart Labels, QR Codes, and Beyond
"A label is no longer just a label, it’s your brand’s handshake, storyteller, and data portal all rolled into one."
Crazy, right? What used to be a simple sticker slapped on a box or bottle is now one of the most innovative tools in marketing and logistics. In fact, studies show that interactive packaging, like QR-coded or NFC-enabled decals, can increase consumer engagement by over 30%. That’s not just eye candy; that’s measurable ROI.
And here’s the wild part: we’re just getting started.
At North American Decal, we’ve been riding the wave of innovation in decal manufacturing for decades. We’ve seen decals go from basic vinyl branding to intelligent assets that track inventory, engage customers, and support sustainability. Whether you’re a startup looking to stand out or a global brand trying to scale smarter, the decals of the future offer a powerful edge.
In this article, I’ll walk you through where the industry is heading: smart labels, QR codes, advanced materials, and the real-world challenges of adopting this tech. I’ll even share stories (the good and the messy) from our frontlines as North America’s biggest decal manufacturer.
Let’s dig into what’s next and how you can make it stick.
The Future Is Sticking Around Smarter Than Ever
About a year ago, I scanned a decal on a wine bottle and got hit with an interactive vineyard tour, tasting notes, and even a playlist to match the vibe. I was hooked. Who knew a simple label could be that cool?
The truth is, decals are getting a serious upgrade. No longer just for branding or safety info, these little sticky wonders are becoming digital gateways. Think QR codes, NFC chips, and even augmented reality. It’s not science fiction; it’s already happening.
As someone deep in the decal biz (yep, we run North American Decal, the largest decal manufacturer in North America), I’ve seen how much the game has changed. And trust me, it’s only getting better.
Let’s dive into what’s shaping the next era of decals and how your business can ride this sticky-smart wave into the future.
Smart Labels: Where Static Stickers Meet Real-Time Tech
I’ll admit it, when we first started experimenting with smart labels, I thought it was overkill. But man, was I wrong. These things are game changers.
They Talk Back (in a good way): Customers can scan a product and instantly see how it’s made, where it’s from, or how to recycle it. Imagine your brand being that transparent and cool.
They’re Detectives: Smart labels can track a product’s journey, alert you if it gets too hot during shipping, or even trigger reorders automatically.
They Create "wow" Moments: One of our clients added an NFC chip to their outdoor equipment decals. When tapped, it gave a survival checklist and video guide. Customers loved it.
Tip from the trenches? Start small. Add QR codes with dynamic URLs that you can update anytime, cheaper than a reprint, and way more flexible.
QR Codes: Old Dogs, New (Brilliant) Tricks
Remember when QR codes were kinda lame? Not anymore. They’ve had a major glow-up.
I was skeptical until we did a rebrand for a pet food company. We slapped a QR code on every bag. Customers scanned it to get pet care tips, reorder with a single tap, and track their pup’s nutrition. Engagement went through the roof.
Dynamic is Key: You can change the destination link without changing the label. Total lifesaver.
AR is Creeping In: Some clients are using QR codes to unlock virtual product demos or 3D models. It’s next-level show rooming, right in the customer’s hand.
They’re Green: Instead of printing mountains of inserts, you can give customers everything digitally. Less paper, more trees.
If your decals don’t include a QR code by the end of 2025, you’re missing the boat.
Labels That Think: Materials for a Smarter, Greener Tomorrow
Let me tell you something, the stuff we can print on now? Is wild. I remember using basic vinyl or polyester for most jobs. Now? We’re rolling out smart, sustainable, sensor-equipped materials weekly.
Recyclable & Biodegradable Options: More and more clients are asking for soy-based inks and compostable liners. It’s not a fad, it’s a shift.
Heat-Resistant Inks for Harsh Conditions: I once burned through a batch of decals (literally) for an outdoor machinery brand. Lesson learned. Now we spec high-temp materials and UV protection as standard.
Labels with Microchips or Embedded Sensors: Yeah, that’s real. A pharma brand we worked with needed tamper-evident decals that could also monitor time and temperature. We made it happen.
So, if your brand talks sustainability but your packaging says otherwise, time to upgrade your labels to match your message.
Bumps in the Road: Real Talk on Tech Adoption
Alright, let’s not sugarcoat it. This next-gen labeling isn’t plug-and-play. We’ve had our share of hiccups helping brands adopt new tech.
Sticker Shock (pun intended): Smart labels cost more upfront. One client balked at NFC chips until they realized their return rate dropped by 22% with interactive guides included.
Systems That Don’t Talk to Each Other: Integrating smart labels with inventory or CRM tools takes planning. But it’s worth it. Once you sync everything, the automation is sweet.
User Confusion: One brand added a killer AR experience, but forgot to tell users how to use it. Result? Crickets. Solution? A big “Scan me to learn more!” icon.
So yeah, there’s a learning curve. But with the right partners (ahem, like North American Decal), you can implement this stuff without losing your mind.
Wrapping It Up: What’s Next (and How We Can Help)
Smart decals are here to stay. From QR codes that link to loyalty programs, to eco-friendly materials, to labels that monitor your product’s condition. This isn’t future talk. It’s now.
And here’s the thing: you don’t need to figure it out alone. At North American Decal, we’ve helped brands of all sizes move from “just a sticker” to smart, sustainable, customer-friendly labeling that actually makes a difference.
Need help choosing the right materials? Integrating with your supply chain? Designing a QR experience that doesn’t suck? We’ve got your back.
Let’s talk. Visit North American Decal and find out how we can turn your next label into your best brand tool!

How Custom Decals Can Strengthen Your Brand Identity in 2025
Introduction
Did you know that it only takes 7 seconds for someone to form an impression of your brand? That’s right! First impressions are everything, especially in today’s fast-paced, competitive business world. With countless brands fighting for attention, standing out visually is no longer optional. It’s essential.
One of the most overlooked (but powerful) tools to build a lasting impression is custom decals. Whether it’s a bold vehicle wrap, a branded storefront window, or a product label that pops, decals make your brand more visible and more memorable without breaking the bank.
And here's the kicker: They work while you’re sleeping, driving, or even sipping coffee at your desk. Let’s dive into how custom decals can boost your brand identity and how North American Decal, the largest decal manufacturer in North America, can help bring your branding to life.
The Power of Custom Decals in Branding
Here’s the thing, people trust what they see repeatedly. Decals are like silent brand ambassadors working 24/7. When someone spots your logo or brand colors consistently, it begins to stick (pun intended).
I once worked with a small bakery that had zero signage. We added custom decals to their delivery vans, storefront windows, and packaging, and guess what? In two months, foot traffic doubled. No crazy ad budget. Just smart, visual branding.
Decals Reinforce:
Brand recognition: That logo? It becomes part of your customer's memory.
Professional image: Custom decals make your business look polished and established.
Marketing on a budget: Instead of a billboard that runs for 30 days, a decal can last years.
Non-intrusive exposure: People don’t feel “sold” to”…. so your message, is just… there.
Whether you're a startup or an established brand, custom decals are a low-cost, high-impact way to stay top-of-mind.
Designing Decals That Reflect Your Brand Identity
Design matters. Big time. Ever seen a cluttered decal with five fonts and neon colors screaming for attention? It’s a fast way to lose credibility.
Here’s what I’ve learned the hard way (like printing 500 stickers that were unreadable on dark windows…..oops!):
Use consistent brand elements: Stick to your brand colors, typefaces, and logo. This builds trust and familiarity.
Pick the right material: Glossy vinyl might look amazing on a product label, but maybe not so much on a matte storefront. Weatherproof materials are a must for outdoor use.
Keep it legible and clean: Less is more. A simple, striking design usually wins.
Scale Design: What looks good on your screen may not work on a 4x4 ft window. Always mock it up to scale first.
Pro Tip: If design’s not your thing, don’t wing it. A professional design partner (Hello, North American Decal!) can save you a ton of trial and error.
Strategic Placement for Maximum Impact
You could have the most beautiful decal in the world, but if no one sees it, what’s the point?
Where you place your decal matters just as much as how it looks. Here’s where I’ve seen businesses get the most bang for their buck:
Vehicles: Your car, van, or truck becomes a rolling billboard. I’ve had clients report new customer calls just from sitting in traffic.
Storefront Windows: These are prime real estate. A well-designed window decal pulls foot traffic like crazy.
Packaging and Products: Every shipped box or labeled jar spreads your brand. Consistency here can seriously level up your perceived professionalism.
Event booths and pop-ups: Quick, portable branding that helps people remember you after the event ends.
When I launched my side hustle, I slapped a decal on the back of my laptop. It sparked more conversations and interest than any Instagram post I’d made that month.
The key is simple: put your branding where your audience hangs out. Meet them where they are visually.
How North American Decal Can Assist
Alright, let’s talk about the pros.
At North American Decal, we’ve been helping brands get noticed for over 60 years. We’re not just printers, we are partners. Whether you're running a local shop or managing a national brand, we’ve got the scale, experience, and tech to make your vision stick (literally).
Here’s how we can help:
Expert Consultation: Not sure what kind of decal works best for your brand? Our team will walk you through everything, from material to finish.
Custom Design: Whether you have a logo or need one developed, we can create visuals that reflect your brand identity and catch attention.
State-of-the-Art Production: Our silkscreen and digital printing options produce vibrant, high-resolution graphics that last.
Full-Service Solutions: From design to print to installation, we do it all. One team, one invoice, one less thing to worry about.
And hey, we’ve helped everyone from Fortune 500 companies to heavy hitting Small Medium Businesses (SMBs) that punch above their weight class. No project is too big or small.
If you want decals that actually do their job, build recognition, drive engagement, and boost brand confidence, then we are your people.
Conclusion
At the end of the day, your brand is your story and custom decals are one of the simplest, most effective ways to tell it. They’re your brand’s handshake, its smile, its calling card available 24/7, wherever your audience is.
You don’t need a six-figure marketing budget to look like a million bucks. You just need the right tools, and the right partner.
North American Decal is here to help you turn heads, earn trust, and grow your brand with custom decal solutions that deliver. Let’s bring your brand to life one decal at a time.
Ready to make your brand unforgettable? Contact us today for a free consultation or browse our portfolio for inspiration.

Why OEMs Trust Certified Decal Suppliers in 2025: Quality, Compliance & Confidence
What makes a supplier certified trustworthy in the world of OEMs? Well, get this: 70% of OEM procurement managers say they flat-out won’t even consider a decal supplier unless they hold certifications like UL, ISO, or CSA. That's not just a preference, it's a dealbreaker.
Think about it. Decals aren’t just decoration. They’re warnings, specs, safety data, and mission-critical info. If they fade, peel, or aren’t compliant? That’s a liability. In this guide, I’ll unpack why certified decal suppliers are the gold standard for OEMs, how those little labels carry a huge amount of weight, and why North American Decal is the top name that OEMs turn to across North America. Let’s dive in.
The Role of Certifications in OEM Supplier Selection
It’s kind of wild how many moving parts go into OEM production. And decals? They may seem small, but they’re in the middle of everything. From labeling electrical specs to safety warnings, those stickers better be spot-on. That’s why certifications matter so much.
Certified decal suppliers like us carry qualifications like:
UL 969, which governs label durability
CSA C22.2, often required in electrical applications
ISO 9001, which ensures quality management processes
OSHA alignment, critical for safety labeling
OEMs have strict procurement standards. If you don’t check all those boxes? You’re out. I’ve seen it happen. A supplier we knew lost a seven-figure contract because they didn’t update their UL certification. Oof.
When you're certified, you're not just printing stickers. You’re guaranteeing consistency, traceability, and quality. Every. Single. Time.
Trust and Transparency: Why OEMs Can’t Afford Guesswork
Have you ever opened up a box of parts, only to realize the labels don’t match the documentation? That’s a nightmare and it's why trust is huge in this game.
OEMs need traceability. If there's a defect or a recall? They want to know exactly where every label came from, who made it, and what lot it was part of. Certified suppliers keep those records tight.
At North American Decal, we maintain logs, inspection records, and even environmental testing results. We had a client once who was this close to a major recall because another supplier had mismatched adhesives on safety decals. They came to us mid-crisis, and we helped them turn it around with UL-traceable labels that were audit-ready. That’s the kind of transparency OEMs crave. Third-party certifications aren’t just red tape. They’re a promise. And we live by that promise every day.
Performance Under Pressure: Certified Decals Meet the Toughest Standards
Let’s talk grit. Decals on OEM equipment go through hell. High heat, nasty chemicals, and weather that can turn metal to rust. A regular sticker just won’t cut it.
Certified decals? They’re built for this. Before we ship anything, it goes through a brutal gauntlet: UV exposure, scratch tests, salt spray, you name it. And not to brag, but ours always pass with flying colors.
I remember one job for a mining equipment, OEM labels needed to survive coal dust, hydraulic fluid, and 120°F temps. That’s no joke. But our CSA and UL-rated decals held up for years in those conditions.
The bottom line? Certified decals aren’t just pretty they’re tough as nails.
North American Decal: A Partner OEMs Can Count On
Now let’s talk about us and why OEMs stick with North American Decal.
We’re fully certified with:
UL 969
CSA C22.2
ISO 9001
RoHS & REACH compliant materials
But more than that, we have an in-house compliance team that audits every batch. We don’t outsource QC. We do it ourselves, right here in North America.
OEMs love our custom options, industrial adhesive systems, specialty coatings, GHS-compliant chemical labels...we tailor everything to their specs. One of our longest-standing OEM partners told us last year, “You guys save us time and sleep.” I’ll take that over a testimonial any day.
Choosing a Certified Supplier: What OEMs Should Look For
So if you're an OEM or work with one, here’s what you really need to check when vetting decal suppliers:
Do they have up-to-date UL, CSA, or ISO certifications?
Can they provide traceable documentation for each batch?
Are their materials RoHS and REACH compliant?
Do they test for durability and environmental exposure?
Red flags? Oh yeah, I’ve seen 'em. Vague answers. No documentation. Overseas production with no audit trail. That’s not just sketchy, it’s dangerous.
At North American Decal, we walk you through the vetting process. We’ll give you the audit results, batch samples, and lab testing before you even place an order. Why? Because you shouldn’t have to hope your labels are compliant. You should know.
Conclusion
Here’s the truth: OEMs trust certified decal suppliers because they can’t afford not to. In a world of strict regulations, global recalls, and billion-dollar liability lawsuits, every component counts including the decals.
At North American Decal? We’re not just label makers. We’re partners in performance, compliance, and peace of mind. If you’re an OEM looking for a decal supplier that gets it, like really gets it, let’s talk. Because your brand deserves a partner who stands behind every sticker with certified confidence.
Ready to upgrade your decal game? Hit us up. We’ll show you what compliance should look like.https://www.northamericandecal.com/contact
How North American Decal is OSHA Compliant in 2025: Safety-First Solutions You Can Trust
Introduction
"Safety doesn’t happen by accident." That quote still hits me every time I see it on a weathered sign in an old warehouse. You’d think by 2025 we’d all have it figured out, but the truth is... OSHA issued over 22,000 citations last year for violations tied directly to poor signage and labeling. That’s not just a number, it’s a wake-up call.
Here at North American Decal, we’ve made OSHA compliance our business. Literally. Our decals don’t just stick, they protect. We know what it takes to meet regulations, because we’ve been doing it longer than most folks have known what “ANSI Z535” even means. In this article, I’m going to walk you through what it really means to be OSHA compliant, how we stay ahead of the curve, and why businesses across North America trust us to keep their people safe and their wallets fine-free. Let’s dive in.
What Does OSHA Compliance Mean for Decals?
When someone says “OSHA compliant,” most folks think of hard hats or steel-toe boots. But let me tell you, decals are the silent heroes of workplace safety.
OSHA, which stands for the Occupational Safety and Health Administration, has pretty detailed regulations around signage. They’re not just being picky for fun. These rules save lives. If your safety decals aren’t readable, reflective, properly placed, or color-coded? That’s a citation waiting to happen or worse, a preventable accident.
There are categories for everything:
Danger signs? Red, black, and white only.
Caution signs? Yellow and black.
Safety Instruction? Usually green and white.
And that’s just the beginning.
If you’re running a warehouse, manufacturing plant, or even a small shop with machinery, you need decals that meet ANSI Z535 standards (which OSHA aligns with). That means size, font, symbols, contrast, and even spacing all matter. I once saw a machine with a faded sticker from the '90s. No one knew what it said anymore… until someone touched the wrong part and sparked a fire. That’s what non-compliance looks like.
So yeah, decals might seem simple, but they can make or break your OSHA inspection.
How North American Decal Ensures OSHA-Compliant Products
We’re not just printing stickers here. We’re crafting life-saving labels.
At North American Decal, we follow a zero-shortcut policy. Every decal we produce whether it’s for a forklift, a fire exit, or a chemical drum, it gets the same gold-standard treatment.
Here’s how we do it:
We use materials that withstand chemicals, UV, extreme temperatures, and time.
Every design follows strict OSHA/ANSI formatting rules: color, size, font, symbols, you name it.
Our printers are top-tier industrial machines, calibrated for pinpoint legibility and maximum contrast.
Before anything ships, we test samples in the real world. Outdoor exposure, chemical spray, abrasion, you’d be surprised how many signs flake out under pressure.
We also bring in third-party audits just to double-check our compliance. I remember one year, we switched to a new vinyl supplier to reduce glare under warehouse lights. That change alone improved legibility by 38%. It’s those little upgrades that make a massive difference.
You don’t become North America’s biggest decal manufacturer by winging it. You do it by obsessing over the little stuff, like whether the red on your “DANGER” sign is OSHA-approved red.
Real-World Applications of OSHA-Compliant Decals
If you’ve walked through a factory or job site, you’ve seen our work. Heck, even if you didn’t notice it, that’s kind of the point. It’s there, it’s clear, and it keeps people safe.
Let me share a few places our OSHA-compliant decals are working hard:
Electrical Panels: One of our clients, a major automotive parts maker, avoided a serious shock hazard after our new labeling system flagged an improperly grounded panel.
Confined Spaces: We helped a water treatment facility re-label every confined entry point with bilingual, high-reflectivity warnings. That project? Prevented two near-misses in the first month.
Chemical Storage: GHS (Globally Harmonized System of Classification and Labelling of Chemicals) and OSHA labeling overlap a lot. We design combo decals that meet both standards and survive corrosive spills.
We also do tons of custom work. Not every workspace fits the mold, so we offer tailor-made OSHA decals that still tick every compliance box. We’ve even created signs with Braille and tactile surfaces for ADA-compliant safety zones.
Honestly, one of the best feelings? Hearing back from a plant manager who says, “Your decals passed our OSHA audit without a single mark.” That’s the real reward.
Staying Ahead of OSHA Regulations: Our Commitment to Innovation
OSHA doesn’t stay still and neither do we.
Every year, new rules drop. Maybe it's a revised font size for arc flash warnings. Maybe it’s new colors for lithium battery zones. We don’t just react, we plan ahead.
We’ve got a dedicated compliance team tracking every proposed regulation and amendment. When something shifts, our design specs and material lists shift with it. That way, our clients don’t even have to think about it.
We’re also investing big in:
Eco-friendly materials that still meet OSHA durability specs
AI-driven proofing tools that flag compliance issues before we print
Partnering with workplace safety consultants to co-develop smarter labeling systems
I once sat in on a webinar with OSHA’s deputy director, and they said something that stuck with me: “The best safety systems are invisible until they’re needed.” That’s the energy we bring into every decal we print.
How to Choose OSHA-Compliant Decals for Your Business
Alright, let’s get practical. If you’re reading this and wondering if your current decals are cutting it... Chances are, they’re not.
Here’s a quick checklist:
Are all your hazard signs color-coded and legible?
Are your decals resistant to UV, water, and chemicals?
Do you have signage in both English and French, if needed?
Have you audited your decals in the past 12 months?
If not, now’s the time.
When choosing a supplier, ask them:
Can you provide documentation of OSHA/ANSI compliance?
Do you offer customization without compromising compliance?
What kind of durability testing do you do?
At North American Decal, we walk you through all of that. We’ll even help you audit your current signage. No pressure, no obligation. Just helpful guidance from folks who live and breathe compliance.
Conclusion
If you’ve made it this far, it’s clear you care about workplace safety. And honestly? That already puts you ahead of the game. OSHA compliance isn’t about fear, it’s about respect. For your team. For your business. For the standards that keep everyone alive and well.
At North American Decal, we’re not just here to sell you decals. We’re here to help you build a culture of safety one sign at a time.
So don’t wait until your next inspection to find out you’ve got a problem.
Let’s take care of it now. Reach out, ask questions, and let us help you turn compliance into confidence. https://www.northamericandecal.com/contact
Your safety signs should speak volumes. Make sure they’re saying the right thing.
Decal Compliance Under USMCA/CUSMA (2025): What You Need to Know
“Did you know that failing to meet origin rules under USMCA/CUSMA could cost your business thousands in unexpected tariffs?”
Yeah—when we first realized how easy it was to slip up, we were just as stunned.
If you're in the business of decals—whether it’s for packaging, safety signage, or branding fleet vehicles—this is one of those gotta-know topics. Especially in 2025, as customs enforcement gets tighter and businesses feel the heat of new tariffs. Decal compliance under USMCA/CUSMA isn't just red tape—it's directly tied to your margins, your timelines, and your reputation.
I’ve personally watched businesses scramble to correct shipment holds because their decals didn't meet rules of origin. It’s not pretty, but it is avoidable. So, if you want the inside scoop on how to keep your decal supply chain clean and compliant—without the headaches—we’ve got your back. Here’s everything you need to know, and how we at North American Decal make it stress-free.
What Is USMCA/CUSMA and Why It Matters for Decals
Okay, let’s start with the basics—because if you’re like me, you probably didn’t read the full trade agreement either (yawn). But here’s what matters: USMCA (United States-Mexico-Canada Agreement) or CUSMA (its Canadian name) is the updated version of NAFTA. It governs trade between—you guessed it—the U.S., Mexico, and Canada.
Now, the decal world might seem small, but when you're shipping across borders, trade agreements have big effects. Why? Because only decals that meet specific origin requirements can qualify for tariff-free treatment. If you're importing materials or using foreign adhesives and inks, suddenly you're in hot water.
When USMCA replaced NAFTA, the rules got a bit stricter, especially around what counts as "originating." We noticed our customers started asking more questions around 2021… and now in 2025, it's a full-on compliance scramble for many. But don’t worry—you’re not alone in this.
Rules of Origin: What Makes a Decal 'Made in North America'?
This is where it gets juicy (and a little tricky). The “rules of origin” define whether your decal qualifies as North American-made. And yes, they look under the hood—every adhesive, liner, ink, and substrate can count toward or against you.
To be considered originating, your decal must be:
Wholly produced in North America or
Made with imported materials that undergo substantial transformation
Let me give you an example. We once had a customer using vinyl sheets from Europe. No big deal—until customs flagged the shipment. Because even though the decal looked North American, the core material didn’t meet origin criteria. We helped them swap to a North American vinyl supplier, and poof—problem solved. But it was a stressful week.
Key components that affect origin:
The face stock or substrate
The adhesive layer
Inks used in printing
The liner or release paper
Pro tip? Substantial transformation means the raw materials must be significantly changed into a new product. Just cutting or printing isn’t always enough. We’ve helped countless businesses get this part right—because it’s not just about what you use, but how it all comes together.
Compliance Documentation: What You Need to Provide
Let me be real—this part? Total paperwork pain. But if you're crossing borders, you gotta have your documentation game on lock.
To claim USMCA/CUSMA preferential treatment, you need:
A valid Certificate of Origin
Proper record-keeping (5+ years is a safe bet)
Detailed material sourcing and cost breakdowns (yes, really)
And please—don’t guess your HS codes or fudge your supplier details. Customs isn’t messing around in 2025. I’ve seen shipments delayed for weeks over one mislabeled field.
We help our customers by:
Providing pre-filled compliance docs
Guiding them through self-certification
Offering checklists and templates (because we love a good spreadsheet)
Most folks don't realize that even if you're the buyer—not the manufacturer—you might still be responsible for compliance. That’s why we make it easy: when you order from North American Decal, we back every shipment with fully compliant documentation and traceability reports.
Risks of Non-Compliance: Penalties, Tariffs, and Delays
You might think, "Ah, it's just decals—how bad could it be?"
Oh, buddy. Let me tell you about the client who didn't verify their origin claims. Customs caught it on a random audit. The result? Backdated tariffs. Thousands in fees. Three shipments held. Not a good quarter for them.
Here’s what can go wrong:
Retroactive duties and penalties
Shipment delays at customs
Fines for inaccurate or missing certificates
Even legal action in severe cases
Honestly, the stress alone isn’t worth the risk. That’s why working with a supplier like us—who knows this stuff cold—makes all the difference. We’ve been through it, and we’ve learned the hard way so you don’t have to.
Plus, compliance gives you peace of mind. You can focus on growing your business instead of worrying whether a batch of decals will get flagged in Buffalo or shut down at the Sarnia crossing.
How North American Decal Ensures Compliance for You
Here’s where we shine. We built North American Decal with compliance in mind—because we knew trade rules weren’t getting easier. Our approach is simple: full traceability, top-tier sourcing, and total transparency.
Here’s how we make your life easier:
All raw materials come from verified North American sources
We maintain digital records on every component used
We offer origin documentation for every order, no extra charge
Need help with customs paperwork? Our compliance support team has your back.
We also host webinars and send out compliance guides with every major regulation update.
Customers say they love it—because nobody wants to wade through 300 pages of trade law to figure out how to ship a box of decals.
One of our automotive clients told us that switching to us shaved two weeks off their customs processing time. That’s what happens when you lead with compliance.
Stay Compliant, Stay Competitive
Look, in 2025, decal compliance isn’t just a “nice to have.” It’s the difference between scaling your business and being buried in red tape.
If you’re still unsure whether your decals meet USMCA/CUSMA standards, now’s the time to audit your supply chain—or better yet, partner with a manufacturer who’s already done the homework.
At North American Decal, we make compliance automatic. No guessing. No stress. Just certified, North American-made decals with full transparency and top-tier support.
Ready to upgrade your decal sourcing? Reach out to us—we’ll review your needs, help you navigate USMCA/CUSMA, and make sure your business is built on a rock-solid, compliant foundation. No fine print. Just peace of mind. https://www.northamericandecal.com/contact

Fleet Branding with Vehicle Decals: Maximizing ROI and Visibility in 2025
Fleet branding isn’t just a "nice-to-have" anymore. It’s one of the most cost-effective, attention-grabbing marketing tools out there today. A single vehicle wrapped with your branding can rack up to 70,000 impressions in just one day. That’s not a typo. That’s a mobile billboard cruising through neighborhoods, job sites, highways—you name it.
I remember the first time I saw our branded van drive past a busy intersection. I nearly did a double-take! It looked sharp, bold, unmistakable. People were staring—some even taking pictures. That’s when it really hit me: decals aren’t just about “looking professional.” They work.
In this guide, I’m going to walk you through why fleet branding with vehicle decals is a powerhouse for ROI and brand visibility, and how we at North American Decal help make the whole process frictionless, affordable, and effective.
What Is Fleet Branding and Why It Matters
Fleet branding is, at its core, the art of turning your company vehicles into moving brand ambassadors. We're talking custom decals, logos, slogans, contact info—strategically applied to your trucks, vans, trailers, even forklifts if you want.
Now, this isn’t like slapping on a bumper sticker and calling it a day. Fleet branding is professional, cohesive, and scalable. It’s about brand consistency across every vehicle, every city, every mile.
Let’s be real: when you’ve got a fleet out in the field—delivering goods, servicing customers, or parked at job sites—why not let them work double-time as free advertising?
Some industries, like construction and logistics, are nailing this. I’ve seen electricians get calls just from folks seeing their trucks parked in front of a neighbor’s house. Talk about low-effort lead gen! And if you're in food delivery, pest control, plumbing—you name it—fleet branding builds credibility and trust at a glance.
Visibility Impact: How Decals Turn Heads
This part always blows people away. A well-branded fleet vehicle can generate up to 70,000 views a day in a busy area. That’s from other drivers, pedestrians, people stuck in traffic, and folks scrolling social media who caught a glimpse. Unlike digital ads, which can be skipped, blocked, or ignored, your fleet is impossible to scroll past on the road.
Let’s break it down:
Vehicles driving predictable routes through high-traffic areas? Boom, hyper-local visibility.
A consistent visual presence in a region? That’s how brands become familiar and trusted.
Bright colors, clean logos, and clever messaging? That’s where psychology comes in—we’re wired to remember what we see repeatedly.
Honestly, I’ve had customers tell me they remembered our brand only because they saw our van parked outside a coffee shop multiple mornings. It’s the little things.
The Real ROI of Fleet Decals
Ah, the million-dollar question: Do vehicle decals actually make money? You bet.
Let’s talk CPM (Cost Per Thousand Impressions). Fleet decals cost a fraction of what traditional media does—billboards, digital ads, even print. Once installed, that decal works 24/7. No monthly fees. No ad budget drains.
A wrap or decal that lasts 5–7 years can deliver hundreds of thousands of impressions per dollar. Now that’s what I call ROI. Some clients I’ve worked with saw a measurable uptick in calls and web traffic after branding their vehicles. Others said the biggest win was how “legit” they looked when showing up to jobs. That’s not fluff—perceived professionalism = more trust = more sales.
And don’t forget the indirect benefits. Recognition. Brand recall. Even employee pride. (I had one tech say he loved driving the branded van because people treated him more respectfully. Crazy, right?)
Design and Placement: Making the Most of Your Space
This is where creativity meets function. And oh man, have I seen it all—brilliant designs and total trainwrecks.
Rule #1? Keep it clean and readable. Your logo, phone number, and website should be visible from 30+ feet away. No tiny text. No overcrowding. Just clean branding with high-contrast colors.
Placement matters too:
Doors? Great for local ID.
Rear panels? Perfect for traffic impressions.
Full sides? That’s prime billboard space.
Don’t fall into the “more is more” trap. A cluttered van doesn’t scream “professional.” It screams “help, my cousin made this in PowerPoint.”
Also, different vehicles = different strategies. What works on a Sprinter van won’t fly on a pickup. That’s where pros like us come in—we help tailor the design to each ride.
Fleet Decals vs. Vehicle Wraps: Pros, Cons, and Costs
Ah, the big debate: decals or wraps?
Wraps cover the entire vehicle—bumper to bumper. Decals are more selective, often just logos, contact info, and maybe a tagline or social handle.
Decals are great if:
You’re budget-conscious.
You want quick updates or replacements.
You run a mixed fleet and want consistent branding without full wrap costs.
Wraps are awesome if:
You want maximum impact.
You’ve got bold, eye-catching designs.
You want to protect the vehicle’s paint.
Cost-wise? Wraps can run into the thousands. Decals are usually a fraction of that, especially for fleets.
Personally, I love the flexibility of decals. One client of ours with a growing HVAC company scaled from 3 to 20 vans in two years—updating decals was a breeze (and didn’t crush their wallet).
Compliance, Durability, and Maintenance
Here’s the not-so-glamorous stuff—but super important.
First, compliance. In Canada and the U.S., certain commercial vehicles require DOT numbers and info to be displayed in specific sizes and fonts. We handle that automatically for clients—no guesswork, no fines.
Durability? Don’t worry. Today’s vinyl decals are beasts. We use UV-resistant, weather-proof materials that stand up to snow, sun, sleet, and power washers. (Trust me, we tested.)
Want to keep them looking fresh? Just avoid harsh chemicals, abrasive sponges, and drive-thru car washes. Hand-wash or use decal-safe soap. That alone can extend the lifespan by years.
And when it’s time for a refresh or a rebrand? We can swap ‘em out fast without damaging your paint job.
How North American Decal Supports Your Fleet Branding
We’re not new to this—we’re North America’s largest decal manufacturer for a reason.
Our team handles everything:
Custom design that actually fits your fleet vehicles
Compliance? Covered.
Production? All done in-house, USMCA/CUSMA compliant
Shipping? Nationwide, fast, and secure
Installation support? You got it
We’ve helped multi-location chains, small startups, and industrial powerhouses roll out cohesive, standout branding across hundreds of vehicles. And we don’t just ship and vanish—we support reorders, changes, and scaling like pros.
Think of us as your silent co-pilot in fleet marketing.
Conclusion
Fleet branding isn’t some marketing gimmick—it’s a rolling billboard with a real ROI. Done right, it makes your business more recognizable, more trusted, and more professional.
Decals give you an edge—whether you’re a one-truck wonder or a coast-to-coast powerhouse. And with North American Decal, you’re never flying blind. We’ve got the experience, the tools, and the talent to bring your brand to the streets in the boldest way possible.
So, what are you waiting for? Let’s get your fleet turning heads. Reach out, and let’s build something that sticks—literally and figuratively. https://www.northamericandecal.com/contact

Why Industrial Decals Are Crucial for Workplace Safety Compliance in 2025
“Workplace injuries cost Canadian employers over $1 billion annually.” That stat hits hard, doesn’t it? Safety isn’t just a box to check — it’s about protecting lives and livelihoods. In high-risk environments, a single overlooked warning label can mean disaster. That’s where industrial decals step in as unsung heroes of compliance and communication.
At North American Decal, we’ve seen firsthand how a well-placed decal can prevent accidents, pass inspections, and keep teams informed. In this article, I’m going to break down exactly why industrial decals matter, the regulations you need to know, and how we make compliance easy for you. Buckle up — because safety doesn’t have to be boring!
What Are Industrial Decals, and Why Do They Matter?
Let’s start at square one: industrial decals are basically super-tough, regulation-ready stickers. But they’re so much more than that. These decals are designed to endure heat, cold, chemicals, UV rays, and even the occasional forklift scratch (don’t ask how I know).
Unlike your average consumer sticker, industrial decals are built to communicate clearly and last long. They convey crucial information: danger zones, PPE requirements, machine instructions, and more. In chaotic environments like factories or warehouses, visual cues beat out wordy memos every single time.
I remember visiting a facility where their decals were literally melting off machinery from the heat. Turns out they used regular office labels. That’s a lawsuit waiting to happen. The right decal doesn’t just stick — it speaks. It says “watch your fingers” or “acid inside” at just the right moment.
Bottom line? These decals reduce risk, boost awareness, and help businesses comply with the law. They’re tiny signs with a massive job.
Workplace Safety Compliance Standards in 2025
Safety compliance in 2025? It’s no joke. The bar’s higher than ever. Between OSHA in the U.S., WHMIS and CSA here in Canada, and ANSI just about everywhere else — the rules are stacked high. And they’re evolving faster than ever.
What’s wild is how many people think just tossing a few warning signs on equipment is good enough. Nope! Regulations are super specific: the size of the pictogram, the color of the border, even where the label sits matters.
Just last month, we helped a manufacturing client update all their WHMIS labels after a GHS revision. Their old decals had the right info — but they were missing the standardized formatting. Without that, it’s still non-compliant.
Decals aren’t just helpful; they’re often legally required. Safety audits, compliance checks, even insurance assessments — they all rely on clear, standardized labeling. It’s like showing your work on a math test. And we’re the ones handing out the answer key.
Common Applications of Industrial Decals in High-Risk Environments
You’d be amazed where these little lifesavers show up. From noisy machine shops to slippery food processing plants — decals are everywhere, quietly doing their thing.
Here are a few spots you’ll see them in action:
Machinery safety labels — Stuff like “Pinch Point” or “Keep Hands Clear.” These are life-saving reminders, especially during training or in high-turnover environments.
Electrical hazard warnings — We’re talking “High Voltage,” “Arc Flash Risk,” or lockout/tagout tags.
Chemical handling & GHS labeling — Proper chemical labels are a must for both WHMIS and GHS. We print tons of these.
Floor markings and directional signage — Ever tried navigating a massive warehouse without signs? Chaos. Floor decals help direct traffic and prevent forklift accidents.
Custom decals for specialized equipment — Sometimes you need something totally unique. We’ve printed labels for deep-sea rigs and underground mining sites!
There’s no one-size-fits-all here. Every industry’s got its own hazards, and the decals need to match that reality. If you're labeling the wrong way, you're not just breaking rules — you're risking lives.
How Poor Decal Quality Can Lead to Non-Compliance
You wouldn’t believe how many times we’ve seen this: a perfectly good safety plan brought down by junky stickers.
Here’s a horror story for you — we had a client who failed an inspection because their danger labels had faded to beige after six months in the sun. They thought they were saving money. In reality? They lost a week of production fixing things and took a compliance penalty.
Bad decals peel. They fade. They confuse workers. They literally undo your safety efforts. One client told me they found a floor decal stuck to a worker’s boot. That’s not how it’s supposed to work, folks!
Poor placement is another killer. If your "Caution: Hot Surface" label is behind a moving panel? That’s not helping anyone. And if you don’t follow regulatory color codes or pictogram sizes, you're not compliant — even if the info is technically there.
Quality matters. Placement matters. Compliance matters.
How North American Decal Helps You Stay Compliant
Now this is where we shine. At North American Decal, compliance isn’t an afterthought — it’s built into every job we do.
We’re not just printing stickers — we’re helping you navigate the maze of rules and avoid fines, downtime, or worse. We actually sit down with you (virtually or in-person) and ask questions like:
What industry are you in?
What standards do you need to meet?
Where are these decals going?
From there, we recommend the right materials (UV-resistant, chemical-safe, whatever you need), print with exacting standards, and even provide layout consulting to help with audits.
One client in Alberta needed bilingual WHMIS labels for a bilingual workforce. Another in Michigan was gearing up for an OSHA surprise inspection. We got both sorted fast.
Whether you need one custom label or 50,000 high-durability decals, we’ve got the scale and expertise to handle it — and we always have your back.
Choosing the Right Industrial Decals for Your Workplace
Okay, let’s get practical. Choosing the right decal isn’t just about picking something red and slapping it on a box.
Here’s what to look for:
Material matters. Need UV resistance? Chemical-proof coating? Floor-grade adhesive? It all depends on your environment.
Match the standard. If you're dealing with GHS, ANSI, or WHMIS — make sure your decals hit those specific formatting and layout rules.
Longevity is key. A label that peels in three months isn't saving anyone. Go for industrial-grade materials and adhesives.
Check the print. High contrast, crisp fonts, correct symbols. You want clarity, not guesswork.
Ask the pros. (That’s us!) We’ve seen what works and what flops, and we’re always happy to help pick the right solution.
Honestly, you don’t need to be a regulation expert. You just need to know one. And that’s where North American Decal steps in.
Conclusion
So here’s the real talk: industrial decals are way more than fancy stickers. They’re critical tools for keeping workplaces safe, compliant, and audit-ready. When done right, they prevent injuries, reduce risk, and help your team feel more confident and protected.
Don’t let poor labeling be the weak link in your safety chain. Whether you're refreshing old decals or launching a new facility, North American Decal has your back. We know the rules, the materials, and the shortcuts (the good kind, not the dangerous ones).
Let’s make your workplace not just compliant but confident.
👉 Got questions? Need a custom quote? Reach out and let’s make safety stick! https://www.northamericandecal.com/contact

Navigating the 2025 Tariffs: How to Source North American-Made Decals Without Breaking the Bank
“Tariffs are the taxes you didn’t vote for—but definitely feel.”
—An old supplier buddy told me that once, and I swear it’s never been truer than in 2025.
With the new wave of tariffs dropping like a hammer this year, a lot of businesses are scrambling. Imports are suddenly more expensive, regulations are more complicated, and those budget-friendly overseas stickers? Not so budget-friendly anymore.
So what do you do when sourcing gets messy and margins start shrinking? You localize. You pivot. You lean on your neighbors—and in our case, you get your decals made right here in North America.
I’ve been in this game long enough to see trends come and go, but what we are dealing with now? This is more than a trend. It’s a shift. And if you're still relying on imports for your labels, vinyls, or stickers... you might be in for a rough ride.
Let’s walk through how to stay ahead of the curve—without blowing your budget.
Understanding the 2025 Tariffs and Their Impact on Sourcing
So, here’s the deal with the 2025 tariffs: They’re not just a minor hiccup. They’re a full-on, line-in-the-sand kind of policy shift. These new regulations have jacked up costs on everything from raw vinyl rolls to pre-printed decals—especially if you’re importing from places like China or Southeast Asia.
A friend of mine who runs a signage business told me his last shipment from overseas got hit with a 25% tariff. He nearly fainted when the invoice came in. Not to mention the customs delay added another two weeks to an already tight schedule.
But it’s not just about price hikes. These tariffs come with a mountain of paperwork and compliance hurdles. You’ve got to know your product codes, country-of-origin details, and tariff schedules like the back of your hand. And if you get it wrong? Expect delays, penalties, or even seizures at the port.
From my own experience at North American Decal, we’ve had more new clients reach out in the last three months than we usually get in a year—why? Because they got burned by tariffs and suddenly realized that “cheap” overseas suppliers weren’t so cheap anymore.
If you're still sourcing from outside North America, now’s the time to rethink it. Between fluctuating costs, shipping nightmares, and import headaches, the real savings are here at home.
What “Made in North America” Really Means in 2025
I’ve lost count of how many customers have asked me, “Hey, if the decals are printed here, does that count as Made in Canada?” Short answer: not necessarily.
Under USMCA (or CUSMA here in Canada), “Made in North America” isn’t just about where something is assembled. It’s about substantial transformation—a fancy way of saying the product has to undergo real, meaningful manufacturing in Canada, the U.S., or Mexico.
Just slapping a label on a Chinese-made product in Toronto doesn’t cut it.
What makes things trickier is the number of suppliers who play fast and loose with the terminology. I’ve seen labels marked “North American Compliant” that were basically imported goods with a local sticker added. That’s not just misleading—it could get your shipment rejected or fined.
At North American Decal, we make sure every part of the process—from sourcing raw materials to printing and cutting—is fully documented and compliant. We even provide Certificates of Origin, which is now a must-have if you want to avoid tariff penalties.
Here’s a little mistake I made early in the game: I once assumed a new vendor was NAFTA-compliant (back in the old days before USMCA). Turns out, they weren’t even close. Cost me a decent chunk in back tariffs and a client’s trust. Never again.
Moral of the story? Verify everything. And if you’re unsure, work with partners who’ve got nothing to hide.
Benefits of Locally Sourcing Decals in 2025
Local sourcing isn’t just a feel-good move—it’s smart business, especially in 2025.
First off, the lead times? Game-changer. When you're not waiting on a container ship or juggling international freight schedules, things move fast. One of our retail clients shaved off three weeks from their launch timeline just by switching to us from their overseas provider.
Then there’s the cost. Sure, unit prices seem lower from overseas, but once you stack on tariffs, fuel surcharges, customs fees, and extra delays? It adds up. Not to mention, when a shipment gets stuck in port or damaged, you’ve got zero control.
Customization is also way easier here. Want a new size, different adhesive, matte finish instead of gloss? Boom, done. No need to start a whole new supply chain convo with someone 14 time zones away.
And hey—compliance is simpler too. With North American-made decals, you’re already on the right side of most labeling laws, packaging standards, and safety requirements. No guessing games or sketchy certifications.
Plus, it just feels good knowing your money stays local. Helps jobs, strengthens communities, and keeps things moving on this side of the border.
How North American Decal Helps You Stay Compliant and Competitive
Look, we’ve been around long enough to know that “compliant” can mean a lot of things to a lot of people. But at North American Decal, it means everything we make meets the strictest standards under USMCA and CUSMA.
We’ve invested in tech, training, and tracking systems that most other decal shops don’t even touch. Every product has a paper trail. Every shipment includes full documentation. It’s boring admin stuff, yeah—but it saves our customers from massive headaches later on.
One of our clients, a Canadian food manufacturer, was facing major delays at the border because their old label supplier couldn’t prove country of origin. We stepped in, reprinted everything in 72 hours, and got them back on shelves before the week was out.
What sets us apart isn’t just our size—it’s our speed, scale, and service. We handle massive volumes without compromising quality. And if you need a custom run of 10,000 die-cut labels with eco-friendly adhesive? We’ve got you.
We’re not just selling decals—we’re helping you stay in business, grow, and adapt.
Key Questions to Ask Your Decal Supplier in 2025
Not all suppliers are created equal, and in 2025, the stakes are higher than ever. If you’re shopping around, here’s what you need to ask:
Are your products 100% made in North America? Ask for proof, not just promises.
Can you provide Certificates of Origin? If they can’t, that’s a red flag.
What are your lead times and rush capabilities? You don’t want to miss a launch window waiting on labels.
Do your materials meet NA safety and labeling standards? Especially important for food, cosmetics, and retail goods.
How do you handle large, custom, or recurring orders? Look for flexibility and transparency.
One time, I skipped that last question and ended up with a supplier who couldn’t scale beyond 5,000 units. I needed 50,000. That was a fun month.
So yeah, do your homework. Ask the uncomfortable questions. Your business depends on it.
Future-Proofing Your Supply Chain in a Post-Tariff World
If there’s one thing 2025 has taught us, it’s that stability is the new savings.
Global trade is unpredictable. One policy shift, one cargo backlog, one pandemic (ugh, don’t remind me), and boom—your whole operation is underwater. That’s why resilient supply chains are the future.
Working with local partners like us at North American Decal gives you flexibility. You can respond to demand spikes, pivot quickly, and sleep a little easier at night.
I’m also a huge believer in automation and transparency. That’s why we’ve integrated real-time order tracking, client dashboards, and auto-reorder systems for our regulars. No surprises. No excuses.
And hey, if you want to future-proof your decal sourcing, I made a checklist just for this:
Is your supplier tariff-proof?
Do they operate under USMCA/CUSMA rules?
Can they deliver in days, not weeks?
Do they scale up (or down) fast?
Are they as invested in your growth as you are?
If you can’t check every box, it’s time to switch.
Conclusion:
Here’s the bottom line—tariffs aren’t going away. But with the right partners and a solid strategy, you don’t have to get burned by them.
Sourcing North American-made decals gives you control, compliance, and peace of mind. And hey, it doesn’t hurt that they look amazing too.
At North American Decal, we’ve got your back. Whether you’re a small shop launching your first product or a national brand scaling up for retail, we’re here to help you make smart, future-proof choices.
Got questions? Horror stories? Or just want to geek out over adhesive types? Hit us up. We love this stuff. Contact: https://www.northamericandecal.com/contact
Let’s make something awesome—without the tariff drama.

What ‘Made in Canada’ Really Means in 2025: Tariffs,Compliance, & Your Business
Introduction
If you’ve ever assumed that slapping a “Made in Canada” label on your product is simple, 2025 is here to prove otherwise. With the latest tariff adjustments and stricter trade regulations, businesses need to understand the real implications of USMCA (United States-Mexico-Canada Agreement) and CUSMA (Canada-United States-Mexico Agreement) compliance.
For companies exporting to the U.S. or Mexico, the difference between getting hit with heavy tariffs or benefiting from duty-free trade boils down to compliance. At North American Decal, we’ve been helping businesses navigate these regulations for years, ensuring that their labeling and documentation are rock solid.
So, what exactly does "Made in Canada" mean under the 2025 rules? And how can businesses avoid costly mistakes? Let’s break it down.
What Does "Made in Canada" Mean Under the 2025 Tariff Rules?
First things first—“Made in Canada” isn’t just a marketing phrase. It’s a legal designation that determines whether your product qualifies for trade benefits or gets slapped with extra duties.
Under the Competition Bureau of Canada’s guidelines, a product must meet these two key conditions to carry a “Made in Canada” label:
At least 51% of total direct production costs must be incurred in Canada (this includes manufacturing, assembly, and packaging).
The last substantial transformation of the product must happen in Canada.
But here’s where things get tricky:
Even if your raw materials are imported, your product can still qualify as "Made in Canada" if it undergoes a significant transformation domestically.
The 2025 tariff changes have stricter verification procedures, meaning that if your documentation isn’t airtight, you could face penalties.
The big takeaway? Compliance is everything—and that’s where expert guidance becomes essential.
Understanding USMCA & CUSMA Compliance for Cross-Border Trade
The USMCA/CUSMA trade agreement is meant to simplify trade between Canada, the U.S., and Mexico. But if you’ve ever dealt with international shipping, you know that "simplified trade" is rarely simple.
To qualify for duty-free trade under USMCA/CUSMA, your product must meet the rules of origin—essentially proving that it was primarily made in one of the three countries.
Key compliance factors include:
Regional Value Content (RVC): This determines how much of your product was made within North America.
Tariff Shift Rules: If your materials are sourced internationally, they must undergo a significant transformation to qualify.
Certification Requirements: Businesses must provide proper documentation proving compliance—or risk facing extra duties.
We’ve seen companies lose thousands over minor documentation mistakes. That’s why working with compliance experts, like North American Decal, can prevent costly errors before they happen.
Tariff Distinctions: How They Impact Your Business
Tariffs aren’t one-size-fits-all, and understanding the differences could mean the difference between a smooth transaction and unexpected costs.
Here’s a breakdown of common tariff classifications that businesses need to consider:
MFN (Most Favored Nation) Tariffs: Standard rates applied to imports from countries without a trade agreement.
USMCA/CUSMA Tariffs: Preferential rates for goods qualifying under the agreement (which can be 0%).
Countervailing & Anti-Dumping Duties: Extra charges applied to imports that are unfairly subsidized or priced below market value.
One of the biggest mistakes companies make is assuming their product qualifies for a tariff exemption—only to find out during customs clearance that it doesn’t. We’ve helped businesses avoid these costly surprises by ensuring their classifications and paperwork are spot on.
How North American Decal Helps Businesses Navigate These Regulations
At North American Decal, we don’t just manufacture decals—we help businesses stay compliant and competitive in an evolving trade environment.
Here’s how we support companies through USMCA and CUSMA compliance:
✅ Regulatory-Compliant Labeling Solutions – We ensure that your Made in Canada labels align with the latest trade laws.
✅ Expert Guidance on Trade Regulations – We help businesses navigate complex tariff rules and avoid compliance pitfalls.
✅ Custom Decals for Industry-Specific Requirements – From automotive to medical to industrial goods, our decals meet sector-specific standards.
With 2025’s stricter tariff enforcement, businesses can’t afford to cut corners on compliance. That’s why having a trusted partner like North American Decal is invaluable.
Why SEO Matters: Helping Businesses Find the Right Compliance Information
Many companies only realize they need compliance help after they’ve already made a mistake. That’s why SEO-optimized content—like this article—is so important.
By providing clear, informative content, we help businesses:
Find the right compliance information BEFORE it’s too late.
Avoid unnecessary tariffs and penalties.
Understand how "Made in Canada" impacts their bottom line.
At North American Decal, we believe that education is just as important as compliance. That’s why we’re committed to sharing up-to-date, SEO-optimized content to help businesses stay ahead.
Conclusion: Stay Compliant & Competitive with North American Decal
Understanding "Made in Canada" regulations and 2025’s tariff changes is essential for businesses that rely on international trade. From labeling rules to USMCA/CUSMA compliance, one mistake could mean higher costs and supply chain delays.
At North American Decal, we’re here to help your business navigate these complexities—ensuring compliance, avoiding penalties, and keeping your operations running smoothly.
👉 Need expert guidance on labeling and trade compliance? Contact North American Decal today!
Sign up for our newsletter
to get all the latest news and updates for North American Decal